z3m3
| Title | Slug | Aliases | Image | Credit | URL | File Ext | Mode | Description |
|---|---|---|---|---|---|---|---|---|
| Don't Use ZSNES | zsnes |  |
link | ZSNES sucks. Git a gud emulator. | ||||
| Game File CRC | crc | Array
(
[0] => crc32
[1] => rom
)
|
link | gif | Follow the clues, gumshoe. See also: $holy gamedump, $holy permalink, $holy verifier, Index Listing |
|||
| Permalink Finder | permalink | Array
(
[0] => perma
)
|
link | redirect | If you are looking to access the spoiler log for an already-randomized game, grab the permalink here. See also: Index Listing |
|||
| Game File Verifier | verify | Array
(
[0] => verifier
)
|
link | redirect | Verify that your base game files are correct. See also: $holy gamedump, $holy permalink, Index Listing |
|||
| RomPatcher.js | patcher | link | redirect | Apply a patch: Creator Mode: Off. Create a patch: Creator Mode: On; 'Original ROM' should be the vanilla game file; 'Modified ROM' should be your randomized game file. BPS usually results in the smallest output file. See also: Index Listing |
||||
| Holy Image Debug Menu | debug | Array
(
[0] => help
)
|
link | redirect | ||||
| Game Dump | gamedump | Array
(
[0] => gamedumper
[1] => dumpgame
[2] => dump
[3] => dumper
[4] => cartdump
[5] => cartdumper
[6] => dumpcart
[7] => cartridgedump
[8] => cartridgedumper
[9] => dumpcartridge
)
|
 |
link | Use a backup utility to dump the contents of your legally-owned game cartridge for use in the Randomizer. See also: Retrode 2, Super NT, Game Dump Verifier, Index Listing |
|||
| Game Dump: Classic 2 Magic | classic2magic | Array
(
[0] => c2m
)
|
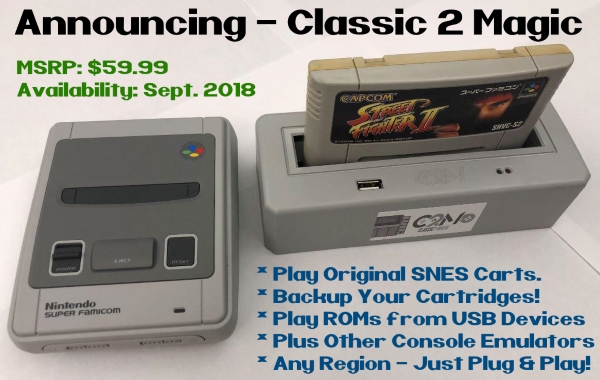 |
link | Use the Classic 2 Magic to dump the game data of your legally-owned SNES game cartridge. See also: Game Dumper, Game Dump Verifier, Index Listing |
|||
| Game Dump: SuperNT | supernt | Array
(
[0] => analognt
[1] => analoguent
)
|
link | redirect | Use the Super NT to dump the game data of your legally-owned SNES game cartridge. See also: Game Dumper, Game Dump Verifier, Index Listing |
|||
| Game Dump: Retrode 2 | retrode2 | Array
(
[0] => retrode
[1] => initrode
)
|
link | redirect | Use the Retrode 2 to dump the game data of your legally-owned SNES or Genesis game cartridge. See also: Game Dumper, Game Dump Verifier, Index Listing |
|||
| The choices are Samus' and Samus' alone! | m3r-olmec | link | redirect | Searching D63ED5F8 can yield many results. The intended destination can yield some metadata about the game. See also: Index Listing |
||||
| Super Metroid Info Page | m3r-info | Array
(
[0] => m3r-gamedumper
[1] => m3r-dumpgame
[2] => m3r-dump
[3] => m3r-dumper
[4] => m3r-cartdump
[5] => m3r-cartdumper
[6] => m3r-dumpcart
[7] => m3r-cartridgedump
[8] => m3r-cartridgedumper
[9] => m3r-dumpcartridge
)
|
link | redirect | Searching D63ED5F8 can yield this metadata about the game. Anything else you find is up to you. The choice is yours and yours alone. See also: Index Listing |
|||
| Game Dump | gamedump | Array
(
[0] => gamedumper
[1] => dumpgame
[2] => dump
[3] => dumper
[4] => cartdump
[5] => cartdumper
[6] => dumpcart
[7] => cartridgedump
[8] => cartridgedumper
[9] => dumpcartridge
)
|
|
link | Use a backup utility to dump the contents of your legally-owned game cartridge for use in the Randomizer. See also: Retrode 2, Super NT, Game Dump Verifier, Index Listing |
|||
| Game Dump: Classic 2 Magic | classic2magic | Array
(
[0] => c2m
)
|
|
link | Use the Classic 2 Magic to dump the game data of your legally-owned SNES game cartridge. See also: Game Dumper, Game Dump Verifier, Index Listing |
|||
| Game Dump: SuperNT | supernt | Array
(
[0] => analognt
[1] => analoguent
)
|
link | redirect | Use the Super NT to dump the game data of your legally-owned SNES game cartridge. See also: Game Dumper, Game Dump Verifier, Index Listing |
|||
| Game Dump: Retrode 2 | retrode2 | Array
(
[0] => retrode
[1] => initrode
)
|
link | redirect | Use the Retrode 2 to dump the game data of your legally-owned SNES or Genesis game cartridge. See also: Game Dumper, Game Dump Verifier, Index Listing |
|||
| The choices are Link's and Link's alone! | z3r-olmec | link | redirect | Searching 3322EFFC can yield many results. The intended destination can yield some metadata about the game. See also: Index Listing |
||||
| Zelda no Densetsu: Kamigami no Triforce Info Page | z3r-info | Array
(
[0] => metadata
)
|
link | redirect | Searching 3322EFFC can yield this metadata about the game. Anything else you find is up to you. The choice is yours and yours alone. See also: Index Listing |
|||
| Have you tried murdering the pig? | pigmurder | Array
(
[0] => ganon
[1] => murderpig
[2] => pig
)
|
 |
otherTom's inspiration | link | Mmm, bacon. | ||
| Have you tried murdering the brain? | brainmurder | Array
(
[0] => motherbrain
[1] => mb
[2] => mbrain
[3] => brain
[4] => murdermotherbrain
[5] => murdermb
[6] => murdermbrain
[7] => murderbrain
)
|
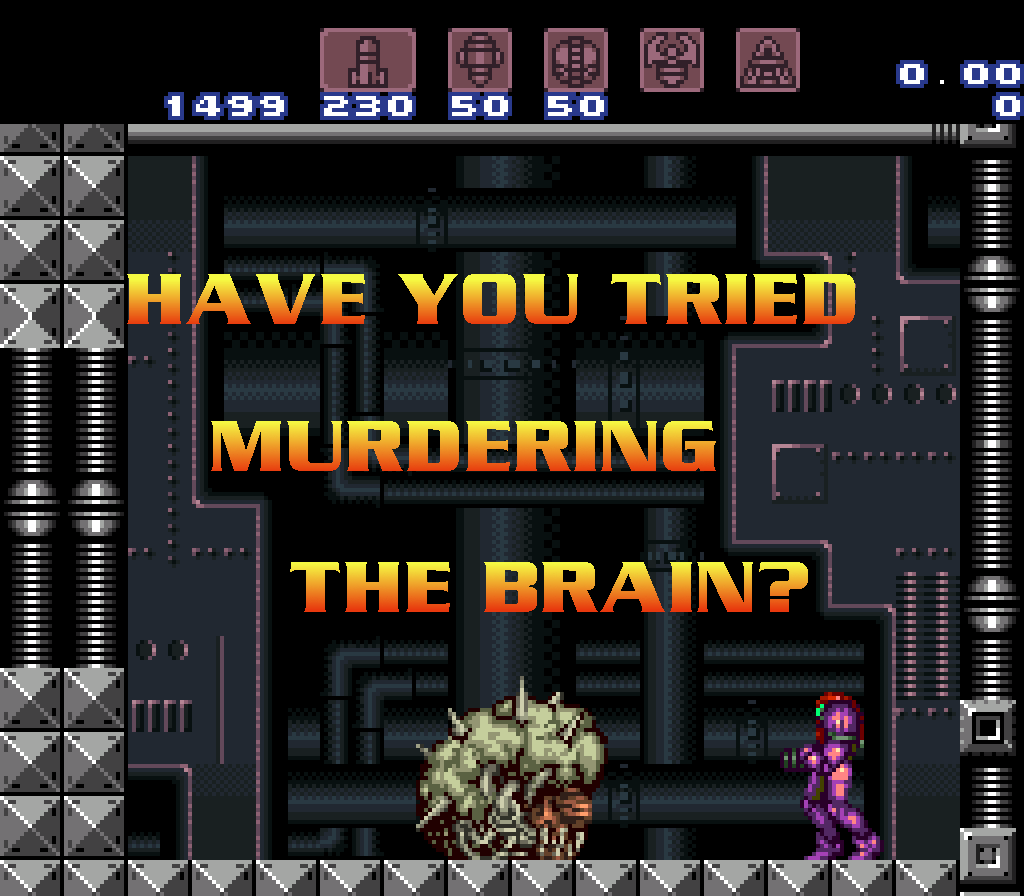 |
otherTom's inspiration | link | Mmm, lobotomy. | ||
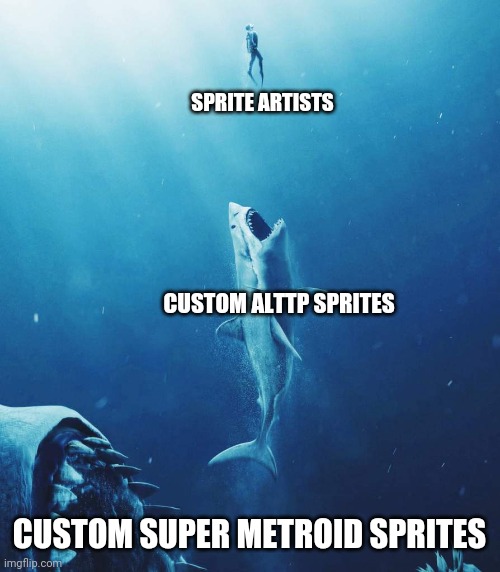
| Metroid3 spriting vs Zelda3 spriting | bigfish | Array
(
[0] => biggerfish
[1] => z3sprite
[2] => z3sprites
[3] => m3sprite
[4] => m3sprites
[5] => customsprite
[6] => customsprites
)
|
 |
link | Spriting is hard. | |||
| 100%; 316/316 | fullclear | Array
(
[0] => 316checks
[1] => 316check
[2] => allchecks
)
|
 |
link | Don't try to get 100% Locations. Keylocks during generation can prevent your ability to do so. | |||
| Multiworld Holy Trinity | mw | Array
(
[0] => bekind
[1] => bekindrewind
[2] => rewind
[3] => norewind
[4] => bekind
[5] => retroarch
[6] => chrome
[7] => burgerking
[8] => bk
[9] => mw
)
|
 |
link | Use Chrome. Don't Rewind (or use other emulator functions, including Save States). Use Retroarch. |
|||
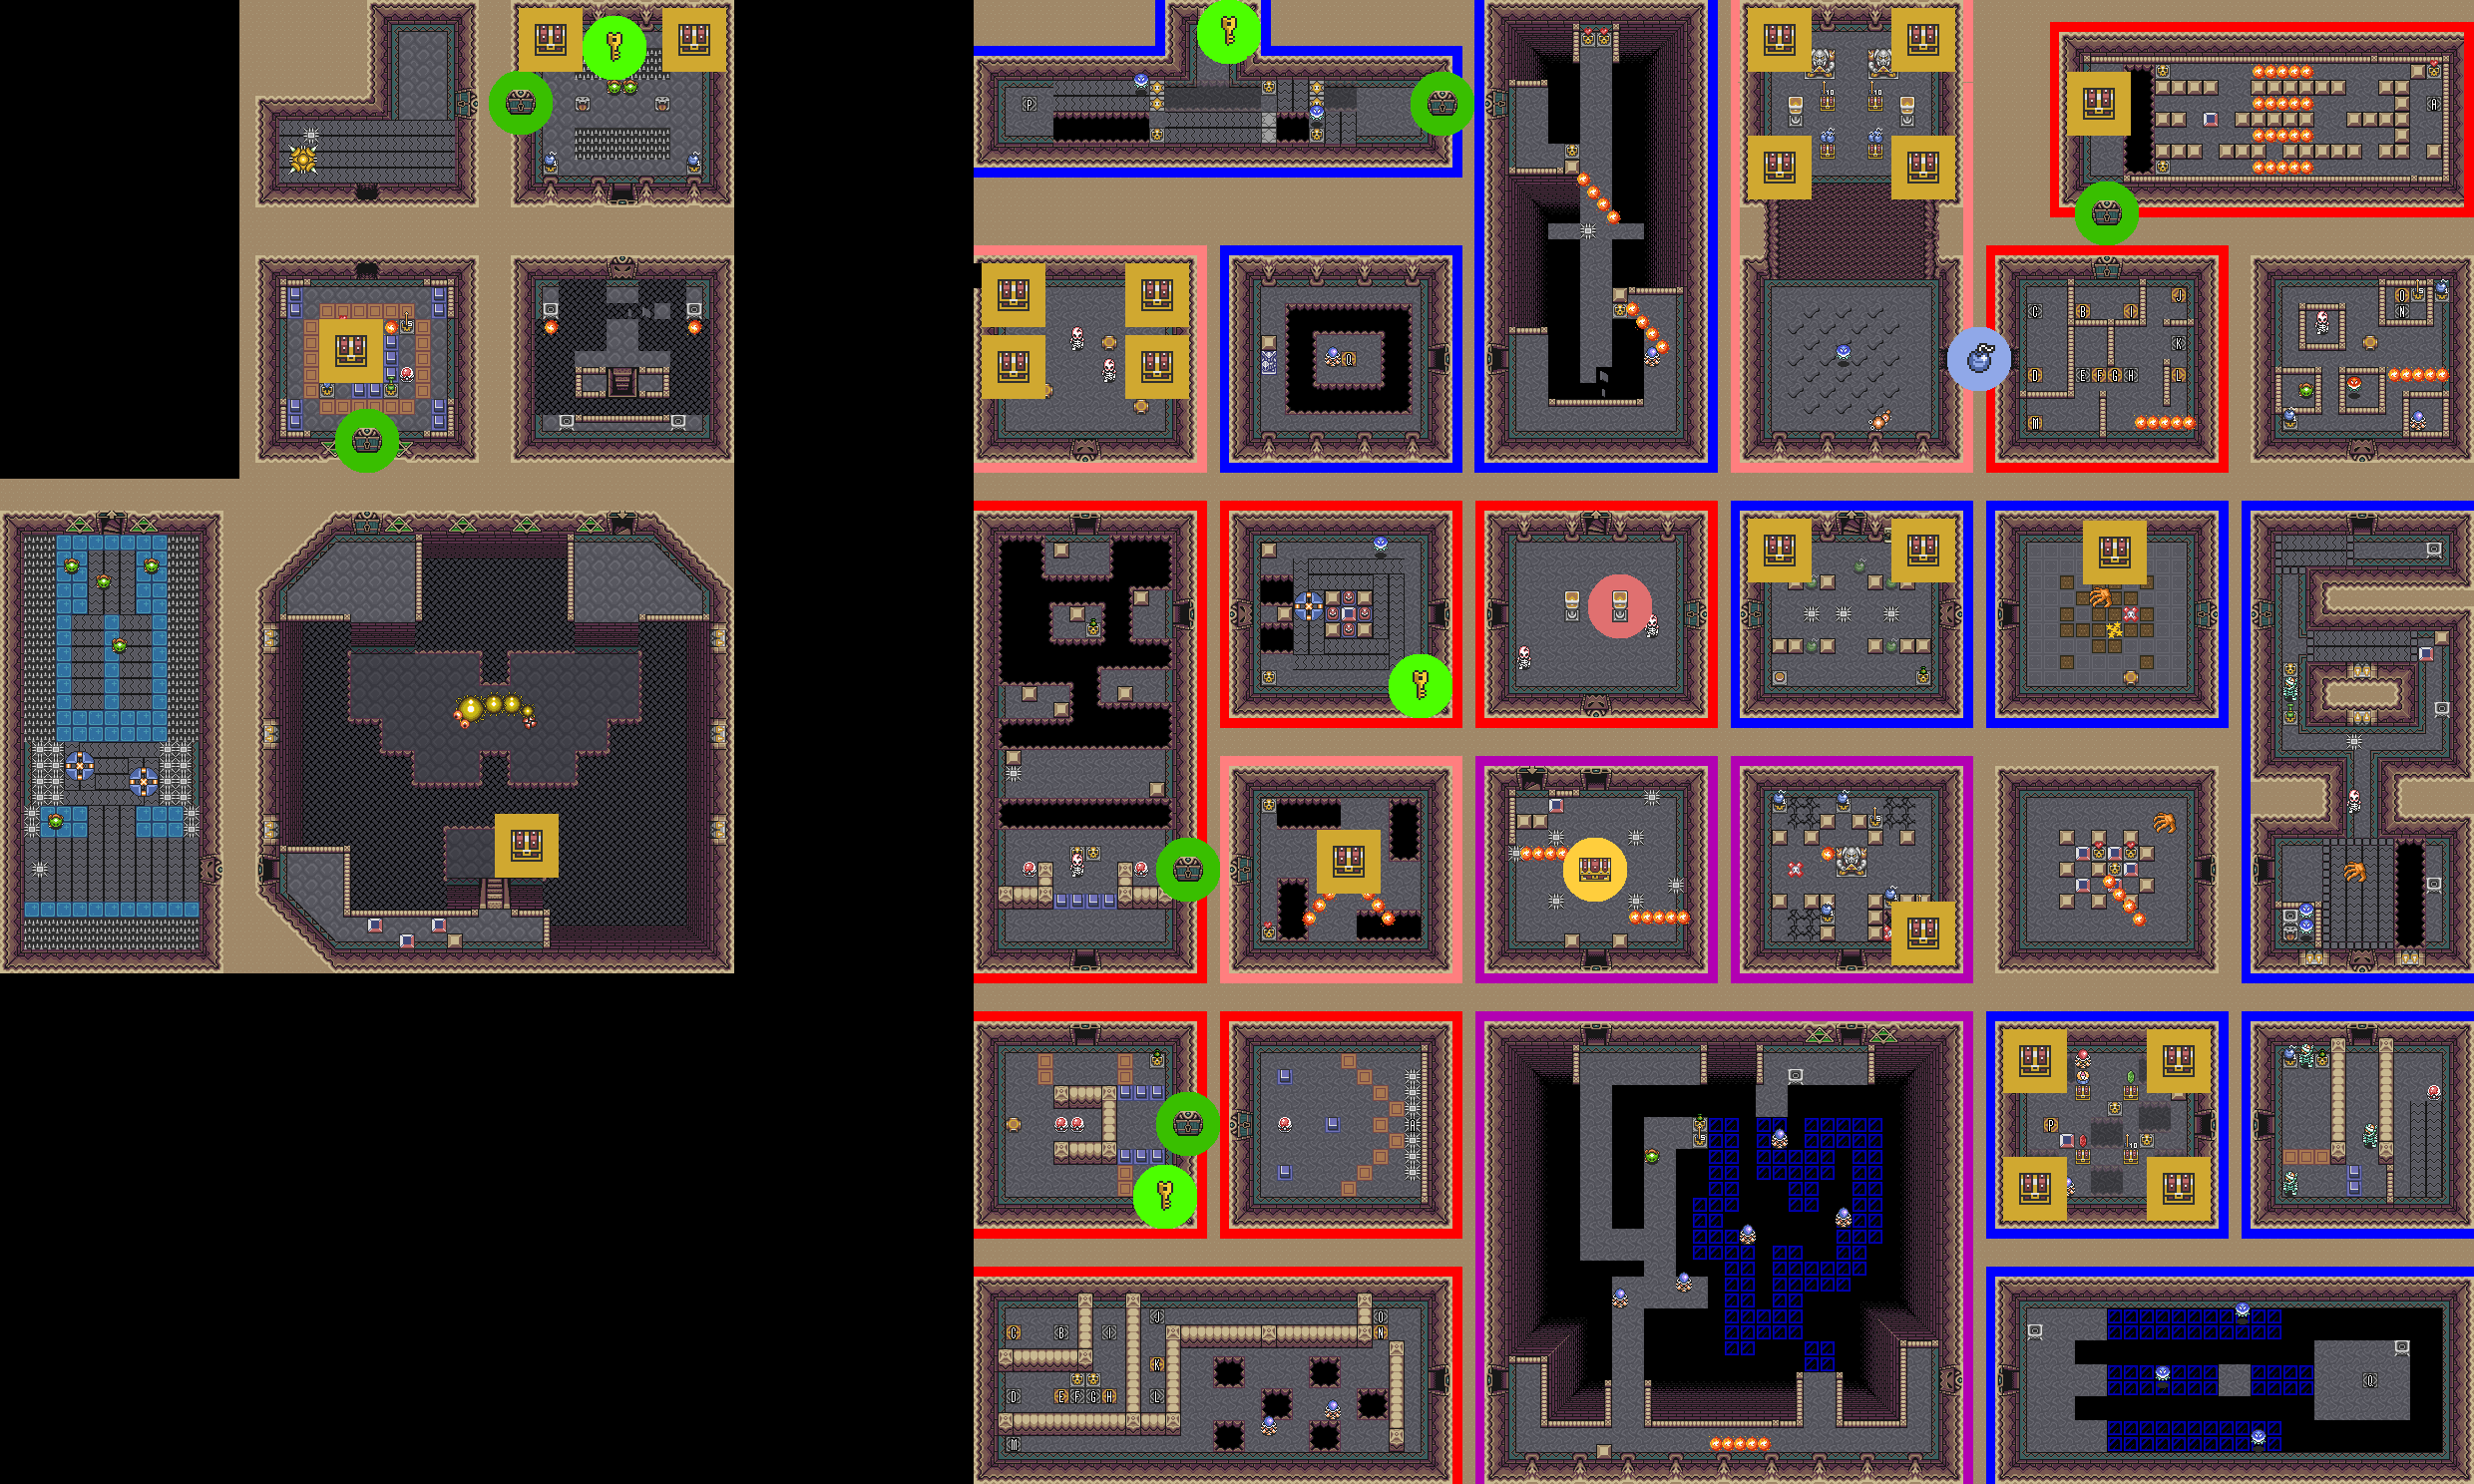
| Keysanity Doors | keysanity | Array
(
[0] => keydoor
[1] => keydoors
)
|
 |
TarThoron | link | Keysanity Door Locations on Zebes | ||
| Keysanity Segments | keysanitymap | Array ( ) |
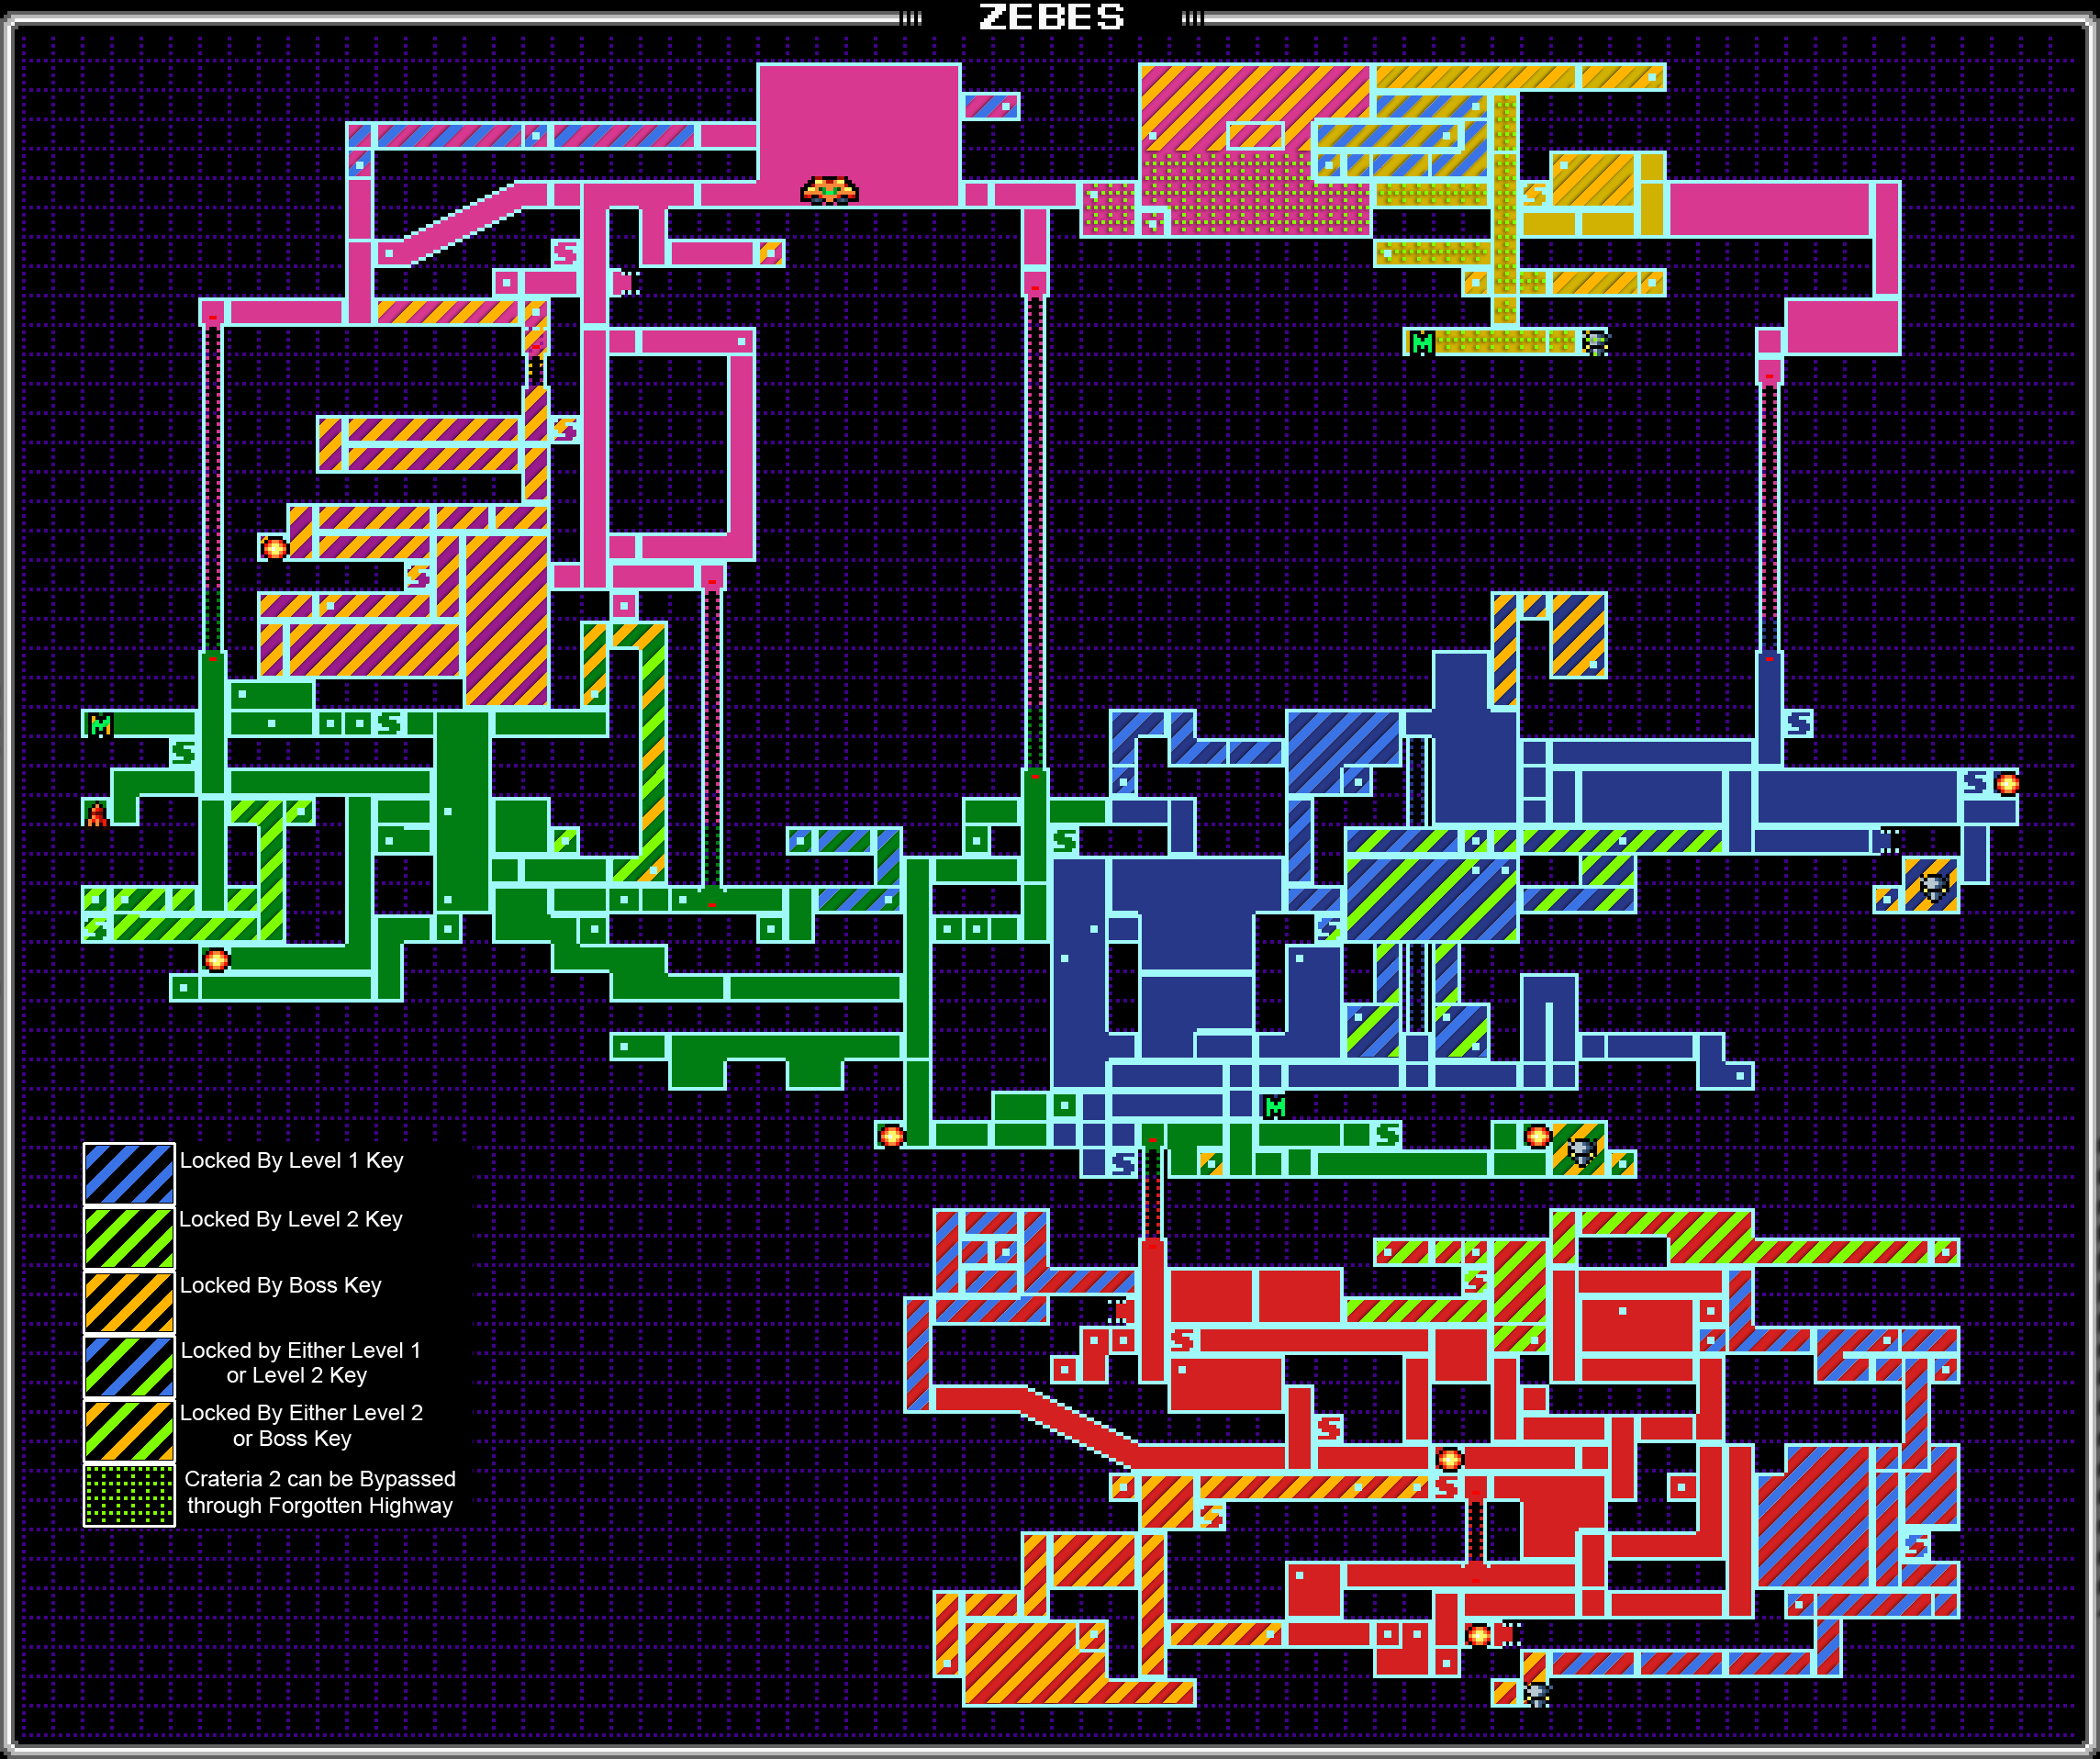 |
link | Keysanity Segments | |||
| Don't Make Me Load the Practice Hack | practicehack | Array
(
[0] => prachack
)
|
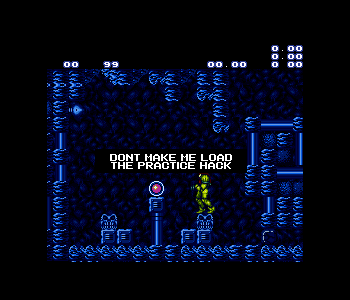 |
link | Get the Practice Hack | |||
| @Shaktool's Strats | strat | Array
(
[0] => strats
)
|
link | redirect | Use `!strat [search term]` to ask @Shaktool to search the Crocomire Super Metroid Strategy Database! See also: Index Listing |
|||
| Destroy @Shaktool | destroyshaktool | Array
(
[0] => nukeshaktool
[1] => killshaktool
[2] => destroyshakky
[3] => nukeshakky
[4] => killshakky
)
|
 |
link | Curious of who all is going to destroy me. | |||
| @Shaktool pings random people | pingshaktool | Array
(
[0] => pingshakky
[1] => shaktoolping
[2] => shakkyping
)
|
 |
link | Help! How do you ping random people? | |||
| Oofworth | oofworth |  |
link | |||||
| Zero Viewers | zeroviewers | :format(webp)/cdn.vox-cdn.com/uploads/chorus_image/image/60381115/acastro_180713_2730_0001.0.jpg) |
link | |||||
| Link | link |  |
link | |||||
| Good Luck | goodluck |  |
link | |||||
| Holy Hand Grenade of Antioch | handgrenade | Array
(
[0] => handgrenadeofantioch
)
|
link | redirect | ||||
| Holy Diver | diver | Array
(
[0] => holydiver
)
|
link | redirect | ||||
| The choices are yours and yours alone! | olmec |  |
link | Searching 3322EFFC can yield many results. The intended destination can yield some metadata about the game. | ||||
| Leaked 'Official' Source Code | beta | Array
(
[0] => leak
[1] => leaked
[2] => leaksource
[3] => leakedsource
[4] => betasource
)
|
|
link | The supposed 'leaked' source code of A Link to the Past is not going to be used or referenced in the main project. By extension, it is not to be used in any contributions to the project including but not limited to: randomizer patches, assembly patches, custom sprites, etc. See #community-rules for further details. | |||
| Downloadable Clients | client | Array
(
[0] => download
[1] => downloads
[2] => gui
[3] => clients
)
|
link | redirect | There are several ways to play. Some players want a downloadable solution. These are not always up-to-date nor always compatible with the main site. See also: Index Listing |
|||
| Don't Use YY-CHR! | yychr | Array
(
[0] => spritesomething
[1] => alttpng
[2] => noyychr
)
|
 |
link | YY-CHR is old & outdated and not well-suited for ALttP custom player sprites. Please use the ALttPNG Suite or SpriteSomething instead. |
|||
| Digital Millennium Copyright Act/DMCA | dmca | |
link | ALttPR is not presently in danger of being taken down by DMCA or Cease & Desist threats. No original game code is transmitted via the website. The patching system gives code that has been invented from scratch by our team and community. The data of the game file that you provide only lives inside your web browser on your device. Please rest assured that all is being done to ensure that the content from the website safe and legal. See also: Galoob vs Nintendo, Accolade vs Sega, Index Listing |
||||
| The Rando Development Philosophy on Vanilla | philosophy | Array
(
[0] => randovanilla
)
|
kan | link | redirect | An essay on why stuff that happens because of vanilla code is or is not fixed or modified. See also: Index Listing |
||
| ROM 'Code' | code | Array
(
[0] => romcode
[1] => racecode
[2] => racingcode
)
|
 |
link | The purpose of the 'Code' is to make sure, at a visual glance, on the File Select screen, before official Time Start, that everyone in a race setting is in fact running the same configuration and you don't get someone disqualified because they're running a different seed. The 'Code' on the file select screen is not designed to protect against collisions. There can be two seeds with the same code. It's unlikely that two racers in a single race will get two different game files with the same code. | |||
| Link Sprite Palette Block | linkpalette | Array
(
[0] => paletteblocklink
[1] => linkpaletteblock
[2] => paletteblock
[3] => palettelink
)
|
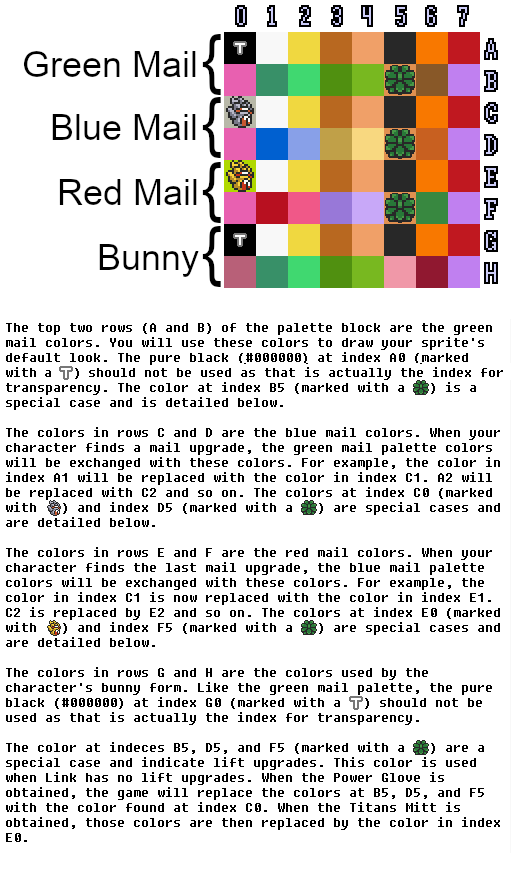 |
PlaguedOne | link | Link Sprite Sheet Palette Block description. | ||
| Link Sprite Mail/Bunny | bunnypalette | Array
(
[0] => bunnypaletteblock
[1] => paletteblockbunny
[2] => palettebunny
)
|
link | redirect | Link Sprite Sheet Palette Block and how it manages the Bunny palette. See also: Index Listing |
|||
| Link Sprite Zap Palette | zappalette | Array
(
[0] => palettezap
)
|
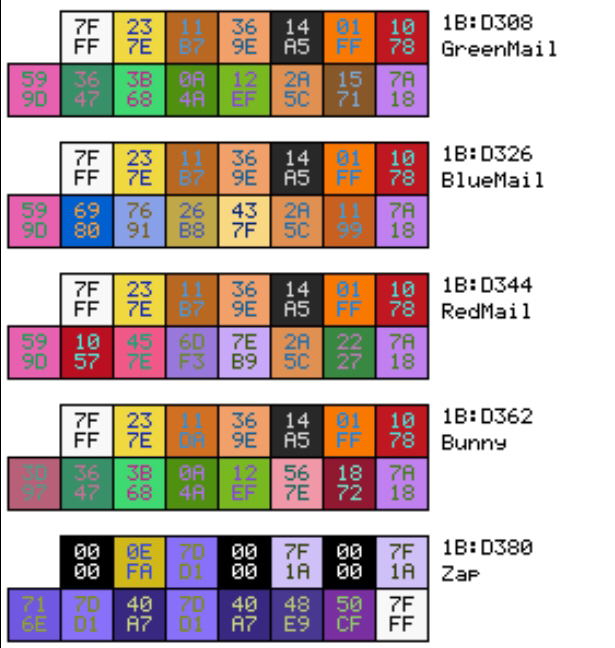 |
kan | link | Link Sprite Sheet Palettes, specific inclusion of Zap Palette. | ||
| Link Sprite Sheet | linksheet | 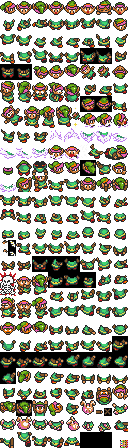 |
link | |||||
| Seeking assistance with source code for Z3-style & M3-style de/compression algorithm | decompression | Array
(
[0] => recompression
[1] => compression
[2] => 3bpp
[3] => onceagain
)
|
 |
link | ||||
| Festive Randomizer | festive | Array
(
[0] => christmas
[1] => festives
[2] => halloween
[3] => spring
[4] => easter
)
|
 |
link | Festive Randomizers are meant to be a treat. They aren't guaranteed to exist during each season. The development of Festive Randomizers are usually done within a small group of developers and are announced shortly before release and usually last about a week after the intended event. Watch #announcements for release information! | |||
| Purple Squares | festivekeese | Array
(
[0] => keese
[1] => festivebats
[2] => bats
[3] => purplesquare
[4] => purplesquares
)
|
link | redirect | The Halloween Festive Randomizers tend to mess with the imagery of many enemies. It's not a bug, it's a feature. If Synack had a dollar for every time someone asked if it was a bug, they would have a lot of dollars. See also: Index Listing |
|||
| Boss Damage Table | damagetable | Array
(
[0] => dmgtable
)
|
link | redirect | See also: Index Listing |
|||
| Damage Table (full) | damagetablefull | Array
(
[0] => dmgtablefull
)
|
link | redirect | See also: Index Listing |
|||
| SD2SNES/FXPAK PRO In-game Hooks | hooks | Array
(
[0] => sd2sneshooks
[1] => fxpakhooks
[2] => fxpakprohooks
[3] => sd2sneshook
[4] => fxpakhook
[5] => fxpakprohook
)
|
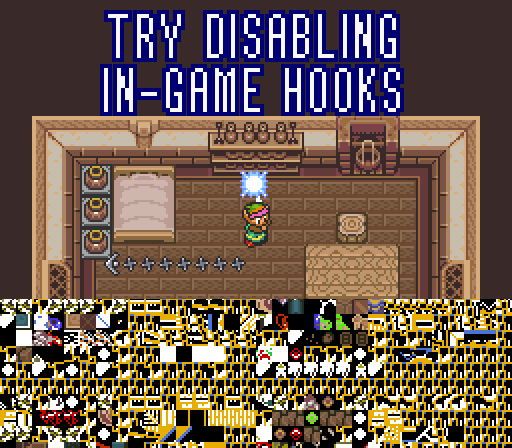 |
kan | link | The "in-game hooks" feature on the SD2SNES/FXPAK PRO is known to cause issues, particularly with vanilla major glitches. If you experience frequent unexplained crashes while glitching, check that this setting is disabled and see if that fixes your issues. | ||
| Archery Game Solution | archery | Array
(
[0] => archerygame
[1] => arrowgame
)
|
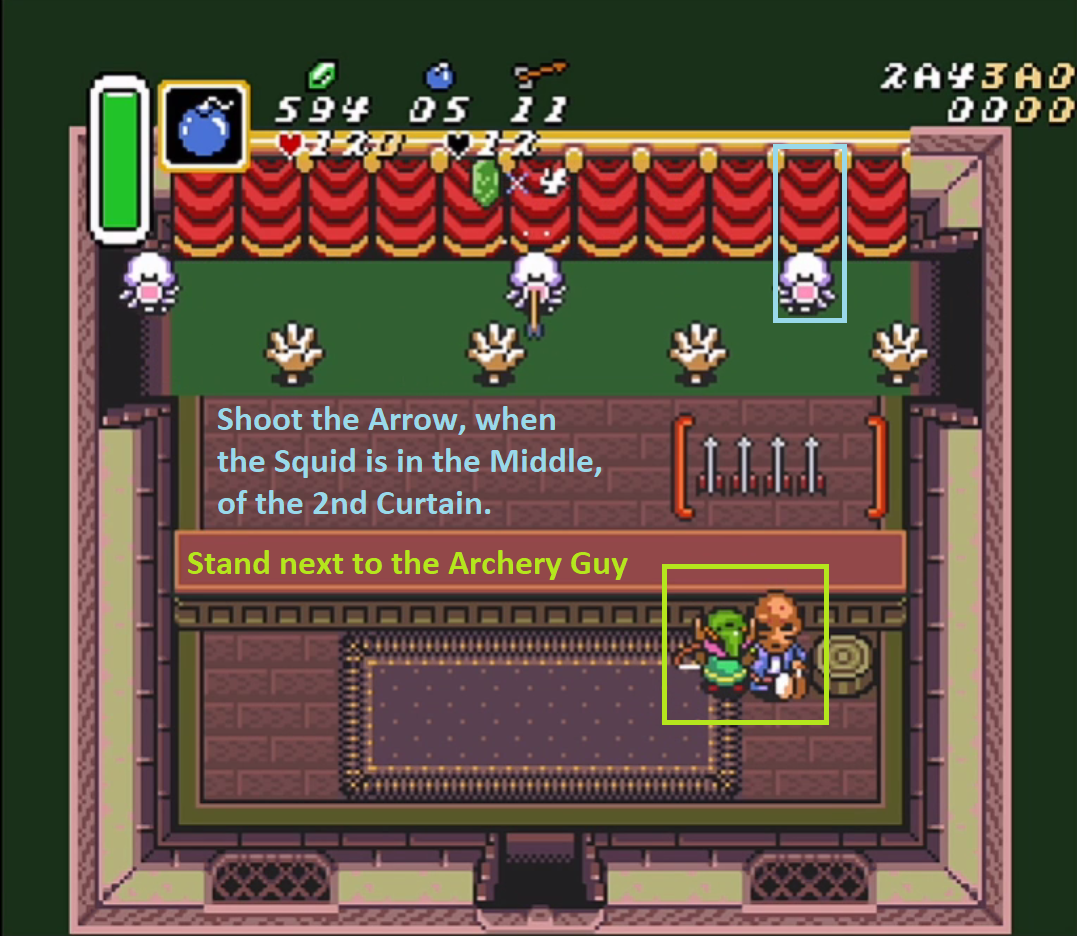 |
Michael Kunze | link | Spend $20, Win $124/game for 3 games totalling $372 in winnings for a net of $312 gained; leave and re-enter to reset sweet spot. | ||
| Maze Race Solution | mazerace | Array
(
[0] => maze
[1] => race
)
|
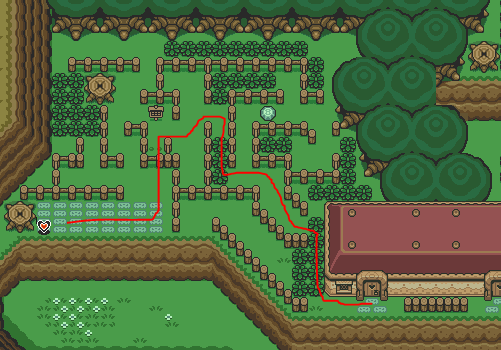 |
link | ||||
| Bombs Acquisition | bombs | Array
(
[0] => bomb
[1] => bombacquisition
[2] => bombsacquisition
[3] => bombinquisition
[4] => bombsinquisition
)
|
 |
link | See this wiki article for more. | |||
| Rupee Acquisition | rupees | Array
(
[0] => rupee
[1] => rupeeacquisition
[2] => rupeesacquisition
[3] => rupeeinquisition
[4] => rupeesinquisition
)
|
link | redirect | See also: Index Listing |
|||
| Rupee Pull | rupeepull | Array
(
[0] => treepull
)
|
 |
link | See this wiki article for more. | |||
| Fish Prize | fishprize | Array
(
[0] => fish
)
|
link | redirect | See also: Index Listing |
|||
| Crab Prize | crabprize | Array
(
[0] => crab
)
|
link | redirect | See also: Index Listing |
|||
| Toppo Prize | toppoprize | Array
(
[0] => toppo
)
|
link | redirect | See also: Index Listing |
|||
| Back of Sewers | backsewer | Array
(
[0] => backsewers
[1] => sewerback
[2] => sewersback
[3] => backdoorsewer
[4] => backdoorsewers
[5] => sewerbackdoor
[6] => sewersbackdoor
)
|
 |
link | Missed Early Sewers? Got a Glove? You're set. Grab 3 chests behind a bombable wall. | |||
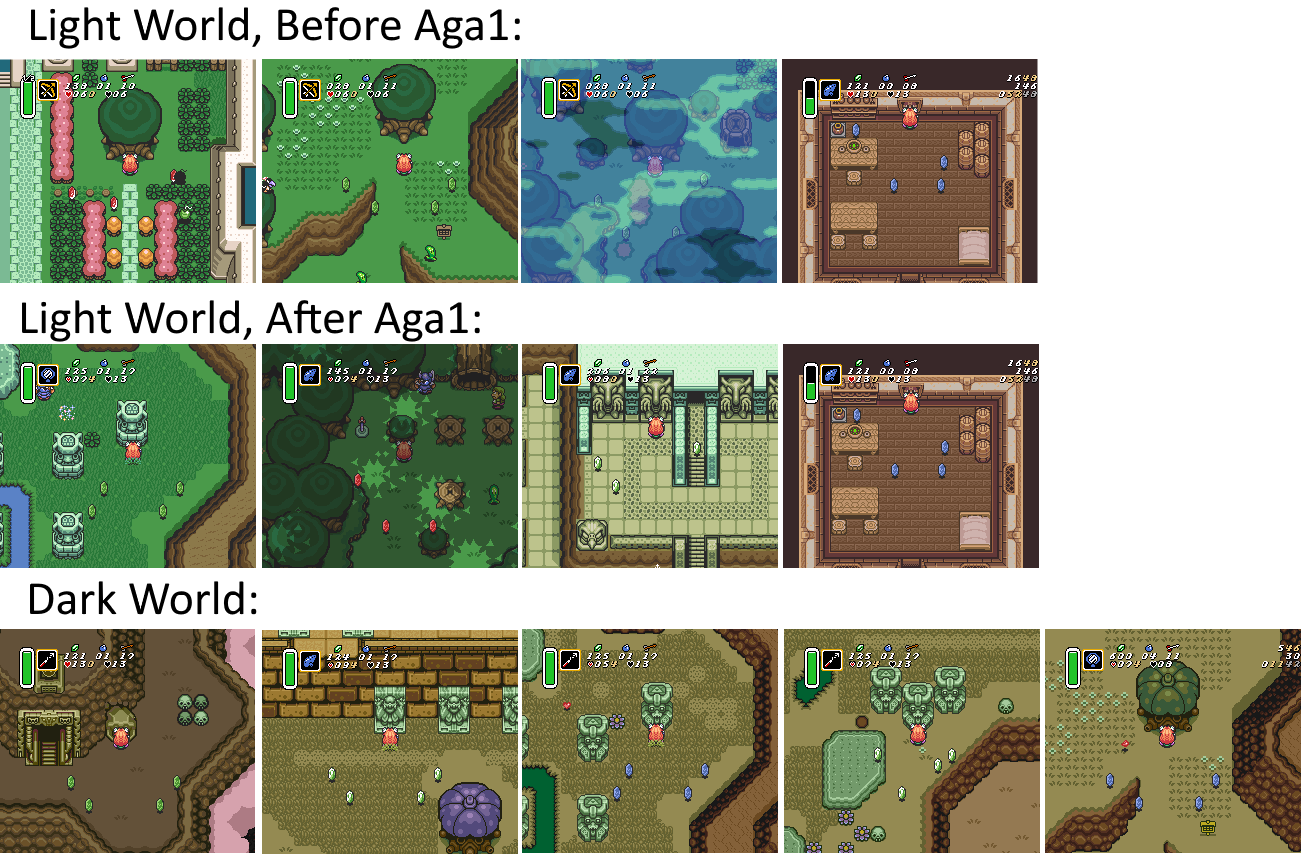
| Dark Room Navigation | darkrooms | Array
(
[0] => dark
[1] => darkroom
[2] => darknav
)
|
link | redirect | Dark Room Navigation Maps See also: Index Listing |
|||
| Save & Quit for Travel | savequit | Array
(
[0] => spawn
[1] => spawnpoint
[2] => spawns
[3] => spawnpoints
[4] => sandq
[5] => sq
)
|
 |
link | You may need to use Save & Quit (Select menu) to travel back to start to progress. See also: Save & Quit, Spawn Points, Index Listing |
|||
| Advanced Item Placement | advancedlamp | Array
(
[0] => advancelamp
[1] => advancedfirerod
[2] => advancefirerod
[3] => advancedtorches
[4] => advancetorches
[5] => torches
[6] => twotorches
)
|
 |
link | Advanced Item Placement can expect navigation of Dark Rooms (alternate image, Saku's Guide) by lighting torches with the Fire Rod instead of relying on the light cone from the Lamp. These rooms specfically include: Hyrule Castle Escape (Dark Cross; one chest (in World States other than Standard) Back of Escape (3 chests)) Eastern Palace (room with two green Eyegores; one holding a key) Palace of Darkness (Dark Basement; two chests). See also: Dark Room Navigation, Hyrule Castle Garage Door, Index Listing |
|||
| Hyrule Castle Garage Door | garagedoor | Array
(
[0] => nolamp
[1] => lightcone
[2] => nolightcone
[3] => nolight
[4] => mantle
[5] => pushmantle
[6] => mantleopen
[7] => mantel
[8] => pushmantel
[9] => mantelopen
)
|
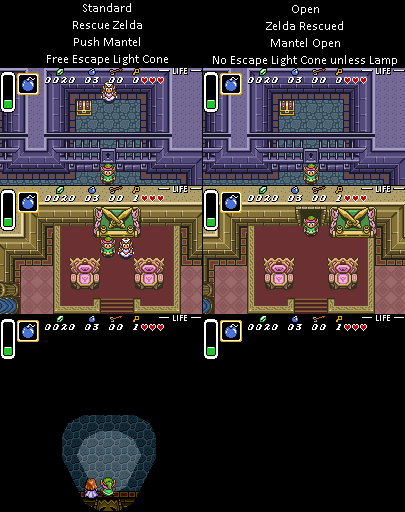 |
link | Standard: Rescue Zelda, Push Mantel, Free Escape Light Cone. Open: Zelda Rescued, Mantel Open, No Escape Light Cone unless Lamp. See also: Dark Room Navigation, Advanced Item Placement, ALL HAIL THE HYRULE CASTLE GARAGE DOOR. (High volume warning.), Index Listing |
|||
| Invisible Floor Navigation | invisofloors | Array
(
[0] => inviso
[1] => invisible
[2] => invisiblefloors
[3] => invisofloor
[4] => invisiblefloor
)
|
link | redirect | Invisible Floor Navigation Maps See also: Index Listing |
|||
| Fake Flipper Fix Reversion | fff | Array
(
[0] => ffff
[1] => fffff
[2] => ffffff
[3] => fffffff
[4] => ffffffff
[5] => fffffffff
[6] => ffffffffff
[7] => fffffffffff
[8] => ffffffffffff
[9] => fffffffffffff
[10] => ffffffffffffff
[11] => fffffffffffffff
[12] => ffffffffffffffff
)
|
 |
kan | link | As of v31.0.11, the Fake Flippers InstaKill code was reverted in favor of behavior closer to vanilla. As a compromise, bad Fake Flipper returns that land off-screen will freeze Link in place, forcing you to Save & Quit. This is to prevent uncareful movement that could result in a hardlock, costing players their progress. Getting hit in the Fake Flippers state will attempt to put Link back where he jumped from. If this location is on another screen, Link's coordinates will be invalid, so you should immediately Save & Quit. In some cases this is preceded by a long pause, but it will always resolve, so do not reset your console. |
||
| Quadrant Glitch | quadrantglitch | Array
(
[0] => quad
[1] => quadglitch
[2] => quadrant
)
|
link | redirect | See also: Index Listing |
|||
| Whirlpools | whirlpools | Array
(
[0] => whirl
[1] => whirls
[2] => pool
[3] => pools
[4] => whirlpool
)
|
 |
link | There are several sets of whirlpools in Hyrule. One set in particular is useful in getting to Zora's Waterfall with Flippers but no lift upgrade. See more on this wiki. | |||
| Spoiler Log | spoiler | Array
(
[0] => racerom
)
|
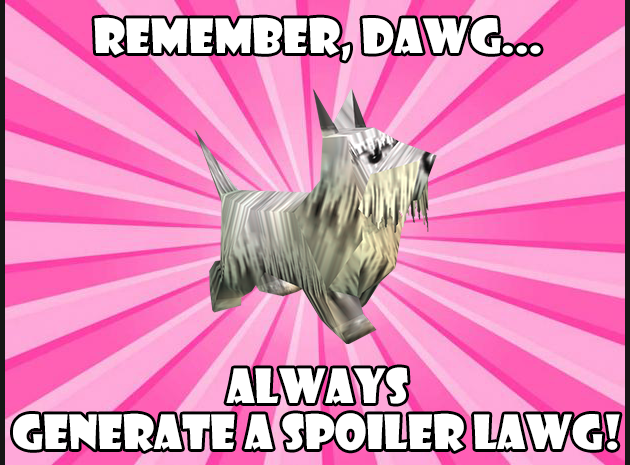 |
link | Remember, dawg... always generate a spoiler lawg! Race ROMs should only be generated in race settings, and even then, it's usually handled by a bot anyway. See also: $holy permalink, Index Listing |
|||
| Haven't played in 20 years! | hellmode | Array
(
[0] => nologic
[1] => hell
[2] => hellseed
[3] => hellmodeseed
[4] => nightmare
[5] => nightmareseed
[6] => crosskeys
[7] => crosskeysseed
[8] => mysteryseed
[9] => criscross
[10] => criscrossseed
[11] => chaos
[12] => chaosseed
)
|
 |
link | Don't start out with insane options if you're new. Consider Playing Vanilla Before Rando. | |||
| Have you tried murdering the wizard? | wizardmurder | Array
(
[0] => agahnim
[1] => murderwizard
[2] => wizard
[3] => rngpls
)
|
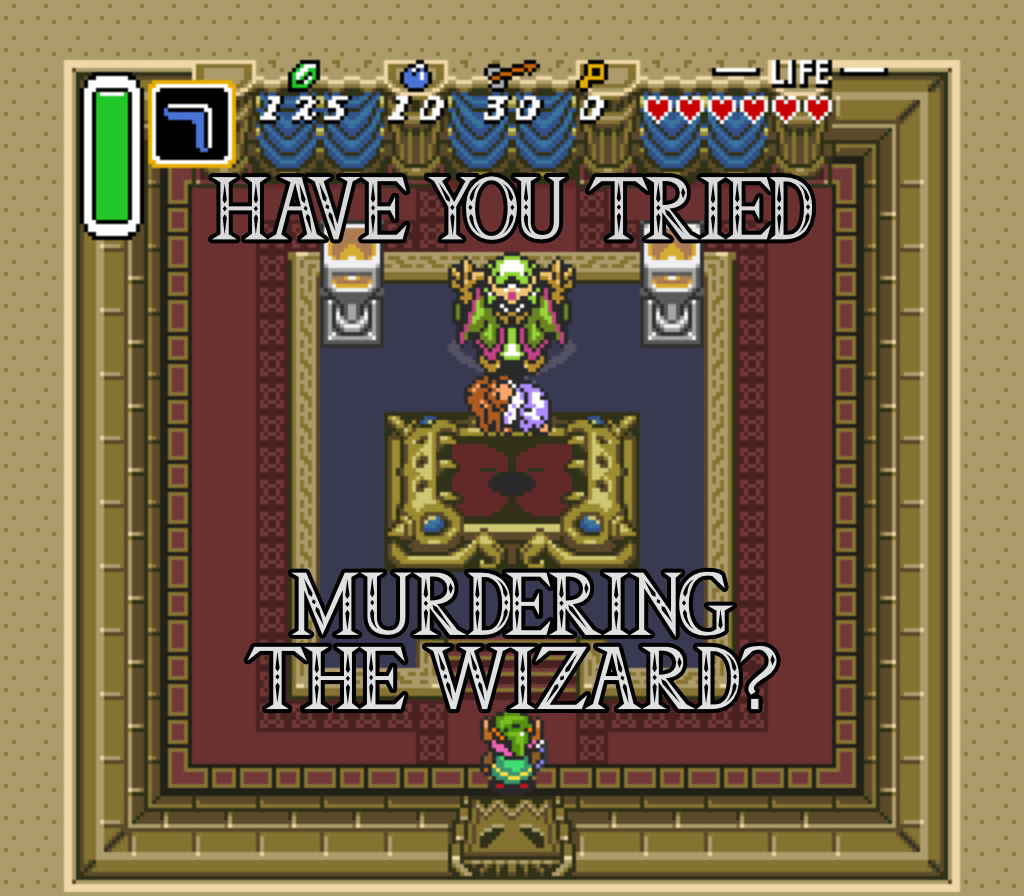 |
otherTom | link | Defeating Agahnim in the Hyrule Castle Tower may be your initial cross-world access. Don't fret getting an "Aga Seed"! It's not all that bad, is actually relatively common, and with practice will only take a few minutes of your time. | ||
| Death Mountain Traversal | deathmountain | Array
(
[0] => dmtraversal
)
|
 |
link | You can get to East Death Mountain via two ways. Across the top using the Magic Mirror and Hammer. Across the bottom using the Hookshot. Once getting there, you can use the Titan's Mitts to access a Dark World warptile. |
|||
| Paradox Cave | paradoxcave | Array
(
[0] => paradox
)
|
 |
kan | link | Everything you know is wrong, black is white, up is down and short is long. | ||
| Cave 45 | cave45 | 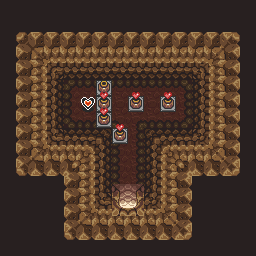 |
link | Cave 45 is located south of the Haunted Grove where you can dig up the Flute Spot. You must start in the Dark World (south of Stumpy) and use the Mirror to return to the Light World to access this ledge. Inverted World State has lowered this ledge. | ||||
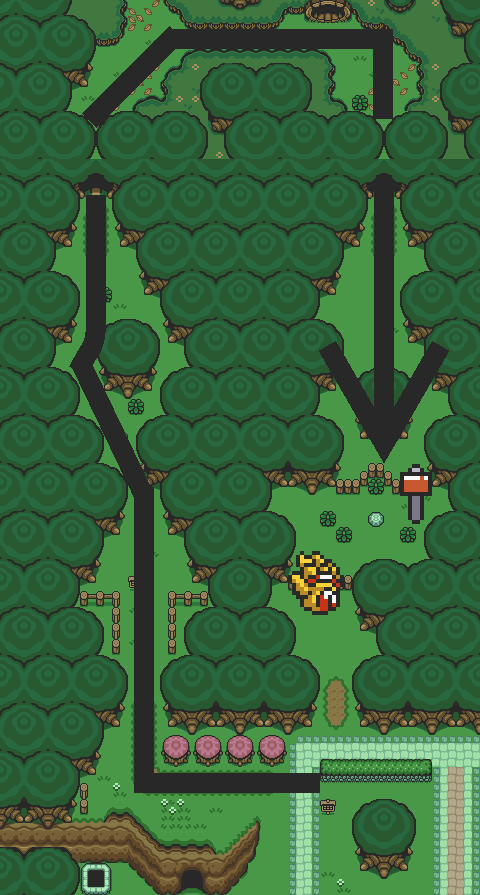
| Pyramid to Dark World North | pyramidescape | 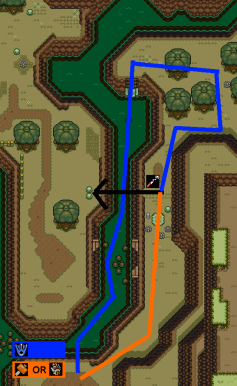 |
link | Flippers: Take the water. Hammer or Glove, take the road. Use the Hookshot to get through! |
||||
| Dark Graveyard to King's Tomb & Graveyard Ledge | darkgraveyard | 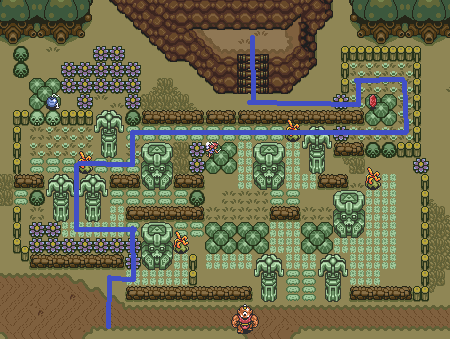 |
link | You can walk through the Dark Graveyard without any special equipment. | ||||
| Dark Kakariko Portal | darkkakportal | Array
(
[0] => darkkakariko
[1] => kakportal
)
|
 |
link | You can approach from the south with Titan's Mitts. You can approach from the north with Hammer. You need Pearl to leave. |
|||
| Bumper Cave Traversal | hooklessbumper | Array
(
[0] => bumper
[1] => bumpercave
[2] => nohookshot
)
|
 |
link | You can pass through Bumper Cave without the Hookshot by hugging the wall and walking through the skullpots. | |||
| Palace of Darkness: Dark Maze | poddarkmaze | Array
(
[0] => darkmaze
)
|
 |
link | Pathways through the Dark Maze in Palace of Darkness with movements that will assist traversal in the dark. See also: Dark Room Navigation, Index Listing |
|||
| Ice Palace: Stairs | icestairs | Array
(
[0] => ipstairs
[1] => icestair
[2] => ipstair
)
|
 |
link | These stairs can be tricky because of the ice physics. Little known fact: You can swing your sword to assist with traversing the ice as it will push you in the direction of your swing. | |||
| Ganon's Tower as Bunny | gtbunny |  |
Edos | link | You can enter Ganon's Tower as a Bunny in Entrance Randomizer, or if canOneFrameClipOW is expected via Dungeon Revive or OWYBA. | |||
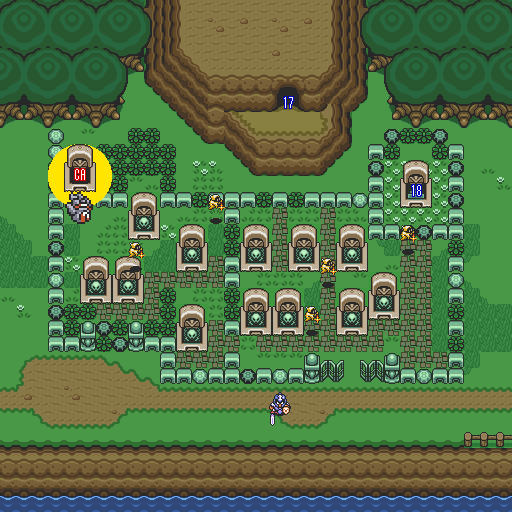
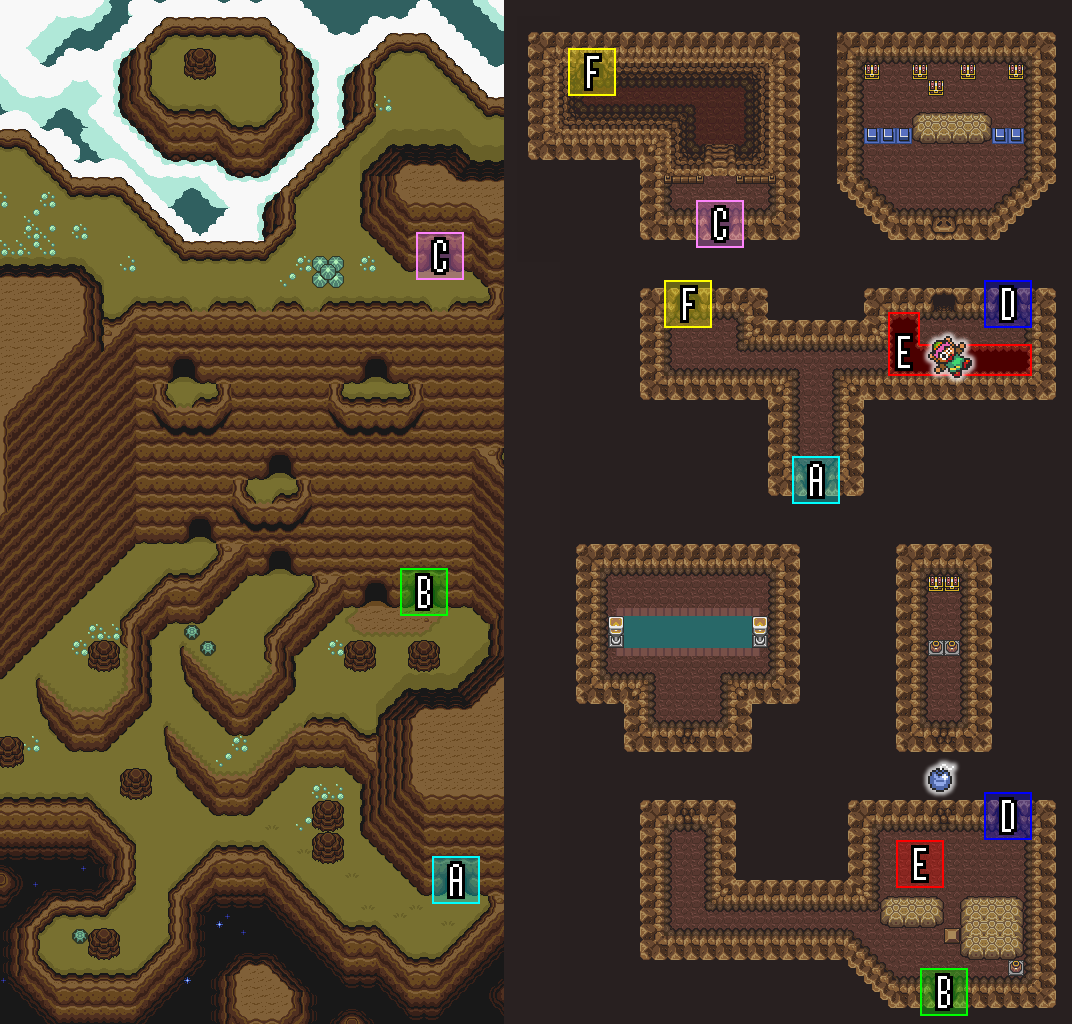
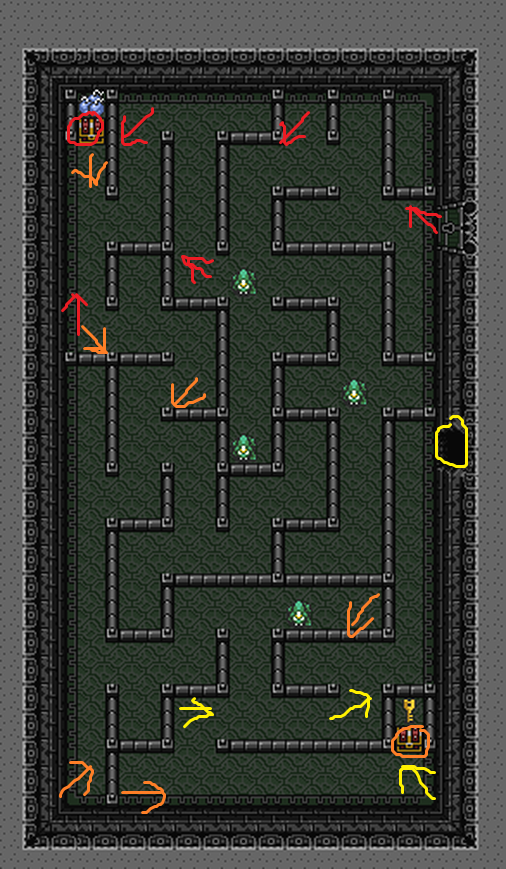
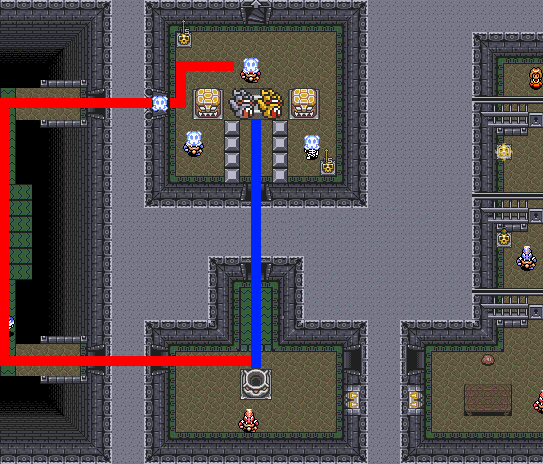
| Ganon's Tower: Pathways | ganonstower | Array
(
[0] => gt
[1] => randoroom
[2] => randomizerroom
)
|
 |
link | Red: Left side. Blue: Right side. Purple: Both sides. Pink: Left side, not required for getting to the center. |
|||
| Ganon's Tower: Keys for Ascent | gtkeys | Array
(
[0] => gtascent
[1] => gtgauntlet
[2] => gtgauntletkeys
)
|
 |
Malmo | link | Remember to take at least one key with you when ascending the tower! Two for good measure! | ||
| Master Sword/Silverless Ganon | silverlessganon | Array
(
[0] => msganon
)
|
link | redirect | To damage Ganon with the Master Sword, you must use Sword Spins. To damage Ganon without Silver Arrows, you must damage him as he is teleporting. This is a very small window, maximize effectiveness by using Sword Spins, regardless of sword level. See also: Index Listing |
|||
| Forgotten Forest | forgottenforest | link | redirect | Located west of Hyrule Castle and east of Kakariko Village. See also: Index Listing |
||||
| Enemizer IS jank! | jank | Array
(
[0] => enemizerjank
)
|
 |
link | Enemizer is jank, but it's still pretty awesome! | |||
| Stuck | stuck | Array
(
[0] => softlock
[1] => hardlock
)
|
link | redirect | Are you sure you're stuck? See also: Index Listing |
|||
| Entity Maps | entitymaps | Array
(
[0] => entities
)
|
 |
link | Entities available on the overworld: Light World, Dark World. | |||
| Warp Tiles (Dollar Store version) | warptilesdiscount |  |
Mikan | link | Descriptions of inventory/events required to use the warp tiles to travel between worlds. | |||
| Warp Tiles (Game Icons version) | warptilesicons | Array
(
[0] => warptiles
)
|
 |
MidnightWonko | link | Descriptions of inventory/events required to use the warp tiles to travel between worlds. | ||
| Thieves' Maiden, no Glove | maiden | Array
(
[0] => thievesmaiden
)
|
 |
link | ||||
| Item Screen/Y-Items | itemscreen | Array
(
[0] => noshovel
[1] => noflute
[2] => nomushroom
[3] => nomush
[4] => nopowder
[5] => inventoryscreen
[6] => inventory
[7] => items
[8] => yitems
)
|
 |
link | Press Y to switch between items that share a slot in your inventory. Details. | |||
| Sidequest Summary | sidequest | Array
(
[0] => sidequests
)
|
link | redirect | See also: Index Listing |
|||
| Turtle Rock Entrance Peg Randomization | trpegs | Array
(
[0] => turtlerockpegs
[1] => pegrando
[2] => pegsrando
[3] => trpeg
[4] => turtlerockpeg
)
|
link | redirect | See also: Index Listing |
|||
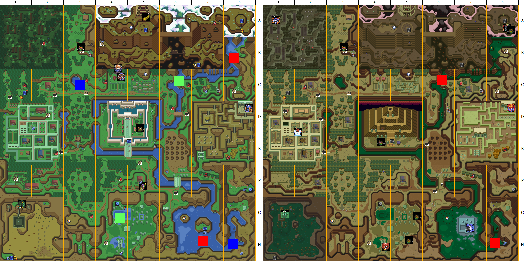
| Overworld Transition Randomization | overworldrandomizer | Array
(
[0] => owrandomizer
[1] => owrando
[2] => overworldrando
)
|
link | redirect | See also: Index Listing |
|||
| Batman | batman |  |
link | Holy Image Batman! | ||||
| Play Vanilla before Rando | vanilla |  |
link | |||||
| ALttP can't Walk & Breathe at the Same Time | walkbreathe | Array
(
[0] => walkandbreathe
)
|
 |
link | ||||
| Big Key Chest != Big Chest | bigkeychest | Array
(
[0] => bigkey
[1] => bigchest
)
|
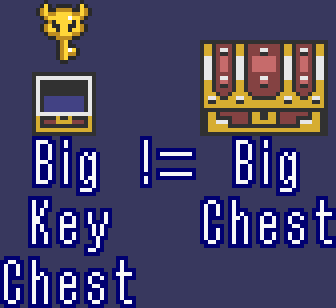 |
link | The Big Key Chest is the chest that normally houses the Big Key in Vanilla. The Big Chest is the chest that is locked by the Big Key. |
|||
| Door Rando Map | doorrando | Array
(
[0] => randodoors
)
|
 |
codemann8 | link | Huge map of door connections in dungeons. | ||
| Door Rando Chibi Maps | chibimaps | Array
(
[0] => chibimap
)
|
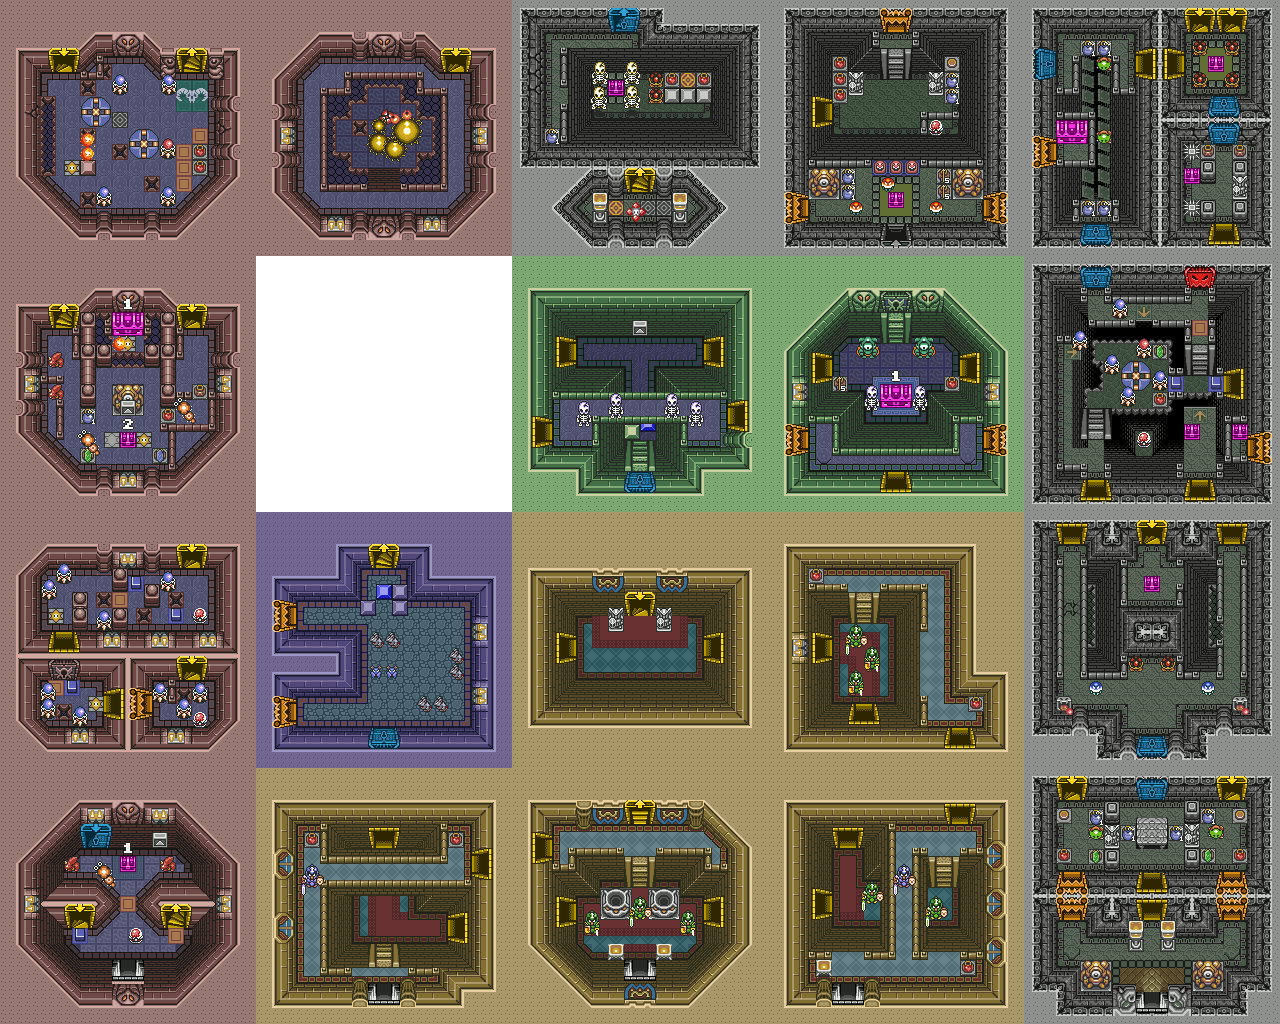 |
prdwong | link | Chibified Dungeon Maps for door connections in dungeons. | ||
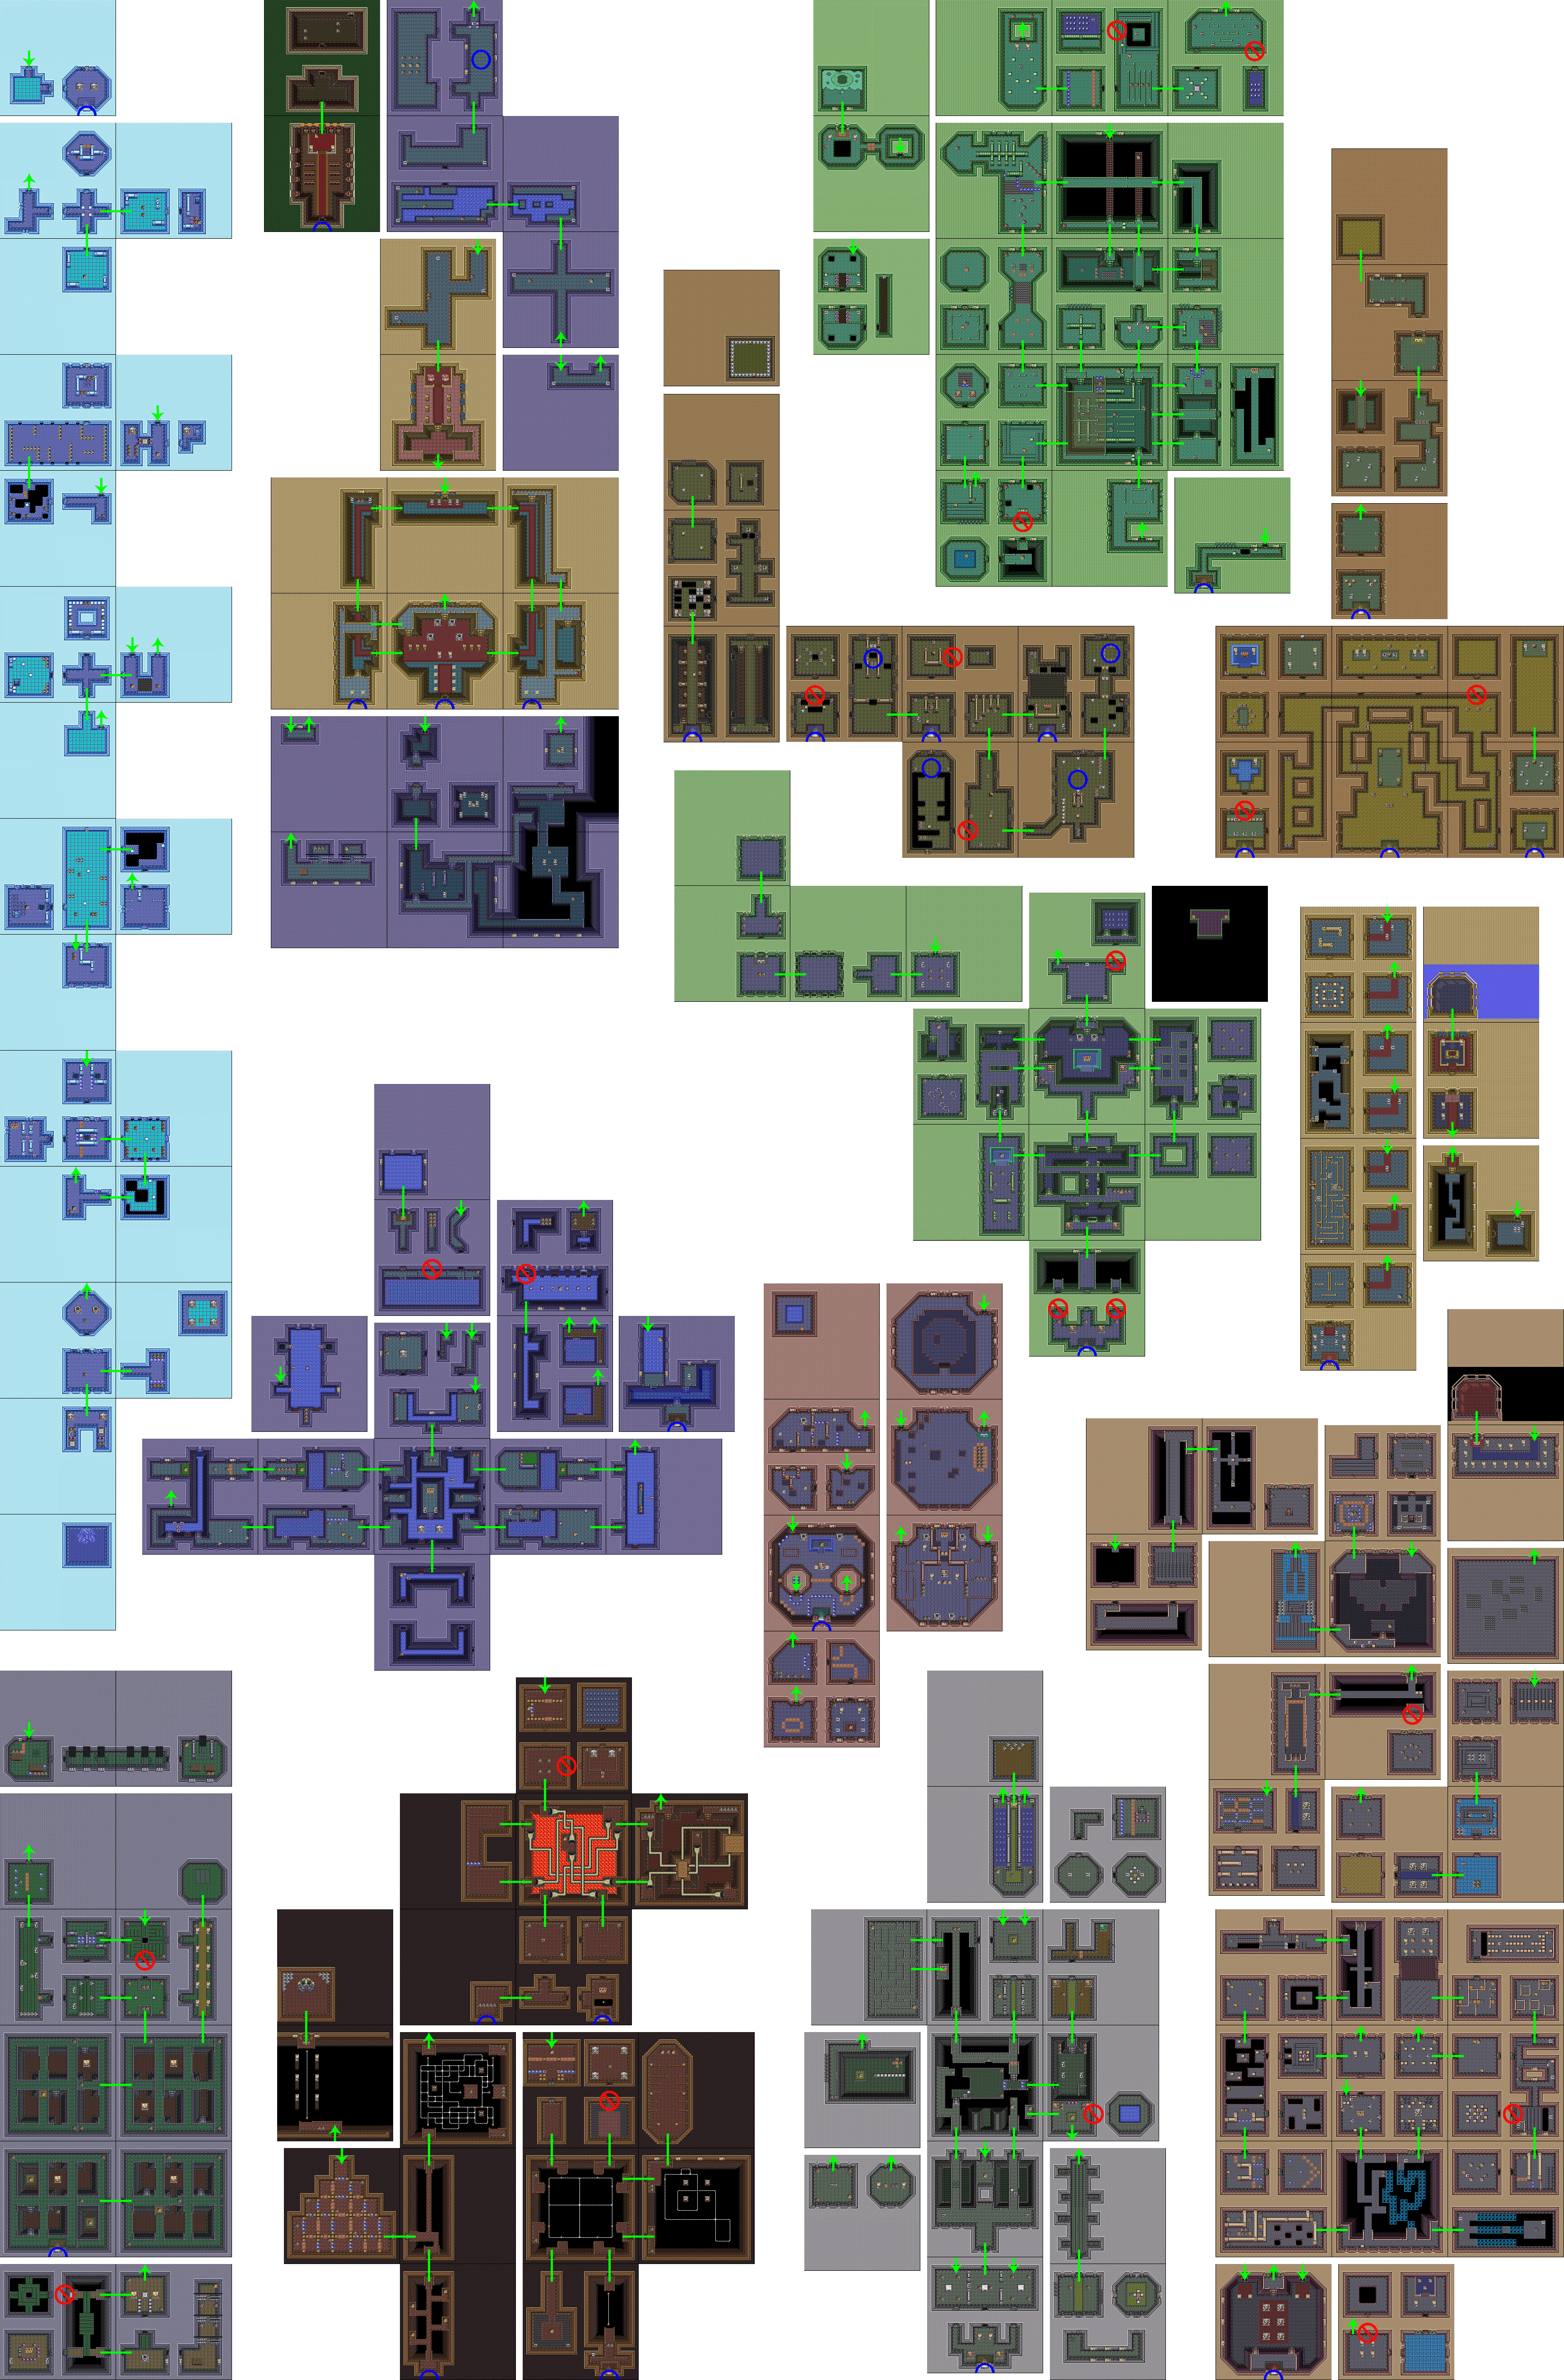
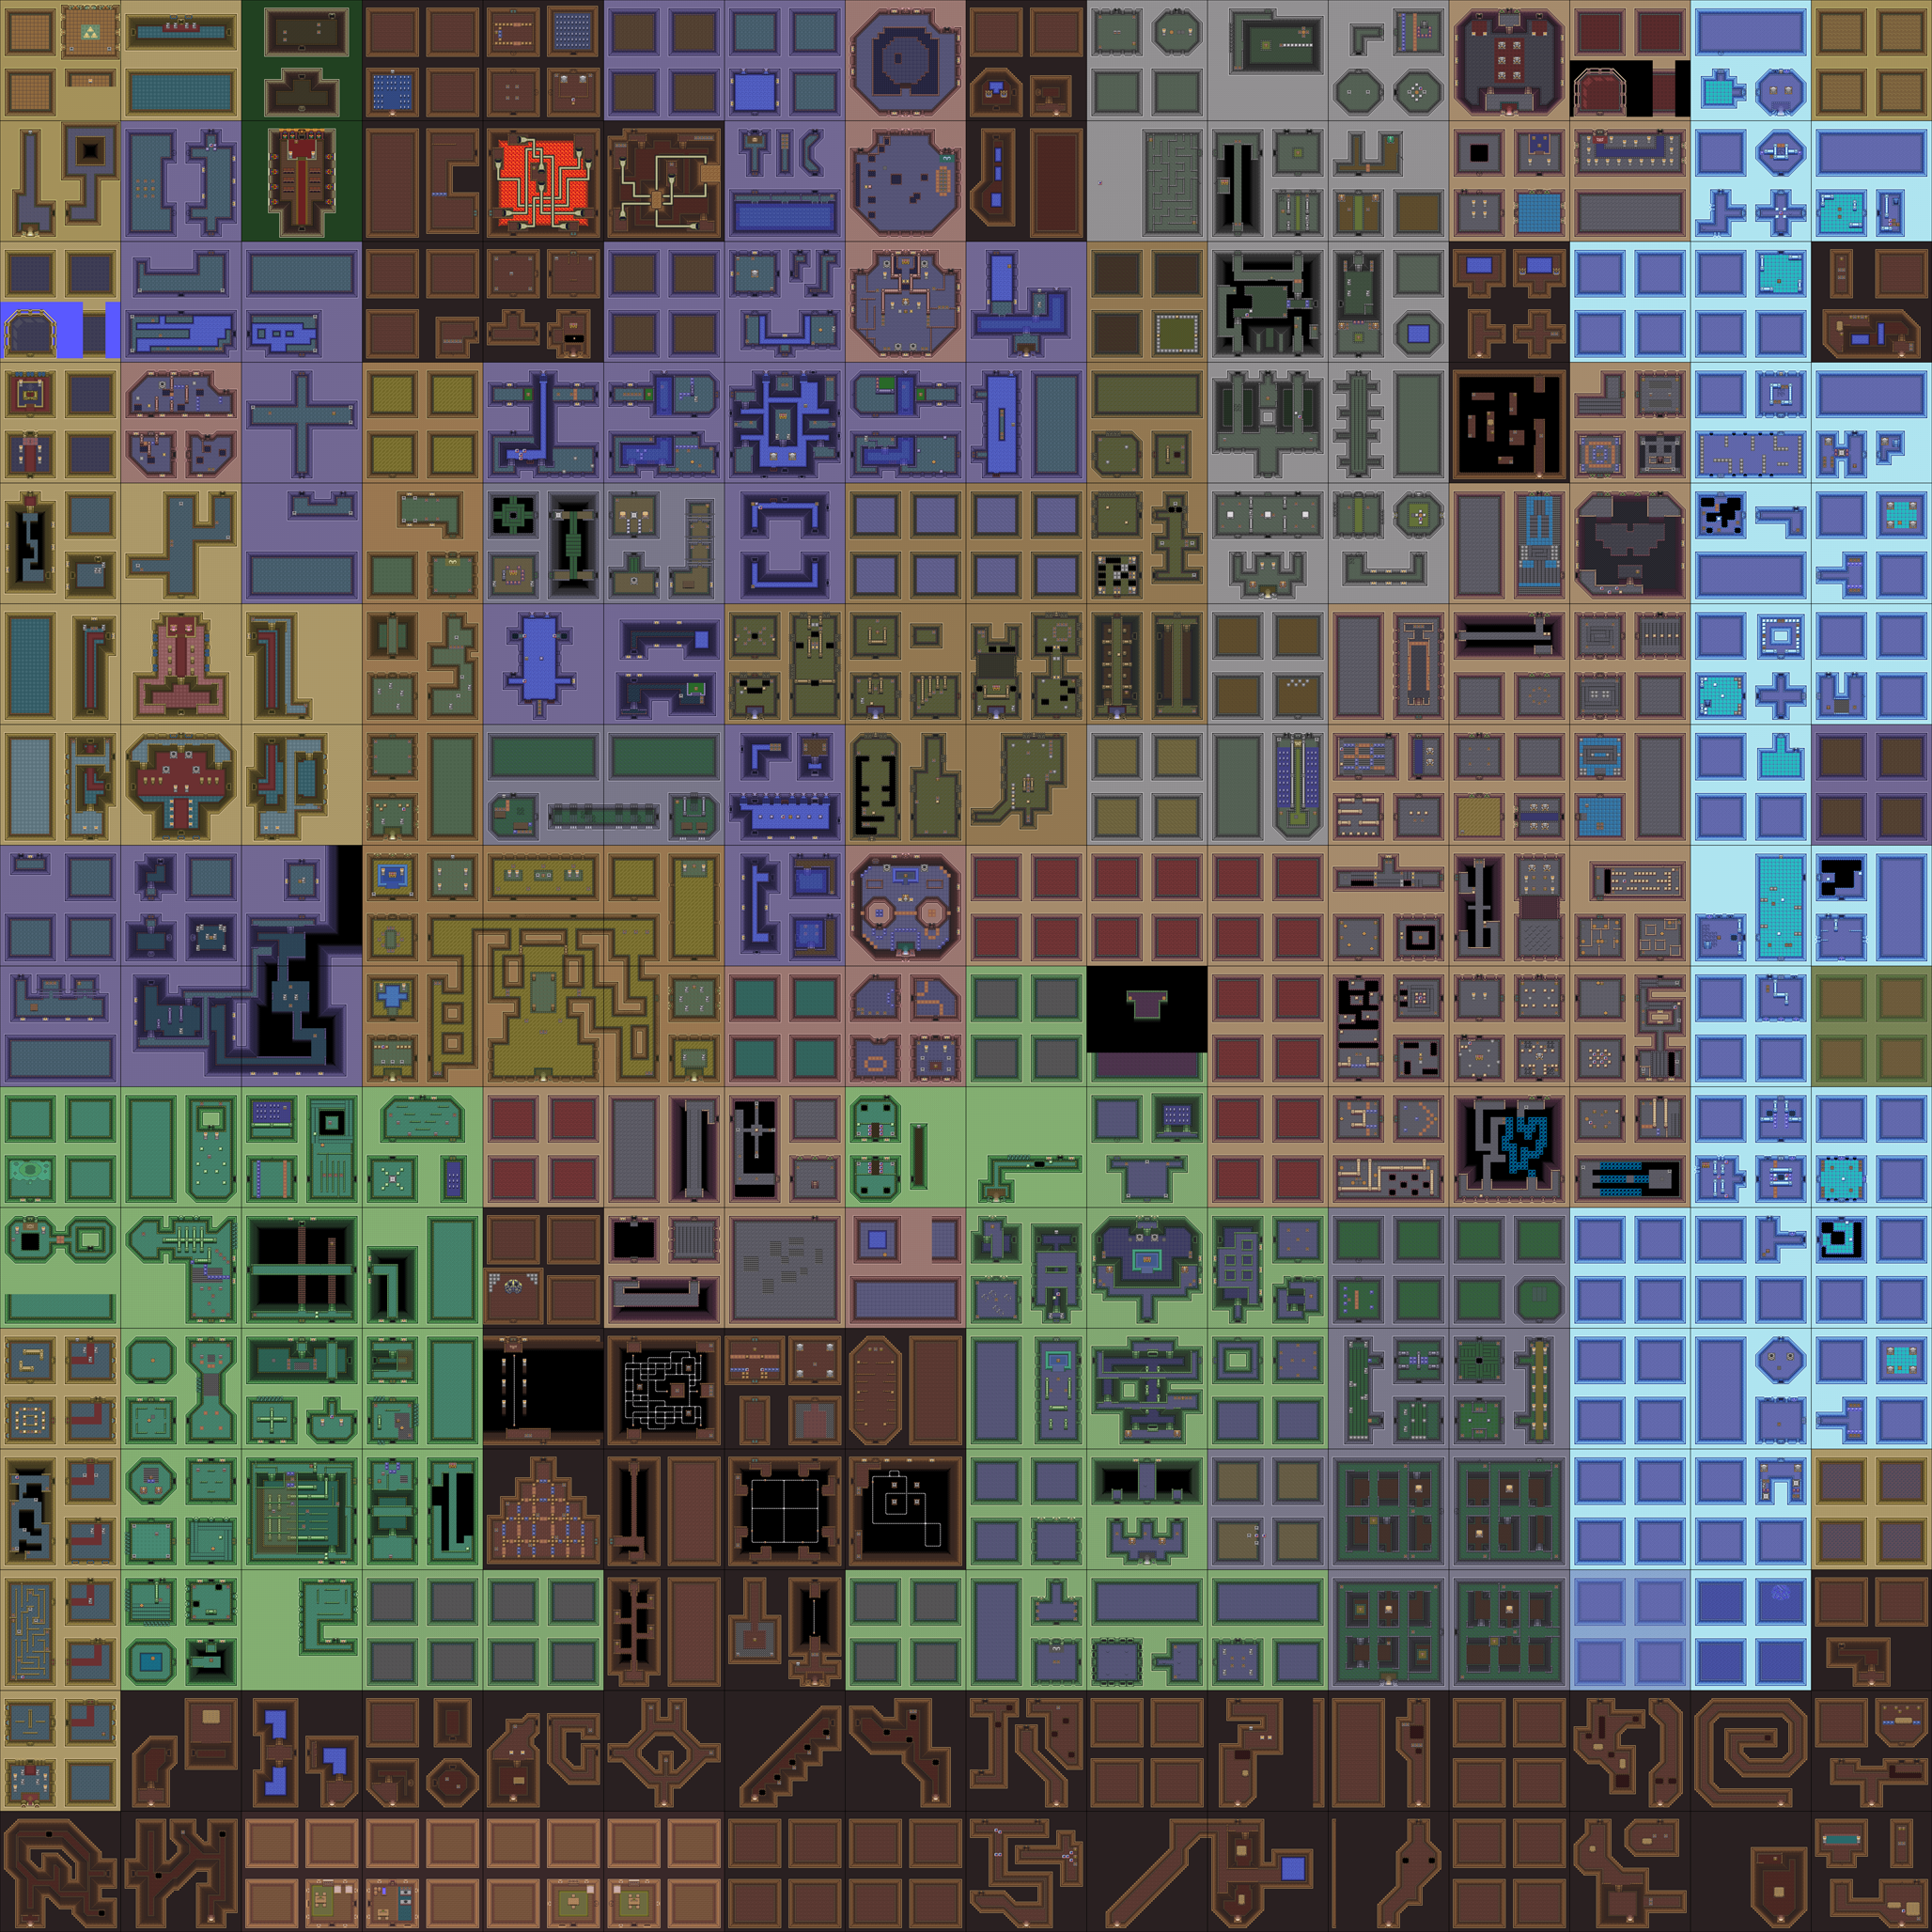
| Dungeon Maps | dungeonmaps | 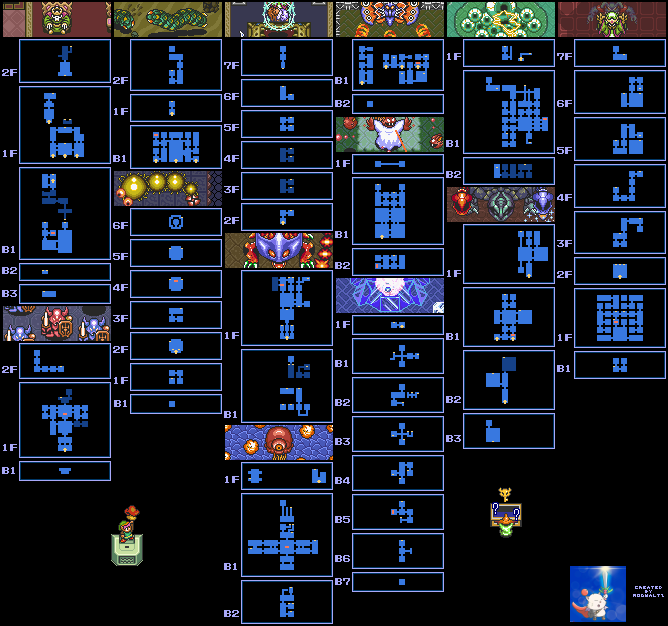 |
MogWaltz | link | A smooshed-together representation of the in-game dungeon maps for easier-visualization about how they all fit together spacially if they were in real space. See also: With Chests/Locked Doors, Index Listing |
|||
| Enemy Prize Packs | prizepacks | Array
(
[0] => prizepack
)
|
link | redirect | See also: Index Listing |
|||
| Interactive EG Map | eg | Array
(
[0] => egmap
[1] => egmaps
)
|
link | redirect | See also: Index Listing |
|||
| EG1 Map | eg1 | Array
(
[0] => eg1map
[1] => egmap1
)
|
 |
link | See also: Interactive EG Map, EG2 Map | |||
| EG2 Map | eg2 | Array
(
[0] => eg2map
[1] => egmap2
)
|
 |
link | See also: Interactive EG Map, EG1 Map | |||
| Bombable Walls | bombable | Array
(
[0] => bombables
[1] => bombablewall
[2] => bombablewalls
)
|
link | redirect | See also: Index Listing |
|||
| Bonkable Locations | bonkable | Array
(
[0] => bonkables
[1] => bonkablewall
[2] => bonkablewalls
)
|
link | redirect | See also: Index Listing |
|||
| Spawnable Locations | spawnable | Array
(
[0] => spawnables
[1] => spawnablechest
[2] => spawnablechests
)
|
link | redirect | See also: Index Listing |
|||
| NPC Item Locations | npcitems | link | redirect | See also: Index Listing |
||||
| Keylock Possibilities | keylock | Array
(
[0] => keylocks
)
|
link | redirect | Not all keys are guaranteed to be accessible. See also: $holy fullclear, Index Listing |
|||
| Duck of Doom | duckofdoom | Array
(
[0] => duck
)
|
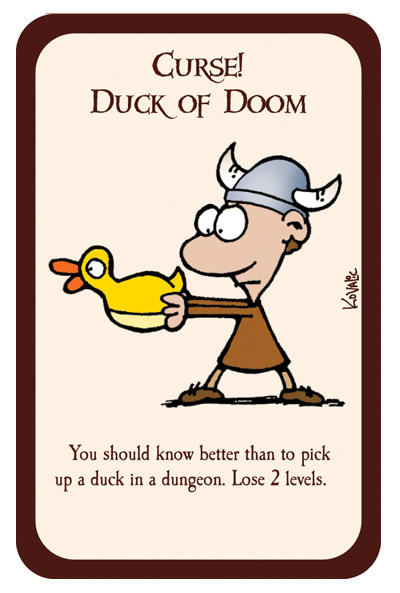 |
link | You know better than to pick up a duck in a dungeon! The "Chicken Clip" can result in Link holding a phantom item that he can't put down, resulting in your inability to leave the room or the house. |
|||
| okay | okay |  |
link | okay | ||||
| Remembering the time I accidentally Ice Palace | accidentallyicepalace | Array
(
[0] => accidentice
[1] => accidentalice
[2] => accidentallyice
[3] => accidenticepalace
[4] => accidentalicepalace
[5] => iceaccident
[6] => icepalaceaccident
)
|
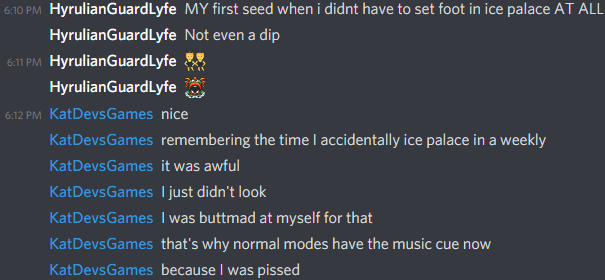 |
link | Be sure to check whether or not you actually do need to Ice Palace, else you may just accidentally Ice Palace. | |||
| 27 Swords | 27swords | Array
(
[0] => 27sword
)
|
 |
link | TFW 27 swords. | |||
| Emulator Layers | layers | link | redirect | If you're missing imagery/graphics, these may be the cause. See also: Index Listing |
||||
| BOING! | boing |  |
link | BOING BOING BOING! It's a Secret to Everybody! | ||||
| Link and the Links AU | linksau | link | redirect | A comic by Naomi Skye that showcases many of the different incarnations of Link and how they would interact if they lived together. See also: Index Listing |
||||
| MSU-1 Tracks | msutracks | Array
(
[0] => msu
[1] => msu1
[2] => msu1tracks
)
|
link | redirect | See also: Index Listing |
|||
| Bad Zelda Pun | badzeldapun |  |
link | My girlfriend burrowed under the sand. So I decided to Leever! |
||||
| The choices are yours and yours alone! | olmec | |
link | Searching D63ED5F8 can yield many results. The intended destination can yield some metadata about the game. | ||||
| Samus Sprite Palette Block | samuspalette | Array
(
[0] => paletteblocksamus
[1] => samuspaletteblock
[2] => paletteblock
[3] => palettesamus
)
|
link | redirect | Samus Sprite Palette Block description. First three rows are suit colors. Row 4 is Death Palette. Row 5 is Crystal Flash palette. Row 6 is File Select. Row 7 has X-Ray Visor & Ship colors. See also: Index Listing |
|||
| Samus Sprite Sheet | samussheet | 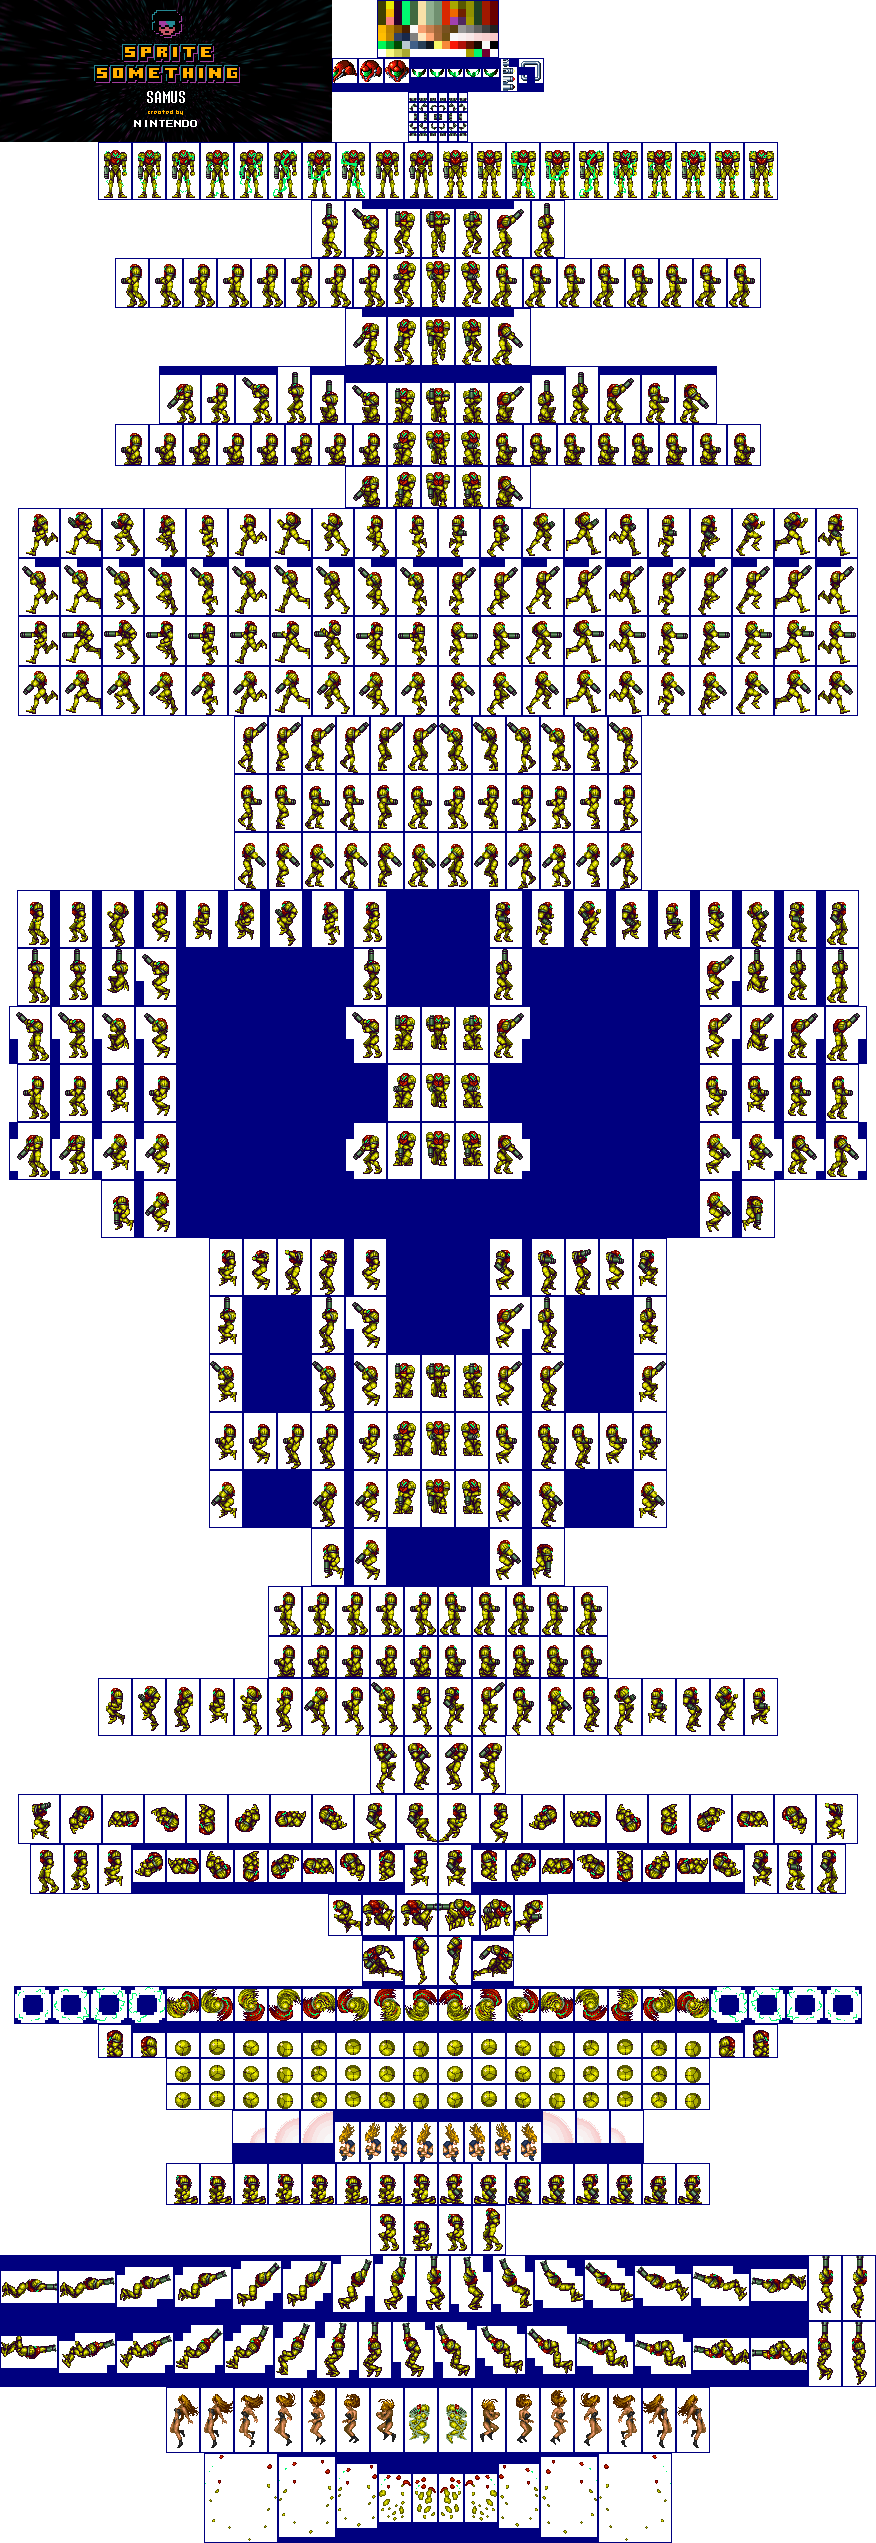 |
link | |||||
| Samus Status Screen Paper Doll | paperdoll | Array
(
[0] => statusscreen
[1] => status
[2] => inventory
[3] => inventoryscreen
[4] => itemscreen
)
|
 |
The Bestest Milly | link | Diagram of the Status Screen and how the tiles are arranged and used. | ||
| Samus Sprite: T-shirt Cannon Edition | tshirtcannon | Array
(
[0] => tshirt
)
|
 |
link | Vanilla storage of Samus' sprite in Super Metroid. | |||
| Tech: canBePatient | canbepatient |  |
link | Executing a strat that requires waiting or doing the same thing over and over again for a substantial amount of time, potentially more than 1.5 minutes, even with good execution. See also: Tech Page |
||||
| Tech: canBeVeryPatient | canbeverypatient |  |
link | Executing a strat that requires waiting or doing the same thing over and over again for a long time, potentially more than 3 minutes, even with good execution. See also: Tech Page |
||||
| Tech: canBeExtremelyPatient | canbeextremelypatient |  |
link | Executing a strat that requires waiting or doing the same thing over and over again for a very long time, potentially more than 6 minutes, even with good execution. See also: Tech Page |
||||
| Tech: canBeLucky | canbelucky |  |
link | Executing a strat that has a reasonable chance to fail due to random elements such as enemy drops. This is used where failure is unforgiving and may result in a death or a slow process to reattempt. See also: Tech Page |
||||
| Tech: canBeVeryLucky | canbeverylucky |  |
link | Executing a strat that has a high chance to fail due to random elements such as enemy drops. This is used where failure is unforgiving and may result in a death or slow process to reattempt. See also: Tech Page |
||||
| Tech: canPrepareForNextRoom | canpreparefornextroom |  |
link | The ability to know which room is coming next and use that information to enter the room in a specific way. This could be achieved from remembering which rooms Samus has been to, using the map to figure out which room is coming next, etc. See also: Tech Page |
||||
| Tech: canSuitlessLavaDive | cansuitlesslavadive |  |
link | Navigating deep lava without lava immunity, or deep acid. This isn't required for entering shallow lava or acid in which Samus can easily jump out of. See also: Tech Page |
||||
| Tech: canHeatRun | canheatrun |  |
link | Navigating heated rooms without immunity to heat damage. See also: Tech Page |
||||
| Tech: canSuitlessMaridia | cansuitlessmaridia |  |
link | Navigating underwater without Gravity. This is not required for falling down a submerged room or for simple underwater platforming, such as where missing a jump does not leave Samus stuck somewhere. See also: Tech Page |
||||
| Tech: canSunkenTileWideWallClimb | cansunkentilewidewallclimb |  |
link | Using two walls spaced 1 tile apart to climb upward underwater. Samus will not be able to move away from the wall while wall jumping and so will be able to continuously gain height with fast jump presses. See also: Tech Page |
||||
| Tech: canCrossRoomJumpIntoWater | cancrossroomjumpintowater |  |
link | Using the momentum from jumping through a doorway from normal to water physics. See also: Tech Page |
||||
| Tech: canSpaceJumpWaterBounce | canspacejumpwaterbounce |  |
link | Using Space Jump to bounce along the water line. It can be used to escape the water with a wall jump, or to get onto low platforms just above the water level. See also: Tech Page |
||||
| Tech: canSpaceJumpWaterEscape | canspacejumpwaterescape |  |
link | Using HiJump to escape the waterline during a Space Jump Water Bounce. See also: Tech Page |
||||
| Tech: canDisableEquipment | candisableequipment |  |
link | Collecting equipment can make movement more difficult in certain situations. Speedbooster without HiJump will reduce Samus' jump height when running and turning Speedbooster off will enable her to jump normally while running. Disabling HiJump will give more time to perform a mid-air morph. Disabling Gravity will allow Samus to float farther in water, or jump slower for a mid-air morph. Beams may need to be disabled to control how enemies are killed (i.e. Remove plasma for canUseFrozenEnemies, or remove ice to effeciently use heat room farm points). See also: Tech Page |
||||
| Tech: canPlayInSand | canplayinsand |  |
link | The ability to control Samus while under the effects of sand physics. This includes the ability to perform a clean jump from the top of sand, to platform while impeded by sandfalls, and to escape from a sand floor in water with Gravity. This also allows using a sandfall to escape a sand floor with HiJump, and using Bombs to escape a 1-tile deep sand pit, and to cross on top of sand with no items, by spin jumping from the surface and canceling spin before landing. This does not include simply falling through sand or touching a negligible sandfall or using Spring Ball to avoid interacting with the sand. See also: Tech Page |
||||
| Tech: canEscapeSand | canescapesand |  |
link | The ability to escape from the bottom of a sand pit in water without Gravity Suit. This means escaping 1-tile deep pits with a sandfall overtop without HiJump but with the help of the solid ledge or a frozen enemy. This also applies to escaping deeper sand pits with HiJump but no sandfall. This does not include deep sand pits with a sandfall or 1-tile sand pits with no sandfall. This is done by holding down and then crouch jumping to become unstuck, then transitioning to another action to ascend through the sand. See also: Tech Page |
||||
| Tech: canSandfallBounce | cansandfallbounce |  |
link | Breaking the sand line while exiting a sandfall at the same time can be used as a way to gain an irregular amount of height. See also: Tech Page |
||||
| Tech: canSandBombBoost | cansandbombboost |  |
link | Sit on the very edge of a sand pit that is flush with the ground and place a bomb. Time walking into the sand so that Samus sinks slightly into the sand when the bomb explodes. When the explosion propels Samus above the sand line, jump and aim down simulataneously to gain extra jump height. Jumping too early will likely sink into the sand while jumping late only does not gain the full jump height. See also: Tech Page |
||||
| Tech: canSandGrappleBoost | cansandgrappleboost |  |
link | Sink very slightly into a sand pit with an enemy nearby, close to the sand line. Jump while firing grapple and aim down as soon as Grapple hits the enemy. This will allow Samus to jump higher than with just a normal jump. See also: Tech Page |
||||
| Tech: canManageReserves | canmanagereserves |  |
link | The ability to manage reserve energy efficiently, including the following techniques: 1) Avoiding wasted energy from reserves overfilling into regular energy, either manually or automatically, 2) Preventing a double enemy hit by having only a small amount of reserve energy when auto refilling, 3) Manually refilling from reserves during a shinespark to prevent the spark from ending early due to low energy. See also: Tech Page |
||||
| Tech: canPauseAbuse | canpauseabuse |  |
link | The ability to pause in order to avoid death while reaching 0 Energy. Energy must be obtained before the unpause fade-in finishes, either by picking up an Energy drop or refilling with Reserve Energy. See also: Tech Page |
||||
| Tech: canReserveDoubleDamageBoost | canreservedoubledamageboost |  |
link | The ability to pause abuse through fatal damage and then use the refill time of a Reserve Tank to take another damage boost. The timing of contact with the enemy, and the pause to enable Reserves are very precise because the amount of height gained is not much. Reserves must begin set to Manual and Samus' energy should reach zero with the next enemy hit. Returning from the pause screen with Reserves on auto will instantly trigger a refill followed by a second enemy hit. Then the screen will remain dark until another pause occurs. See also: Tech Page |
||||
| Tech: canPreciseReserveRefill | canprecisereserverefill |  |
link | The ability to use Reserves to manually refill to an exact value. To refill by one, select the Reserve Tank and press up on the same frame (right or down can instead be used if Samus has items in those locations). To do this again without unpausing is requires a down and up input on consecutive frames, which is unreasonable. Alternatively, if Samus has items on the right column, pressing down and right on consecutive frames works. This can be useful for getting exact Reserve Energy for setting up G-Mode, or to pause abuse multiple times with minimal Energy loss. See also: Tech Page |
||||
| Tech: canDownGrab | candowngrab |  |
link | The ability to aim down to reduce Samus' hitbox to reach higher ledges. Commonly paired with a Crouch Jump. See also: Tech Page |
||||
| Tech: canDownBack | candownback |  |
link | Holding the direction buttons down and then also backwards in order to move forwards, while in the correct falling state. See also: Tech Page |
||||
| Tech: canStopOnADime | canstoponadime |  |
link | Holding the angle up or angle down buttons when no directional inputs are held will completely stop Samus in place. This is used to enter elevators instantly, but can also be used to avoid being carried into some rooms by momentum. See also: Tech Page |
||||
| Tech: canMoonwalk | canmoonwalk |  |
link | This is an option that can be turned on in the special setting mode after selecting a save file. It is required for some tech. See also: Tech Page |
||||
| Tech: canMoonfall | canmoonfall |  |
link | Jumping off a ledge while moonwalking to fall with an uncapped speed. See also: Tech Page |
||||
| Tech: canMoondance | canmoondance |  |
link | The ability to perform moonfalls a substantial number of times (176) in a row in order to sink through a solid floor. Moondancing requires becoming partially trapped so that the moonfall ends in a crouch state where pressing forward returns Samus to a stand without losing the built up vertical speed. Samus can become trapped inside of solid tiles or frozen enemies for the purposes of moondancing. This tech assumes the enemy can be frozen again without it being killed and without a frame perfect refreeze. The moondance speed value setup area does not necessarily need to be the same as where the clip is performed. But the speed will be reset if Samus falls, jumps, stands up with the Up button, or takes damage. In some situations it is important to stop one moonfall before clipping into the floor, at 175 moonfalls. The solid floor can be many tiles below Samus in which case it may also be necessary to change Samus' hitbox while falling. After 175 moonfalls, Samus' stored vertical speed is $FFE6.F400, while after 176, it is $FFE6.D800. See also: Tech Page |
||||
| Tech: canExtendedMoondance | canextendedmoondance |  |
link | Continue the moondance an additional 146 times to clip an additional tile into the floor when clipping. Every moonfall will clip Samus 1 tile into the ground and Grapple must be used to return to a standing position. A frozen enemy will need to be repositioned to a lower height at the point when Samus begins clipping into the floor with every moonfall. The final clip may involve clipping into a floor, and from there moonfall clipping again to sink through a total of up to 4 solid tiles. After 145 additional moonfalls, Samus' stored vertical speed is $FFD6.FC00, while after 146, it is $FFD6.E000. See also: Tech Page |
||||
| Tech: canEnemyStuckMoonfall | canenemystuckmoonfall |  |
link | The ability to use two enemies spaced the appropriate vertical distance apart so that Samus can Moonfall and become 'trapped' between them. The uncapped fall speed will continue increasing while 'trapped'. After enough time has passed, Samus can escape with enough fall speed to clip through a solid floor tile. It may be necessary to change Samus' hitbox while falling to clip through the solid tile. This is most commonly performed with the help of Ice Beam but can work with non damaging enemies such as snails. See also: Tech Page |
||||
| Tech: canFreeFallClip | canfreefallclip |  |
link | The ability to fall with enough speed to clip through solid tiles without a normalized setup. This can be initiated with either a Moonfall or a Grapple bounce. See also: Tech Page |
||||
| Tech: canResetFallSpeed | canresetfallspeed |  |
link | Using unmorph as a way to reset fall speed. See also: Tech Page |
||||
| Tech: canTrivialMidAirMorph | cantrivialmidairmorph |  |
link | The ability to enter Morph Ball while in the air. This is only for simple variants where the vertical space and time in which Samus needs to morph is relatively unconstrained. See also: Tech Page |
||||
| Tech: canMidAirMorph | canmidairmorph |  |
link | The ability to enter Morph Ball while in the air, where the vertical space or time in which Samus needs to morph is moderately constrained. There can be an expectation to Morph quickly as well, usually following a jump from the ground. In air physics this includes jumping and morphing in a 4 tile high space, into a morph tunnel that is not at the top of that space. In water physics this includes jumping and morphing in a 3 tile high space (Samus takes up 2.625 tiles when standing). See also: Tech Page |
||||
| Tech: canWallJumpInstantMorph | canwalljumpinstantmorph |  |
link | The ability to mid-air morph immediately out of a wall jump. After the wall jump, continue holding jump in order to only need to press down a single time to morph. This is typically used in places where the morph neededs to be done quickly in order to have relatively precise positioning. See also: Tech Page |
||||
| Tech: can3HighWallMidAirMorph | can3highwallmidairmorph |  |
link | Getting up into a morph passage from a 3-tile-high space by mid-air morphing off of a wall jump. This is easier from an opposite wall. After the wall jump, continue holding jump in order to only need to press down a single time to morph. See also: Tech Page |
||||
| Tech: can4HighMidAirMorph | can4highmidairmorph |  |
link | A mid-air morph that has to be done in a 4-tile-high space, into a morph tunnel at the top of the space. It's a lot more precise than with more room. Turn off HiJump before attempting this. Most applications of this tech are in places where wall jump instant morphing is not possible. See also: Tech Page |
||||
| Tech: canInsaneMidAirMorph | caninsanemidairmorph |  |
link | Performing a mid-air morph exceptionally quickly or precisely. See also: Tech Page |
||||
| Tech: canRJump | canrjump |  |
link | Performing a tight mid-air morph with the help of an angle-crouch jump and/or a pause buffer. This allows mid-air morphing in a 3-tile-high space in air physics, or a 2-tile-high space in water physics. "R" refers to holding an angle button while jumping from a crouch, to negate the vertical boost that a crouch jump would otherwise give: 1) Hold down to crouch, and continue to hold down. 2) Additionally hold an angle button, either angle up or angle down. 3) While crouched and holding both down and angle, pause and jump just before the pause hits (similar to a gravity jump). 4) Release all inputs during the pause screen. 5) During the unpause black screen, press and hold jump and diagonal down-forward. See also: Tech Page |
||||
| Tech: canLateralMidAirMorph | canlateralmidairmorph |  |
link | Performing the same input as a mockball, but in mid-air, in order to maintain forward momentum while morphing in mid-air. See also: Tech Page |
||||
| Tech: canSpringBallBounce | canspringballbounce |  |
link | Using a lateral mid-air morph to bounce off a surface with Spring Ball while retaining previous momentum. See also: Tech Page |
||||
| Tech: canTrickySpringBallBounce | cantrickyspringballbounce |  |
link | Performing spring ball bounces in tricky situations, such as precisely platforming while bouncing to keep blue speed. See also: Tech Page |
||||
| Tech: canStationaryLateralMidAirMorph | canstationarylateralmidairmorph |  |
link | While performing a stationary vertical jump and after the first down press, Morph with down and forward being pressed on the same frame (neither before the other). Doing this immediately gives a noticable horizontal speed boost. This is most useful underwater where acceleration is slower. See also: Tech Page |
||||
| Tech: canBounceBall | canbounceball |  |
link | Using Morph to retain momentum when transitioning to water physics. See also: Tech Page |
||||
| Tech: canMomentumConservingMorph | canmomentumconservingmorph |  |
link | Uses the uninteruptable frames of morphing or unmorphing in order to continue moving up after hitting a solid object above. This can be used to make it barely just past a ledge. The same technique can also be used to temporarily glide along a ceiling to extend a jump horizontally. See also: Tech Page |
||||
| Tech: canMockball | canmockball |  |
link | Maintaining running speed while morphed, by holding jump and down (to crouch) during a lateral jump, then morphing as Samus hits the ground while holding jump and transition from holding down to holding forward. Sometimes referred to as a Machball. See also: Tech Page |
||||
| Tech: canSpeedball | canspeedball |  |
link | Maintain the SpeedBooster effect while rolling as a Morph Ball in order to destroy bomb blocks in Morph tunnels. A Speedball involves performing a Mockball at faster speeds and additionally it will help to be able to perform short jumps to reduce the amount of space needed. A Speedball can also be used with SpringBall as a way to jump with temporary blue state while maintaining Samus' momentum. See also: Tech Page |
||||
| Tech: canTwoTileSqueeze | cantwotilesqueeze |  |
link | Taking advantage of the smaller hitbox of spinjump and down-aim to squeeze through two-tile gaps. Aiming down while jumping into a two-tile gap will allow Samus to stand up. See also: Tech Page |
||||
| Tech: canCrouchGateClip | cancrouchgateclip |  |
link | Using a spinjump and down-aim to clip into a closing gate, allowing Samus to walk through the gate. See also: Tech Page |
||||
| Tech: canTunnelCrawl | cantunnelcrawl |  |
link | Moving along a 2-tile-high passage while standing up by repeatedly spin-jumping and then pressing down. The tech comes with softlock risks without Morph Ball or a way to wiggle to the right with canTurnaroundAimCancel With X-Ray, it may be easier to wiggle with canXRayTurnaround. See also: Tech Page |
||||
| Tech: canBufferedMomentumConservingTurnaround | canbufferedmomentumconservingturnaround |  |
link | Uses the uninteruptable frames of turning around in order to continue moving after hitting a solid object. This is easiest to see following a Gravity jump through a door transition. During the transition, hold down and backwards to begin the turnaround action. Water physics will delay the turnaround for long enough to continue past overhead ledges with upwards momentum intact. See also: Tech Page |
||||
| Tech: canMomentumConservingTurnaround | canmomentumconservingturnaround |  |
link | Uses the uninteruptable frames of turning around in order to continue moving after hitting a solid object. Can be used to make it through an opening door, or barely just past a ledge. It is often beneficial to be in a downward pose when hitting the ceiling, in order to shrink Samus' hitbox to delay contact. The difficulty is in judging the timing of the turnaround, predicting the ending position, and adjusting to movement speed. See also: Tech Page |
||||
| Tech: canQuickDrop | canquickdrop |  |
link | Using a momentum conserving turnaround on a crumble block, an opening doorshell, or any other breaking block, to preserve Samus' momentum. This is often used when traversing with a shinecharge, or to quickly fall through a crumble block and jump back through it before it re-forms. See also: Tech Page |
||||
| Tech: canMidairWiggle | canmidairwiggle |  |
link | Turning around quickly so as to manipulate game physics. For using Screw Attack to break blocks and to shrink Samus' hitbox following a wall jump, and for maneuvering sharply underwater. See also: Tech Page |
||||
| Tech: canOffScreenMovement | canoffscreenmovement |  |
link | The ability to perform non-trivial movement while Samus is off-camera. This does not include movement where visual feedback is unimportant, such as simply falling down or holding a single direction. See also: Tech Page |
||||
| Tech: canUseGrapple | canusegrapple |  |
link | The ability to fling Samus moderate distances by grappling onto attach points to build up momentum. Knowing how to use Grapple also means knowing that the Grapple Beam can be used as a weapon to instantly kill certain enemies. See also: Tech Page |
||||
| Tech: canPreciseGrapple | canprecisegrapple |  |
link | The ability to precisely aim at grapple points while moving quickly, and precise control of Samus' speed and trajectory when releasing from a grapplable object. canPreciseGrapple can also be used to shoot Grapple Beam through single tile ceilings. See also: Tech Page |
||||
| Tech: canGrappleJump | cangrapplejump |  |
link | Using Grapple to propel Samus upwards, then continuously morphing/unmorphing/jumping in mid-air to climb upwards. Shoot Grapple again when done climbing to end the effect of the Grapple Jump and regain control of Samus after the final jump. The window for morphing and jumping is much more lenient with HiJump. This is most often a series of crouch jumps, but it is possible to stand and spinjump on each Grapple Jump. See also: Tech Page |
||||
| Tech: canPreciseGrappleJump | canprecisegrapplejump |  |
link | The ability to set up a grapple jump in a precise way or in combination with other movements, including 1) Aiming a grapple fling with a precise angle, 2) Positioning using a mid-air turnaround or wiggle, 3) Performing actions between individual grapple jumps, such as arm pumping, shooting, or kago-ing an enemy, 4) Breaking a water line while grapple jumping. See also: Tech Page |
||||
| Tech: canTrickyGrappleJump | cantrickygrapplejump |  |
link | The ability to perform grapple jumps requiring complex or highly precise sequences of movement, including 1) Aiming a grapple fling with a highly precise angle. 2) Using turnarounds or wiggles in order to reach a precise position without normalization, 3) Moving greater horizontal distances using denser sequences of arm pumps, and 4) Morphing and unmorphing quickly in between other actions. See also: Tech Page |
||||
| Tech: canBombGrappleJump | canbombgrapplejump |  |
link | Simultaneously use Grapple Beam to kill an enemy and detonate a bomb on Samus to gain the ability to jump for one frame. By jumping first and performing this trick in the air, Samus gets a second jump. This is most useful underwater to reach higher ledges. This trick is effectively double frame perfect and kills the enemy requiring either a room reset, or a respawning enemy. See also: Tech Page |
||||
| Tech: canGrappleTeleport | cangrappleteleport |  |
link | Exiting a door transition while grappled, in order to initiate a teleport in the next room. The position to which Samus teleports corresponds to the position of the grapple block in the first room. The corresponding position in the destination room (counting tiles from the top-left corner of the room) must have a block to which Samus can remain grappled (e.g. a solid block would work but air would not); otherwise the teleport will not occur. See also: Tech Page |
||||
| Tech: canGrappleTeleportWallEscape | cangrappleteleportwallescape |  |
link | Using specific movements to escape horizontally after grapple teleporting inside a door shell or wall: 1) press up to retract Grapple, pulling Samus as far out of the wall or door as far as possible, 2) hold a directional input away from the door or wall, 3) release Grapple while continuing to hold away from the door or wall, 4) if X-Ray is available, crouch and X-Ray climb until high enough to walk out of the door or wall, 5) or if Morph is available, turnaround spin-jump (in either direction), then morph and roll out. See also: Tech Page |
||||
| Tech: canGrappleBombHang | cangrapplebombhang |  |
link | Receiving a boost from a Bomb or Power Bomb while grappled, to enter a 'glitched grapple hanging' state. Among other things, this state gives a way to trigger a door transition while still grappled. The game may lag heavily in this state: if lag persists, it can sometimes be alleviated by changing the inputs held. See also: Tech Page |
||||
| Tech: canUnmorphGrappleHang | canunmorphgrapplehang |  |
link | Entering a 'glitched grapple hanging' using a precisely timed unmorph, without the use of Bombs or Power Bombs. The positioning required to make this work is very specific; normalized setups are described in individual strats. In every case, Grapple is used at the end of the unmorph animation (a 2-frame window) to get Samus stuck grappling in a standing position. By doing this while pressed against a Grapple block and grappling at the very top of it, Samus can get clipped inside a Grapple block by a pixel (or sometimes two, for a block on the left); In this case, Samus will remain standing after releasing Grapple; jumping (to force crouch) and firing an angled grapple shot will then result in glitched grapple hanging. See also: Tech Page |
||||
| Tech: canFrozenEnemyGrappleHang | canfrozenenemygrapplehang |  |
link | Entering a 'glitched grapple hanging' by using a well-positioned frozen enemy: Freeze an enemy at a specific height, stand on it, then fire Grapple horizontally while walking toward a Grapple wall. The Grapple shot may either contact the Grapple block directly, or it may kill a second enemy. Either way, if successful, Samus will get clipped slightly inside the wall. From there, crouch or jump (to force crouch), then fire an angled grapple shot to obtain glitched grapple hanging. Jumping to force crouch will put Samus in a higher position, which in some positions can allow Samus to grapple to a higher block. For grappling to the left, Samus' vertical pixel position in hexadecimal must end in 0, 1, 2, 3, 4, 5, 6, 7, or F; this corresponds to the bottom of Samus' hitbox being between 4 and 12 pixels above the bottom of the tile; in this case, aim to freeze the enemy so that its top aligns with the mid-point of the tile. For grappling to the right, Samus' vertical pixel position in hexadecimal must end in 2, 3, 4, 5, 6, or 7; this corresponds to the bottom of Samus' hitbox being between 7 and 12 pixels above the bottom of the tile; in this case, aim to freeze the enemy so that its top is slightly above the mid-point of the tile. See also: Tech Page |
||||
| Tech: canSuperSink | cansupersink |  |
link | Release Grapple while swinging with sufficient downward vertical momentum to exceed the fall speed cap, in order to allow Samus to continue gaining higher speed while falling. While in this state Samus may morph and frame-perfectly equip or unequip Spring Ball in order to land while continuing to gain fall speed; Once Samus reaches a speed of 16, she will clip down through any number of solid tiles below, with her fall speed resetting to zero once an air tile is reached. See also: Tech Page |
||||
| Tech: canMorphTurnaround | canmorphturnaround |  |
link | The ability to use Morph to turn around without moving horizontally. This is typically used to back into a corner without Moonwalk. See also: Tech Page |
||||
| Tech: canCrouchJump | cancrouchjump |  |
link | The ability to crouch before jumping to reach higher ledges. Commonly paired with a down-grab or a mid-air Spring Ball jump. See also: Tech Page |
||||
| Tech: canTurnaroundSpinJump | canturnaroundspinjump |  |
link | The ability to buffer a jump by using the turnaround animation frames. This allows for an easier Spin Jump timing and works as a way jump far underwater without building up run speed. See also: Tech Page |
||||
| Tech: canFlatleyJump | canflatleyjump |  |
link | Positioning Samus at the very edge of a platform, facing away, then turning around and jumping to initiate the jump from a position that is off the platform (and slightly below it). Sometimes referred to as a corner jump. See also: Tech Page |
||||
| Tech: canGravityJump | cangravityjump |  |
link | Turning off Gravity Suit right after the start of an underwater jump to achieve a much higher jump. Can be performed in water, lava, or acid. See also: Tech Page |
||||
| Tech: canUseIFrames | canuseiframes |  |
link | Take damage to gain invulnerability frames so that Samus can run through enemies and on spike floors or wall jump from a spike wall. Enemies and their projectiles provide 95 i-frames, while spikes and thorns provide 60. See also: Tech Page |
||||
| Tech: canStationarySpinJump | canstationaryspinjump |  |
link | Spin jumping with no horizontal movement by quickly pressing and releasing forward and then immediately pressing jump (after stopping). Doing this while holding run produces a spin jump with very low horizontal speed. See also: Tech Page |
||||
| Tech: canSpringBallJumpMidAir | canspringballjumpmidair |  |
link | It is possible to use Spring Ball while mid-air, if Samus is still climbing upwards. This gives an additional jump, allowing her to go higher. This can be done by morphing in mid-air, then quickly turning on Spring Ball while still climbing upwards, and then jumping again. This is often done most easily by buffering the Spring Ball jump: while unpausing after turning on Spring Ball, press and hold jump starting anytime after the pause menu has finished fading out (i.e. while the screen is black). This is often combined with a crouch jump to gain a bit more height. See also: Tech Page |
||||
| Tech: canTrickySpringBallJump | cantrickyspringballjump |  |
link | A precise, mid-air spring ball jump. This includes those with a relatively tight pause, jump, and morph, in order to spring ball jump just above shallow water. And those which require the jump input to be pressed near the peak of the jump, which cannot be done by buffering the jump out of the pause menu. To do this, pause as early as possible before jumping and morphing in order to have as much visibility as possible after equipping Spring Ball to time the second jump. This can also be used out of a Spring Wall or from a spin jump, in order to gain more horizontal distance before triggering the second jump. This, along with a crouch jump, is also needed in order to perform a maximum height spring ball jump. Maximum height jumps primarily have underwater applications, as it enables Samus to barely make it up 7 tiles vertically. See also: Tech Page |
||||
| Tech: canSpringwall | canspringwall |  |
link | A mid-air Spring Ball jump that starts with a wall jump to gain more height. It often benefits from the momentum change when equipping Spring Ball while morphed and moving horizontally after a WallJump. See also: Tech Page |
||||
| Tech: canDoubleSpringBallJumpMidAir | candoublespringballjumpmidair |  |
link | Using a mid-air Spring Ball jump twice during a single jump to gain even more height. This consists of a tight variant of mid-air Spring Ball jump, then turning off Spring Ball, then a second mid-air Spring Ball jump all while still climbing upwards. This is typically used underwater with HiJump, but it is technically possible in lava without HiJump or to perform more than two Spring Ball jumps in acid. See also: Tech Page |
||||
| Tech: canUnderwaterBombIntoSpringBallJump | canunderwaterbombintospringballjump |  |
link | Use the tiny amount of height gain from an underwater Bomb explosion to re-equip Spring Ball and perform a mid-air Spring Ball jump. This is most often used to get a second Spring Ball jump when underwater without Hi-Jump. Bombs are required since Power Bombs will prevent pausing. This is typically used after a midair Spring Ball jump, but it can also be used from the ground in G-mode with artificial morph, or rarely at the top of a cross room jump into water. See also: Tech Page |
||||
| Tech: canSpringFling | canspringfling |  |
link | The ability to gain extra distance merely by turning Springball on or off. When equipping or unequipping Springball while Morphed, Samus' speed is reset. If rising (and not in liquid physics), the horizontal speed is set to full roll speed. If falling, the vertical speed is set to zero and horizontal speed is reset unless SpeedBooster is equipped. See also: Tech Page |
||||
| Tech: canCrumbleJump | cancrumblejump |  |
link | The ability to jump off of a crumble block while it crumbles. A straight jump may employ the small amount of jump buffering the game offers, but a spinjump can only use the time before the crumble block breaks. See also: Tech Page |
||||
| Tech: canCarefulJump | cancarefuljump |  |
link | Executing a jump that requires somewhat precise or unintuitive movement. See also: Tech Page |
||||
| Tech: canTrickyJump | cantrickyjump |  |
link | Executing a jump that requires very precise timing. See also: Tech Page |
||||
| Tech: canInsaneJump | caninsanejump |  |
link | Executing a jump that requires extremely precise timing, in the vicinity of frame-perfect precision. See also: Tech Page |
||||
| Tech: canCWJ | cancwj |  |
link | A continuous wall jump (CWJ) consists of a wall jump without turning around. It can be done by spinjumping forward and then wall jump off a solid object to retain all forward momentum. The more speed Samus has, the smaller the frame window for the CWJ. A slow CWJ uses a wall or ledge near the initial jump point, while a fast CWJ will wall jump using the opposite side of a more distant platform. See also: Tech Page |
||||
| Tech: canWallJump | canwalljump |  |
link | Jump off walls, as taught by the Etecoons. See also: Tech Page |
||||
| Tech: canPreciseWallJump | canprecisewalljump |  |
link | A wall jump that needs to be performed at a fairly precise spot in order to yield the desired result. See also: Tech Page |
||||
| Tech: canTrickyWallJump | cantrickywalljump |  |
link | A wall jump that is tricky to perform. This includes 'delayed wall jumps' in which Samus must move away as far from the wall as possible before wall jumping; it also includes cases in which Samus must dodge enemies or other obstacles while wall jumping. See also: Tech Page |
||||
| Tech: canInsaneWallJump | caninsanewalljump |  |
link | A wall jump with extreme precision, in the vicinity of pixel and frame perfect precision. These jumps are typically delayed wall jumps. See also: Tech Page |
||||
| Tech: canConsecutiveWallJump | canconsecutivewalljump |  |
link | Climbing a wall with three or more consecutive wall jumps without a mistake. See also: Tech Page |
||||
| Tech: canFastWallJumpClimb | canfastwalljumpclimb |  |
link | Climbing a wall with consecutive wall jumps very quickly, e.g. for setting up a full halfie. See also: Tech Page |
||||
| Tech: canUnderwaterWallJump / canWackyAssUnderwaterSingleWalljumpShit | canunderwaterwalljump | Array
(
[0] => canwackyassunderwatersinglewalljumpshit
)
|
 |
link | The ability to gain height by walljumping underwater against a single wall. The movement requires using the unintuitive behaviour of turning around in water in order to return Samus to a walljump position. Each walljump provides very little height gain so they must be performed very quickly to make progress. This tech assumes Samus has HiJump and only expects gaining about 1 tile of height through consecutive walljumping. See also: Tech Page |
|||
| Tech: canLongUnderwaterWallJump | canlongunderwaterwalljump |  |
link | The ability to gain height by walljumping underwater against a single wall. This tech assumes Samus has HiJump and expects gaining more than 1 tile of height through consecutive walljumping. See also: Tech Page |
||||
| Tech: canBootless2WideUWJ | canbootless2wideuwj |  |
link | The ability to underwater wall jump without HiJump between two walls that are two tiles apart. Turn around before reaching the wall, then jump as early as possible to gain a small amount of height. With very precise execution, Samus will gain height very slowly. This requires Space Jump when breaking the water line. See also: Tech Page |
||||
| Tech: canJumpIntoRespawningBlock | canjumpintorespawningblock |  |
link | The ability to time a jump up into a respawning block so that Samus gets stuck in it and can jump up again. The bottom of Samus' hitbox must be completely in the respawning block or she will fall out. Because of this, it is typically required to aim down or morph to stay in the block. See also: Tech Page |
||||
| Tech: canUnmorphBombBoost | canunmorphbombboost |  |
link | A tech that involves mid-air morphing to place a bomb or Power Bomb, then mid-air unmorphing to briefly hover above the bomb, in order to use the bomb blast to go just a bit higher than max jump height. See also: Tech Page |
||||
| Tech: canWallJumpBombBoost | canwalljumpbombboost |  |
link | The ability to accurately place a bomb or Power Bomb in mid-air following a wall jump, then using that bomb explosion to propel Samus forward. There is a timing component where the bomb is placed while rising then hit while falling, and a momentum component for maximizing horizontal distance. See also: Tech Page |
||||
| Tech: canBombHorizontally | canbombhorizontally |  |
link | Place a single bomb then move Samus to the side to be boosted horizontally from the explosion. This is typically used as a way to cross gaps or to reposition at the end of an IBJ. Press forward while in the air to carry the momentum farther. Since it only uses one bomb, it can be executed with a Power Bomb or a bomb. It is not assumed by this tech, but it is possible to move forward just before the explosion in order to gain more horizontal momentum. See also: Tech Page |
||||
| Tech: canHBJ | canhbj |  |
link | A Horizontal Bomb Jump (HBJ) uses three bombs to execute. Place a bomb to get boosted horizontally; place a second bomb immediately as Samus is propelled. Place a third bomb, mid-air, as far horizontally as possible while still being able to return and get propelled by the second and then third bombs. See also: Tech Page |
||||
| Tech: canIBJ | canibj |  |
link | Infinite Bomb Jump (IBJ) uses consecutive bomb jumps to gain height indefinitely. To start and continue an IBJ, place a bomb as the previous one is exploding. The vertical speed with which Samus moves is controlled by how high or how low each bomb is placed relative to the previous one. The speed of the IBJ ranges from moving fairly fast with high bombs, to no movement or even losing height with low bomb placements. This tech alone only requires maintaining an IBJ for a vertical distance of approximately 11 tiles (the same distance as Samus can jump with HiJump), however, it may require doing this multiple times consecutively (i.e. if there is a ledge to land on mid-way). See also: Tech Page |
||||
| Tech: canLongIBJ | canlongibj |  |
link | The ability to maintain an IBJ for any distance longer than approximately 11 tiles (the distance that Samus can jump with HiJump). Note that without this tech, Samus may still require doing multiple consecutively short IBJs (i.e. if there is a ledge to land on mid-way). See also: Tech Page |
||||
| Tech: canJumpIntoIBJ | canjumpintoibj |  |
link | The ability to start an IBJ from a jump or a spring ball jump. It is most often used in strats that need Samus to IBJ up faster or to avoid something near the ground. See also: Tech Page |
||||
| Tech: canBombAboveIBJ | canbombaboveibj |  |
link | The ability to break blocks above Samus while maintaining an ongoing IBJ without falling. See also: Tech Page |
||||
| Tech: canCeilingBombJump | canceilingbombjump |  |
link | The ability to IBJ at the ceiling and place bombs at a steady rhythm while slowly moving horizontally. See also: Tech Page |
||||
| Tech: canLongCeilingBombJump | canlongceilingbombjump |  |
link | The ability to ceiling bomb jump over a distance of two screens or more. See also: Tech Page |
||||
| Tech: canDiagonalBombJump | candiagonalbombjump |  |
link | The ability to IBJ with backspin which results in an IBJ with diagonal movement. This also includes the ability to HBJ at the top of an IBJ. See also: Tech Page |
||||
| Tech: canDoubleBombJump | candoublebombjump |  |
link | The ability to place a second bomb near the top of a bomb boost during an IBJ in order to ascend much faster. See also: Tech Page |
||||
| Tech: canStaggeredIBJ | canstaggeredibj |  |
link | The ability to change the bomb placement timing in order control the speed with which you gain height. This is typically used to avoid an enemy moving in Samus' path above. See also: Tech Page |
||||
| Tech: canPowerBombMidIBJ | canpowerbombmidibj |  |
link | The ability to place a single Power Bomb while climbing during an IBJ, and then switch back to Bombs to continuing the climb without falling. This is often used to break a block that respawns where breaking it before the IBJ would be too slow, or to break a block in a heated environment that is too high to reach from the ground and a second IBJ would waste Energy. See also: Tech Page |
||||
| Tech: canSpringBallBombJump | canspringballbombjump |  |
link | After gaining some height with a single bomb explosion from the ground, use Spring Ball to jump higher. Usable only when Samus' vertical speed is 0 (at the max height gained by the bomb). See also: Tech Page |
||||
| Tech: canBombJumpWaterEscape | canbombjumpwaterescape |  |
link | From a submerged platform, setting up a single bomb jump above the water line to propel Samus up and out of the water. See also: Tech Page |
||||
| Tech: canUseEnemies | canuseenemies |  |
link | Using an enemy in a room to accomplish something that couldn't be done if it weren't there, e.g. when standing on or grappling from an enemy. See also: Tech Page |
||||
| Tech: canSnailClimb | cansnailclimb |  |
link | The ability to repeatedly manipulate Yards (snails) and use them as platforms. The snail is damaging when out of its shell so Samus must face the center of the snail to cause it to hide. The snail climb consists of Samus jumping away from the snail as it becomes active, then turning around to return to the snail and resposition for the next jump. Standing on the edge of the snail and turning around underwater does carry the risk of falling off. Spring Ball can bounce on an active snail (only one bounce when underwater without HiJump). Snails can be used as single use platforms without it being considered a snail climb. See also: Tech Page |
||||
| Tech: canNeutralDamageBoost | canneutraldamageboost |  |
link | Using the small vertical knockback from taking enemy damage, while not holding any directional inputs, to assist Samus in her movement. See also: Tech Page |
||||
| Tech: canHorizontalDamageBoost | canhorizontaldamageboost |  |
link | Using the knockback from taking enemy damage to give Samus a large movement boost by holding the jump and backwards buttons. By changing the timing of the directional input, the way that Samus is knocked back can be changed and has situational uses. Holding forward will knock Samus backwards and down. Holding jump but delaying the back button delays the horizontal damage boost to gain some neutral boost first. Very quickly releasing back and pressing forward will give a forward boost. See also: Tech Page |
||||
| Tech: canManipulateMellas | canmanipulatemellas |  |
link | The ability to manipulate bug enemies that moves in a diving pattern (Mella, Mellow, or Menu). These enemies inch upwards or downwards with each dive, so making it dive repeatedly can put it at the proper height to execute a strat. Most commonly, it is desired for the enemy to move upward as much as possible per swoop. One way to achieve this is to make the enemy target Samus on the same frame that it first becomes active; this can be done by moonwalking toward the enemy, in order to prevent the enemy from coming on camera until it is in range to target Samus. See also: Tech Page |
||||
| Tech: canSamusEaterStandUp | cansamuseaterstandup |  |
link | The ability to gain a shinecharge in place while captured by a Samus Eater. This is done by landing in the Samus Eater while moving forward. Note that Samus maintains control of most of her abilities while captured by a Samus Eater. See also: Tech Page |
||||
| Tech: canKago | cankago |  |
link | Clipping through an enemy by performing an uninterruptible animation while coming into contact with them. These animations include morphing, unmorphing, or performing a turnaround. See also: Tech Page |
||||
| Tech: canTrivialUseFrozenEnemies | cantrivialusefrozenenemies |  |
link | Can use Ice Beam to freeze enemies to use as platforms. This only includes the most basic examples, where enemies can be easily positioned and refrozen without risk of killing them. See also: Tech Page |
||||
| Tech: canUseFrozenEnemies | canusefrozenenemies |  |
link | Can use Ice Beam to freeze enemies in nontrivial situations, such as to use as a platform or to wall jump off of. This may require removing Plasma Beam in order to prevent freezing and then killing the enemy with a single shot. See also: Tech Page |
||||
| Tech: canMochtroidIceClimb | canmochtroidiceclimb |  |
link | Using a frozen Mochtroid to climb upwards, by continually jumping as it thaws and refreezing it higher. See also: Tech Page |
||||
| Tech: canTrickyUseFrozenEnemies | cantrickyusefrozenenemies |  |
link | The ability to use Ice Beam to freeze enemies in precise positions. If Supers are available, they can be used to knock wall crawlers off walls and freeze them mid air. See also: Tech Page |
||||
| Tech: canWallIceClip | canwalliceclip |  |
link | Collision will prioritize frozen enemies before walls which allows Samus to clip 1 pixel into a wall if an enemy is there. This can be used to get Samus into position to X-Ray Climb. Additionally, enemies that fly through walls may be repeatedly frozen to advance 1 pixel at a time to eventually push Samus through a wall or touch a door transition. See also: Tech Page |
||||
| Tech: canCrazyCrabClimb | cancrazycrabclimb |  |
link | Repeatedly freezing a crab to climb up an uneven wall, using no other support. These climbs often require high precision when jumping around ledges: too many pixels in any direction and Samus may fall off or clip through the crab. This includes only tricky versions of crab climbs and may include manipulating global and non-global crabs, multiple at a time, and freezing crabs in mid-air. See also: Tech Page |
||||
| Tech: canMetroidAvoid | canmetroidavoid |  |
link | Being proficient at avoiding metroids, and knowing where they are in the room. Metroids will charge towards Samus but keep their momentum if they miss. Shooting a metroid will stop it in place and knock it back slightly. Rinkas exist in all metroid rooms, so this tech also includes the ability to avoid Rinkas while in a Metroid room. See also: Tech Page |
||||
| Tech: canBabyMetroidAvoid | canbabymetroidavoid |  |
link | The ability to skip the Baby Metroid health drain. The Baby Metroid skip has three parts: The first jump, repeated jumps over the baby while clearing the vines, and the final jump into the transition. The classic skip, with this tech, assumes HiJump, Wave Beam, and Morph Ball. Speed Booster can help, but only changes the first jump. See also: Tech Page |
||||
| Tech: canDodgeWhileShooting | candodgewhileshooting |  |
link | The ability to run from, jump over, or duck under attacks that do not require precise avoidance movements while shooting the enemy. See also: Tech Page |
||||
| Tech: canFarmWhileShooting | canfarmwhileshooting |  |
link | The ability to actively kill enemies to spawn drops and collect them while racing a timer. There is a low chance that the required drop(s) will not spawn. This does not apply to easy farm bugs, like Gamets. See also: Tech Page |
||||
| Tech: canTrickyDodgeEnemies | cantrickydodgeenemies |  |
link | The ability to dodge enemies requiring highly precise or unintuitive avoidance movements. See also: Tech Page |
||||
| Tech: canEscapeEnemyGrab | canescapeenemygrab |  |
link | The ability to become grabbed by Draygon or a Beetom and then escape by pressing 60+ inputs. See also: Tech Page |
||||
| Tech: canEnemyExtendRunway | canenemyextendrunway |  |
link | The ability to use an enemy to extend the length of a runway. This is typically set up with a frozen wall-crawler, but can include other frozen enemies or Snails, Trippers, etc. The enemy can be up to 3 pixels higher than the adjacent runway and still have benefits. At 3 pixels above the runway, Samus can run off of the enemy and not lose speed, which is often useful for cross-room speedy jumps and jumps into water. At 2 pixels above, single-stutter shortcharges often fail and multi-stutters are unreliable. At 1 pixel above, multi-stutters are fairly reliable. A pixel-perfect positioning is necessary when using an enemy to bridge a gap, where Samus needs to run onto and off of the frozen enemy. If the enemy is even 1 pixel lower than the runway, it cannot be used. See also: Tech Page |
||||
| Tech: canTrickyEnemyExtendRunway | cantrickyenemyextendrunway |  |
link | The ability to use tricky enemy setups to extend the length of a runway. This includes the use of unintuitive or particularly precise setups or the use of multiple enemies with non-trivial setups. See also: Tech Page |
||||
| Tech: canHitbox | canhitbox |  |
link | The ability to move through some enemies undamaged by timing a hit on them. This can be done with a Plasma shot, a well timed Power Bomb explosion, or a normal shot against Metal Pirates. See also: Tech Page |
||||
| Tech: canPseudoScrew | canpseudoscrew |  |
link | The ability to spinjump with Charge beam stored. Pseudo screw gives Samus some protection from projecitles and enemies. It will damage enemies who are vulnerable to this attack and Samus will only take damage if the enemy takes damage and is not killed. See also: Tech Page |
||||
| Tech: canWallJumpWithCharge | canwalljumpwithcharge |  |
link | The ability to store charge beam and continue wall jumping. This is done by releasing the shoot button when trying to walljump, otherwise Samus will stop spinning. This can be used to store a charge shot or to pseudo screw through enemy projectiles. See also: Tech Page |
||||
| Tech: canSpecialBeamAttack | canspecialbeamattack |  |
link | A Special Beam Attack (SBA) is activated by equipping Charge and exactly one other beam and selecting Power Bombs. After charging the beam, a power bomb will be consumed, and a beam specific attack will occur. See also: Tech Page |
||||
| Tech: canOffScreenSuperShot | canoffscreensupershot |  |
link | The ability to shoot a Super at a precise location to hit an offscreen inanimate target, e.g. a Super block. See also: Tech Page |
||||
| Tech: canGateGlitch | cangateglitch |  |
link | The ability to open a left-facing blue or green gate from the right, using Missiles or Supers. The generally applicable method to do this is to stand some distance away from the gate, hold angle-up, jump, press and hold forward, then frame-perfectly fire a shot just before Samus would bonk the gate. See also: Tech Page |
||||
| Tech: canWrapAroundShot | canwraparoundshot |  |
link | The ability to reach targets on one side of a room by shooting Wave Beam at the right spot in the opposite wall. See also: Tech Page |
||||
| Tech: canGrappleClip | cangrappleclip |  |
link | Using Grapple on an enemy or grapple block to clip into walls and other surfaces. See also: Tech Page |
||||
| Tech: canHeroShot | canheroshot |  |
link | The ability to follow a shot to prevent it from despawning before hitting its target. This may include aiming between enemies or waiting for the shot to travel some distance before following it. See also: Tech Page |
||||
| Tech: canAutoCancelWeapon | canautocancelweapon |  |
link | The ability to set a HUD equipment item (Missile, Super, Power Bomb, Grapple, XRay Scope) to be single use. Doing this allows for a fast beam shot following the item use, or can reduce button input complexity. The button combination is 'Item Select' + 'Item Cancel' pressed together. See also: Tech Page |
||||
| Tech: canHyperGateShot | canhypergateshot |  |
link | The ability to shoot blue & green gates from either side using Hyper Beam during the escape. This is easy to do; this tech just represents knowing it can be done. This is based on a randomizer patch applied on all settings, as in the vanilla game it isn't possible to open green gates using Hyper Beam. See also: Tech Page |
||||
| Tech: canDash | candash |  |
link | The ability to use the dash button to gain run speed. See also: Tech Page |
||||
| Tech: canSpeedyJump | canspeedyjump |  |
link | The ability to use dash speed with Speed Booster to jump higher and possibly further. Without HiJump, it is also possible to use a short speedy jump to jump lower; this has fewer applications, but can be useful, i.e. to jump further if there is a low ceiling. See also: Tech Page |
||||
| Tech: canTrickyDashJump | cantrickydashjump |  |
link | Using Speed Booster and jumping with a precise runway length in order to jump higher than with a slightly shorter or longer run. This works because of the extreme non-linearity of the speed to jump height ratio, when Speed Booster is active. See also: Tech Page |
||||
| Tech: canSidePlatformCrossRoomJump | cansideplatformcrossroomjump |  |
link | The ability to jump through a horizontal door transition from a nearby platform below the doorway, jumping close and low enough through the door to be able to pass through while carrying upward momentum into the next room. See also: Tech Page |
||||
| Tech: canShinespark | canshinespark |  |
link | The ability to use the Speed Booster to store a shinecharge, then fly in a direction until an obstacle is hit or Samus gets down to 29 energy. This is done by gaining enough speed that Samus turns blue, pressing down to gain a shinecharge, then pressing jump after Samus has come to a stop. Holding angle-up while pressing jump will cause Samus to shinespark diagonally instead of vertically. See also: Tech Page |
||||
| Tech: canHorizontalShinespark | canhorizontalshinespark |  |
link | The ability to shinespark horizontally from the ground. This can be achieved by starting without horizontal momentum and pressing jump and then forward while still holding jump (or repressing jump). These inputs can be done in rapid succession or with a short delay. Shinesparking in water can be done the same way, but requires a slightly longer delay between the jump and forward presses. If needing to spark near ground level, avoid being crouched when pressing jump, as crouch jumping will boost Samus vertically and result in a higher position for the spark. See also: Tech Page |
||||
| Tech: canHorizontalMidairShinespark | canhorizontalmidairshinespark |  |
link | The ability to jump and shinespark horizontally mid-air. From a spin jump, a shinespark wind-up is triggered by releasing either forward or jump (or both) and pressing either up or angle-up. The wind-up is a brief period during which the player can control the direction of the spark. During the wind-up, if jump is pressed together with up, angle-up, or forward, Samus will immediately spark up, diagonally, or horizontally, respectively. If the wind-up expires, Samus will default to a vertical spark. If jump is held when activating the wind-up by pressing up or angle-up, then the wind-up is effectively skipped as the spark activates immediately. See also: Tech Page |
||||
| Tech: canShinechargeMovement | canshinechargemovement |  |
link | The ability to perform simple movement with a shinespark charge timer running to get into position to shinespark. This reposition may be necessary to avoid obstacles, conserve energy, etc. After moving, be sure to wait for Samus to come to a complete stop before pressing jump to spark, because if Samus has horizontal momentum then jumping will cause Samus to spin jump instead of sparking. See also: Tech Page |
||||
| Tech: canMidairShinespark | canmidairshinespark |  |
link | The ability to jump and shinespark mid-air: vertically or diagonally. This is often used to save Energy when shinesparking. This is typically done from a spin jump, in order to not spark immediately, while still on the ground. To shinespark vertically, either press up while midair, or release jump and then press angle up. To spark diagonally, press angle up while midair while still holding jump (or repressing jump) but while not holding forward. See also: Tech Page |
||||
| Tech: canShinesparkDeepStuck | canshinesparkdeepstuck |  |
link | Activating a shinespark to get deep stuck in a door. This is done by spin jumping, facing away from the door, and pressing angle up to activate a shinespark on the same frame as getting a wall jump check. While going through the transition, hold jump and angle up. See also: Tech Page |
||||
| Tech: canShinechargeMovementComplex | canshinechargemovementcomplex |  |
link | The ability to make multiple movement actions with a shinespark charge timer running to get into position to shinespark. This reposition may be necessary to avoid obstacles, conserve energy, etc. See also: Tech Page |
||||
| Tech: canShinechargeMovementTricky | canshinechargemovementtricky |  |
link | The ability to make precise and potentially unintuitive movement actions with a shinespark charge timer running to get into position to shinespark. A common example is using the shinespark wind-up period to wait for a hero shot to open an off-camera door. See also: Tech Page |
||||
| Tech: canUseSpeedEchoes | canusespeedechoes |  |
link | Using the Samus echoes that are emitted after a shinespark bonk as a weapon to kill enemies. See also: Tech Page |
||||
| Tech: canControlShinesparkEnd | cancontrolshinesparkend |  |
link | The ability to control where a shinespark ends, by starting with a certain amount of energy. See also: Tech Page |
||||
| Tech: canShinesparkSlopeClip | canshinesparkslopeclip |  |
link | The ability to clip into a slope-type wall by shinesparking into it. In some cases this may require activating the spark at a precise horizontal position. Clipping into a wall in this way can be used to set up an X-Ray climb. See also: Tech Page |
||||
| Tech: canSlowShortCharge | canslowshortcharge |  |
link | The ability to control Samus' run speed while shortcharging by releasing run after achieving blue. Being able to 4 tap is expected as that brings out the most value from this tech. See also: Tech Page |
||||
| Tech: canCarryFlashSuit | cancarryflashsuit |  |
link | A flash suit is a glitched state where Samus has the ability to shinespark without having a shinecharge timer. It is most commonly obtained with a spike suit, but can also be obtained by interrupting a Crystal Flash, as well as other methods. Samus will lose a flash suit when shinecharging, using X-ray, or Crystal Flashing, and she will use the flash suit when performing any inputs that would normally use a shinespark when having a shinecharge, such as standing jump, or aiming up or diagonally up after jumping. See also: Tech Page |
||||
| Tech: canSpikeSuit | canspikesuit |  |
link | The ability to gain a flash suit using spikes or similar damage source. Gain a shinecharge, take a spike hit while morphed, unmorphing either 1 or 2 frames after taking damage. Then press jump to activate a shinespark on the last frame of knockback, 10 frames after taking damage. See also: Tech Page |
||||
| Tech: canTrickySpikeSuit | cantrickyspikesuit |  |
link | The ability to perform a spike suit using a more difficult setup, which may include tricky enemy dodges, bomb boosting, or using Spring Ball. See also: Tech Page |
||||
| Tech: canPatientSpikeSuit | canpatientspikesuit |  |
link | The ability to gain a flash suit using setups that take longer per attempt, involving crossroom shinecharges, long traversals, or room resets to use a farm. See also: Tech Page |
||||
| Tech: canRiskySpikeSuit | canriskyspikesuit |  |
link | The ability to gain a flash suit using a setup that has to be successful on the first try. Failing the spikesuit could require a revert as a second attempt may not be possible Examples include one way crumble blocks or where the intial spark is used to escape. See also: Tech Page |
||||
| Tech: canElevatorCrystalFlash | canelevatorcrystalflash |  |
link | The ability to gain a flash suit by interrupting a crystal flash by going down an elevator. While on the elevator platform, place a Power Bomb midair, pixel perfectly, at the height where Samus can crystal flash while standing. The Power Bomb will need to be centered on her hitbox, which may not be possible with a full height jump. While standing, press the crystal flash inputs, where the down press is not pressed until the last frame, where the inputs are checked. This occurs approximately 13 frames after the Power Bomb explosion is completely gone. Instead of crystal flashing, Samus will go down the elevator. If it was done properly, Samus' beam will be grey in color. See also: Tech Page |
||||
| Tech: canSlopeSpark | canslopespark |  |
link | The ability to gain a flash suit without Morph by using an enemy damage boost to land on a slope and spark before knockback frames have expired. Gain a shinecharge, then while moving into an enemy near the top of a slope, frame perfectly switch directions while pressing jump and hold both back and jump for 4 or 5 frames. Jump can be pressed one frame before or on the same frame as the direction switch, then after 4 or 5 frames release either jump, back or both simultaneously. If only releasing back or jump then there is no time limit on how long the other input can be held, Samus will just remain in the slope spark pose until a shinespark is initiated. See also: Tech Page |
||||
| Tech: canRModeCrystalFlashInterrupt | canrmodecrystalflashinterrupt |  |
link | The ability to gain a flash suit by interrupting a Crystal Flash with an R-mode forced standup. This can be done by taking enough damage to force an auto reserve trigger after the Crystal Flash has at least partially filled the Reserve Energy. See also: Tech Page |
||||
| Tech: canComplexRModeCrystalFlashInterrupt | cancomplexrmodecrystalflashinterrupt |  |
link | The ability to R-mode forced standup Crystal Flash interrupt in more complex scenarios. This may include timing enemy contact to occur immediately after Samus gains Reserve Energy, to prevent a double hit; unintuitive enemy positioning, to prevent the enemy from being killed by the Power Bomb or light orb; and other unusual enemy setups. See also: Tech Page |
||||
| Tech: canTrickyRModeCrystalFlashInterrupt | cantrickyrmodecrystalflashinterrupt |  |
link | The ability to R-mode forced standup Crystal Flash interrupt in precise, unintuitive or slightly luck-based scenarios. This may also include precisely and blindly timing a Power Bomb to occur as an enemy is approaching off-camera, or Crystal Flashing at the top of a bomb boost. This may also include tricky ways to end with more than 50 Energy. See also: Tech Page |
||||
| Tech: canRModeKnockbackSpark | canrmodeknockbackspark |  |
link | The ability to gain a flash suit without Morph by using enemy damage to trigger reserves and cause a forced standup. After entering a room in R-Mode, farm enemies to add between 1-4 energy into the reserve tank. Damage down until the next enemy contact will trigger reserves. Shinecharge and get hit by an enemy while stationary. Frame perfectly press jump to activate a shinespark on the last frame before the knockback timer expires, 4 frames after the enemy contact. See also: Tech Page |
||||
| Tech: canXModeSpikeSuit | canxmodespikesuit |  |
link | The ability to gain a flash suit by using spike X-Mode to gain the initial shinecharge instead of a runway. See also: Tech Page |
||||
| Tech: canComplexCarryFlashSuit | cancomplexcarryflashsuit |  |
link | The ability to preserve a flash suit while performing strats that have a moderately high risk of losing the flash suit. For example, jumping into an IBJ without HiJump, which can be done from an angle down jump or a spin jump. This can also sometimes have applications while dodging enemies or while taking damage from them. Damage boosting can be tricky, as it requires holding both backwards and jump until Samus lands; releasing either too early will use the flash suit. It is possible to morph and unmorph midair to switch from a "jumping" to "falling" state, in order to be able to aim up or diagonally up while midair; one common reason to do this is to grapple across a ceiling, which requires a morph and unmorph between each swing. See also: Tech Page |
||||
| Tech: canTrickyCarryFlashSuit | cantrickycarryflashsuit |  |
link | The ability to preserve a flash suit while performing strats that have a high risk of losing the flash suit. For example, performing a gate glitch in air without the use of Spring Ball - from a spin jump, morph then unmorph, in order to be able to angle up shot. This also expects the ability to grapple jump without the use of HiJump. See also: Tech Page |
||||
| Tech: canUseFlashSuitInitialSpark | canuseflashsuitinitialspark |  |
link | The ability to utilize the initial spark while obtaining a flash suit through a spike suit or slope spark. This will typically be used to spark through a door while maintaining a flash suit. See also: Tech Page |
||||
| Tech: canCarryBlueSuit | cancarrybluesuit |  |
link | A blue suit is a glitched state where Samus has the ability to pass through (and destroy) bomb blocks, Speed blocks, and most enemies. This is similar to the blue state obtained by running with Speed Booster, except that a blue suit continues even after Samus stops moving. A blue suit is obtained by interrupting a shinespark or shinespark wind-up, for example using a Crystal Flash or R-Mode forced standup, or by killing Draygon or being drained by the Baby Metroid. Actions that cause Samus to lose a blue suit include dashing, shinesparking, or falling into sand (though walking across sand is fine). See also: Tech Page |
||||
| Tech: canBlueSuitSpikeJump | canbluesuitspikejump |  |
link | The ability to navigate spikes while carrying a blue suit in the presence of active enemies. In this situation, Samus' i-frames are instantly eliminated whenever Samus falls or walks forward, To avoid a rapid chain of spike hits, hold forward while landing on the spikes so that Samus is boosted downward, and release forward before knockback ends, so that Samus does not walk forward. If successful, Samus will be standing on the spikes, with 60 frames of invulnerability. From here, Samus can jump straight up out of the spikes, or spin jump by turning around with a buffered jump. See also: Tech Page |
||||
| Tech: canRModeSparkInterrupt | canrmodesparkinterrupt |  |
link | The ability to gain a blue suit by triggering an R-Mode forced stand-up during a shinespark wind-up. To do this, enter a room in R-Mode and put some energy back into reserves, for example by farming enemy drops or performing a Crystal Flash. Damage down to where auto-reserves will trigger after one more enemy hit. Use a runway to gain a shinecharge, and press jump to activate shinespark wind-up near an enemy, in such a way that the enemy hits Samus during the wind-up, triggering an R-Mode forced stand-up. See also: Tech Page |
||||
| Tech: canRModePauseAbuseSparkInterrupt | canrmodepauseabusesparkinterrupt |  |
link | The ability to gain a blue suit by triggering an R-Mode forced stand-up during a shinespark wind-up, combined with using pause abuse to delay the interrupt, such as when the interrupting damage must be received with Samus not being in a shinespark windup. Execution is similar to a standard Spark Interrupt except that Reserves are set to Manual, and the player must press Start to pause just before taking the interrupting damage to reach 00 energy. The player must then initiate windup just before the pause fadeout completes. Once the game is paused, switching Reserve to Auto and unpausing will complete the R-Mode interrupt. The screen will remain completely black during this time, which can be corrected by pausing the game again. See also: Tech Page |
||||
| Tech: canCrystalSpark | cancrystalspark |  |
link | The ability to gain a blue suit by activating a Crystal Flash during shinespark wind-up. This is done by gaining a shinecharge, jumping, mid-air morphing, and laying a Power Bomb at a pixel-perfect height, unmorphing, activating the shinespark wind-up by pressing jump, then holding the Crystal Flash inputs. See also: Tech Page |
||||
| Tech: canUnderwaterCrystalSpark | canunderwatercrystalspark |  |
link | Perform a Crystal Spark while on a shinecharge timer with underwater physics. See also: Tech Page |
||||
| Tech: canXModeBlueSuit | canxmodebluesuit |  |
link | The ability to gain a blue suit by shinesparking while in X-Mode and exiting X-Mode before the shinespark has crashed. Release dash during the shinespark wind-up animation to exit X-Mode, interrupting the shinespark and gaining a blue suit. A blue suit will not be gained if dash is released after a shinespark has crashed against a wall or object. Releasing dash mid shinespark will cause Samus to Superjump and potentially go out of bounds but this can also be used to jump away from spikes or thorns. Care must be taken around spikes or thorns after a blue suit is gained if there are active enemies as I-frames will expire quickly and escaping can be difficult. See also: Tech Page |
||||
| Tech: canSuperjump | cansuperjump |  |
link | Ability to Shinespark while in XMode in a controlled way. A side effect of Superjumping is that Samus gains a Blue Suit. See also: Tech Page |
||||
| Tech: canDoubleXModeBlueSuit | candoublexmodebluesuit |  |
link | The ability to gain a blue suit by shinesparking in X-Mode and exiting X-Mode before the shinespark has crashed. Build the intial shinecharge by entering X-Mode with dash speed, once shinecharged release dash to exit X-Mode. Before the shinecharged window expires, quickly re-enter X-Mode and peform a shinespark. Due to the short window, this second X-Mode has to be done first try. Release dash during the shinespark wind-up animation to exit X-Mode, interrupting the shinespark and gaining a blue suit. A blue suit will not be gained if dash is released after a shinespark has crashed against a wall or object. Releasing dash mid shinespark will cause Samus to Superjump and potentially go out of bounds but this can also be used to jump away from spikes or thorns. Care must be taken around spikes or thorns after a blue suit is gained if there are active enemies as I-frames will expire quickly and escaping can be difficult. See also: Tech Page |
||||
| Tech: canSpeedKeep | canspeedkeep |  |
link | The ability to retain the Dash counter and momentum by frame perfectly unmorphing before taking damage from spikes. It is necessary to bounce while in Morph Ball, either by falling or by taking damage, to set the correct fall state for a SpeedKeep. This allows for charging a Shinespark or Temporary Blue using a shorter runway if there is a stretch of spikes available. It is also possible to use multiple SpeedKeeps to build up the Dash counter without travelling much distance in a room by applying canChainTemporaryBlue movements. See also: Tech Page |
||||
| Tech: canPreciseSpaceJump | canprecisespacejump |  |
link | Carefully controlling the height and timing of Space Jump in order to carry momentum, and possibly blue speed, across substantial distances to specific locations. See also: Tech Page |
||||
| Tech: canBlueSpaceJump | canbluespacejump |  |
link | Using Space Jump to carry SpeedBooster's blue speed across a room that couldn't be reached by simply running and jumping. This can be used to break destructible blocks, kill or pass through enemies, or any other use for blue speed at the other side of the room. See also: Tech Page |
||||
| Tech: canTemporaryBlue | cantemporaryblue |  |
link | The ability to maintain a temporary blue state through any of the following methods: 1. Gaining a shinecharge while holding an angle button, and continuing to hold angle, 2. Entering a speedball and unmorphing while holding an angle button, 3. Sliding off a ledge while gaining a shinecharge, 4. Running, gaining blue speed, jumping into a mid-air morph, and unmorphing. See also: Tech Page |
||||
| Tech: canChainTemporaryBlue | canchaintemporaryblue |  |
link | The ability to move while maintaining temporary blue. This can be done by jumping, releasing angle, then doing a mid-air morph using mockball inputs. Afterwards, hold angle again while soft unmorphing and continue to hold angle after landing. Hold forward the entire time while morphed after the mockball inputs to prevent losing temporary blue. In particular, forward must still be held when starting to unmorph but must be released before the unmorph animation finishes (a 7-frame window, in air physics); alternatively, if both angle-up and angle-down are held while landing, then there is no need to release forward before the unmorph animation finishes. It is possible to use X-Ray to turn around during a temporary blue chain. If enough fall speed can be gained to bounce when hitting the ground morphed, then it is possible to unmorph after the bounce, providing a larger frame window compared to soft unmorphing directly; this also allows Samus to travel a greater horizontal distance with each jump. In air physics, a direct soft unmorph provides a 8-frame window in which to unmorph. After that, there is a gap of 1 frame that does not work, as the game will not register an unmorph at the moment of bouncing. Then there is a 20-frame window in which to unmorph after bouncing, before the second bounce. Again there is a gap of 1 frame that does not work, at the moment of the second bounce. Finally there are 2 frames that work after the second bounce. In water physics, there is a 16-frame window for a direct soft unmorph. All these frame windows can vary when landing on unlevel surfaces or slopes. In air physics, a 4-tile-high space is enough to gain speed for a bounce; in water physics, even a full-height jump with HiJump is not enough to get a bounce, which means that bouncing is not possible except after falling a substantial distance. See also: Tech Page |
||||
| Tech: canLongChainTemporaryBlue | canlongchaintemporaryblue |  |
link | The ability to move across large distances while maintaining Temporary Blue. See also: Tech Page |
||||
| Tech: canPauseRemorphTemporaryBlue | canpauseremorphtemporaryblue |  |
link | The ability to continue chaining temporary blue after mid-air unmorphing. This is done by pausing while aiming down, then pressing down during the unpause black screen to buffer a morph. Coming out of the pause, roll from down into forward before the morph animation finishes. Alternatively, press diagonally down-forward during the black screen to buffer a stationary lateral morph. See also: Tech Page |
||||
| Tech: canWaterShineCharge | canwatershinecharge |  |
link | Starting from an air environment, run into water and charge a spark in the water. This is typically done while crossing a door transition from a room with air physics to a room with water. This is easy to do; the tech just represents knowledge that it is possible. See also: Tech Page |
||||
| Tech: canStutterWaterShineCharge | canstutterwatershinecharge |  |
link | Performing a water shinecharge in a shorter runway by using a stutter that is greatly extended by the water slowdown. Perform a stutter shortly before entering water, typically through a door transition, by briefly releasing and then repressing forward before, but as close to, the transition as possible while continuing the dash. This carries the stutter into the water where Samus will run in place while building the shinecharge, Allowing Samus to enter the water with little momentum. After entering the water, dash should be held the entire time. With Gravity Suit it is possible to do this without leaving water, with or without a room transition, by removing the suit just after stuttering. The same technique is applicable with acid. See also: Tech Page |
||||
| Tech: canPreciseStutterWaterShineCharge | canprecisestutterwatershinecharge |  |
link | Performing a stutter water shinecharge in a situation requiring a precise stutter, for example if not much runway is available in one or both of the rooms. See also: Tech Page |
||||
| Tech: canXRayWaitForIFrames | canxraywaitforiframes |  |
link | Use X-Ray to pause time until invulnerability frames are finished. Combine with Plasma Beam to repeatedly damage enemies with one fired shot, called Microwave. If used while inside an enemy projectile or thorns, i-frames will be restarted but no damage will be taken. See also: Tech Page |
||||
| Tech: canReserveTriggerBufferXRay | canreservetriggerbufferxray |  |
link | Starting an automatic reserve transfer while having X-Ray already selected allows the player to buffer the dash button to instantly start X-Ray Scope and pause time as soon as the reserve transfer finishes. One side effect of this is that the normal application of heat damage accumulated during a reserve trigger is prevented. See also: Tech Page |
||||
| Tech: canXRayTurnaround | canxrayturnaround |  |
link | Using X-Ray to turn around in place without changing pixel position. Alternating X-Ray turnarounds with regular turnarounds enables movement in either direction even while crouched. This allows Samus to wiggle through two-tile tall passages, but only if the crouch originated from standing or unmorphing (not spinjumping). See also: Tech Page |
||||
| Tech: canXRayCancelShinecharge | canxraycancelshinecharge |  |
link | Using X-Ray to cancel a shinecharge to avoid having to wait for the 180-frame shinecharge timer to expire. This allows moving more quickly after gaining temporary blue. See also: Tech Page |
||||
| Tech: canXRayStandUp | canxraystandup |  |
link | Force Samus to stand up from a crouching position by canceling the use of the X-Ray Scope while turning around. See also: Tech Page |
||||
| Tech: canXRayClimb | canxrayclimb |  |
link | Repeatedly using X-Ray's forced standup trick to climb up through in-bound walls. This requires Samus to be partially clipped into the wall to begin climbing, which is often set up by getting stuck in a closing door. The simplest setup is getting stuck in a right facing door in order to climb the left wall of a room. To do this, enter this room from the room to the left with a stationary spinjump moving away to touch the transition with momentum that will get you stuck in the destination door. X-Ray climbs can also be setup by allowing solid blocks to reform on Samus, or by clipping into a wall by some other means. See also: Tech Page |
||||
| Tech: canLongXRayClimb | canlongxrayclimb |  |
link | Performing an X-Ray climb of distance approximately two screens or more. See also: Tech Page |
||||
| Tech: canRightSideDoorStuck | canrightsidedoorstuck |  |
link | Getting stuck in a right side (left facing) door. Starting from the room to the right, perform a dashing stationary spinjump into a doorcheck. Then, as Samus arrives in the desired room, hold down to automatically fall forward into the closing door. This requires the doorway in the room to the right to not be underwater. This is typically used to start an X-Ray Climb. See also: Tech Page |
||||
| Tech: canRightSideDoorStuckFromWater | canrightsidedoorstuckfromwater |  |
link | When the adjacent room is underwater it is not possible to gain dash state for the stationary spinjump. Instead, an extremely precise jump is required followed by aiming down to shrink Samus' hitbox. From a full height jump, there is a 2-frame window which can touch the transition at the correct height, when Samus is slightly below the center of the doorway. With HiJump unequipped, the start of the frame window is just as Samus rotates to become horizontal. Hold forward through the transition. One frame after the transition completes, hold diagonally down-forward. See also: Tech Page |
||||
| Tech: canRightSideDashlessDoorStuck | canrightsidedashlessdoorstuck |  |
link | Performing a dashless right-side door-stuck setup from an air environment, for example in order to carry a blue suit. From a full height jump, the transition must be touched frame-perfectly at the correct height, when Samus is in the center of the doorway. With HiJump unequipped, this is on the frame just before Samus would rotate to horizontal. Hold forward through the transition. One frame after the transition completes, hold diagonally down-forward. See also: Tech Page |
||||
| Tech: canXMode | canxmode |  |
link | Ability to enter X-Mode using spikes by precisely unmorphing after bouncing into spikes or thorns. This can be used to run in place and gain a shinecharge. Samus must neutral bounce once while morphed before unmorphing; the bounce can be on a platform above the spikes, or on the spikes themselves if enough space is available. To build a shinecharge with X-mode, Samus must enter X-mode with dash speed; e.g. this can be done with a dashing stationary spinjump, and selecting X-Ray before landing on the spikes. Hold the dash button so that X-Ray is buffered to activate immediately after unmorphing. See also: Tech Page |
||||
| Tech: canXModeMovement | canxmodemovement |  |
link | Ability to apply various movement techniques in X-mode, including 1) releasing forward in order to move forward (with loss of dash speed) 2) arm-pumping to move forward while maintaining dash speed 3) holding an angle button to turn around while maintaining dash speed 4) timing the X-mode release after i-frames refresh in thorns to avoid an additional thorn hit. See also: Tech Page |
||||
| Tech: canSlopeXMode | canslopexmode |  |
link | The ability to enter X-Mode by using a frame perfect direction switch damage boost to land samus onto a slope and enter X-Mode This method of X-Mode doesn't require Morph but cannot be used to charge a shinespark, only for room traversal or gaining a bluesuit if shinecharged when entering X-Mode. Walking into a solid tile while in X-Mode will crash the game. See also: Tech Page |
||||
| Tech: canRMode | canrmode |  |
link | Ability to enter R-mode. Have some energy in reserves (set to Auto), take damage while going through a door, use X-Ray while entering the next room, and release X-Ray after reserves have finished filling. See also: Tech Page |
||||
| Tech: canRModeStandupClip | canrmodestandupclip |  |
link | After entering a room in R-Mode, put some energy into reserves (set to Auto) and then have reserves trigger to force Samus into a standing pose. See also: Tech Page |
||||
| Tech: canGMode | cangmode |  |
link | Ability to enter G-mode and utilize the unusual behaviors that it enables. This requires X-Ray, Reserve Energy, and reserves set to Auto refill. In order to enter G-mode, Samus needs to take damage after touching a room transition so that she immediately takes damage and triggers the refill while entering the next room. In addition, she needs to be using X-Ray while entering the room and release X-Ray before reserves have finished filling. For the simplest cases, Samus will need to start with 4 (or fewer) Reserve Energy, giving a 4-frame window to release X-Ray in the next room (or fewer: 1-frame per Reserve Energy). When successfully entering G-mode, the room will darken and the door will remain open (releasing X-Ray too early, neither of these occur; releasing it too late, the room darkens and the door closes - this is R-mode). See also: Tech Page |
||||
| Tech: canComplexGMode | cancomplexgmode |  |
link | Doing something precise, risky, or unintuitive while in G-mode or while setting up G-mode. This includes: enemy dodging that would not normally be an issue and is unintuitive, such as enemies that deal a small amount of damage and awkward dodging while artificially morphed; bypassing door locks while in G-mode to maintain indirect G-mode in the next room; exiting G-mode while inside of overloaded blocks in order to have them solidify and be able to X-Ray climb. Getting a usable amount of Energy for G-mode setups where there is a high risk of taking extra damage beforehand can often benefit from getting close to the correct position, taking an enemy hit and then using X-ray and waiting for Samus's i-frames to expire in order to be able to take additional hits without the enemy moving very much. See also: Tech Page |
||||
| Tech: canTrickyGMode | cantrickygmode |  |
link | Doing something particularly precise, risky, or unintuitive while in G-mode or while setting up G-mode. This includes very precise movement, enemy manipulation, and timings, where a failure may result in soft-lock or death. This also includes complex dodging of invisible projectiles or camera scroll blocks, and it can be paired with complex off-screen movement. See also: Tech Page |
||||
| Tech: canGModeXRayClimb | cangmodexrayclimb |  |
link | G-mode can be used to set up an X-Ray climb in several ways. The most common ways are to enter a room in direct G-mode, back up into the open doorway, then exit G-mode to have the door close on Samus. This can be used to initiate a 'deep stuck' X-Ray climb, which can enable Samus to climb past slopes which are in the column of tiles in front of the door shell. This can also be used to initiate a 'very deep stuck' X-Ray climb, which can enable Samus to climb up and trigger the transition of a door above without needing to open the door. Much less common examples include overloading PLMs and exiting G-mode while inside of overloaded blocks to solidify them and enable an X-Ray Climb; this variant will also require canComplexGMode. See also: Tech Page |
||||
| Tech: canHeatedGMode | canheatedgmode |  |
link | Setting up or using G-mode in a heated environment without heat protection. Positioning an enemy to set up G-mode from a heated room requires precise Energy management. With slightly too much Energy, Samus can take damage then use X-Ray until her i-frames expire to immediately be able to take damage again. While G-mode provides heat protection (sometimes referred to as 'artificial Varia'), entering G-mode in a heated room is risky, as a fail will likely result in death if Samus had only 4 Reserve Energy. Exiting G-mode while in a heated environment will remove Samus' artificial heat protection; luring and killing an enemy near the door to collect its drop with a pause abuse is possible. See also: Tech Page |
||||
| Tech: canGModeImmobile | cangmodeimmobile |  |
link | Ability to enter G-mode starting with high reserve energy, resulting in Samus being immobilized. Have 5 or more energy in reserves (set to Auto), take damage while going through a door, use X-Ray while entering the next room, and release X-ray immediately before reserves finish filling (a 3-frame window when starting with 12 or more reserve energy, a much larger frame window if you have between 5 and 11). Samus will be unable to move until getting hit by an enemy (or until canceling G-mode by using X-Ray). See also: Tech Page |
||||
| Tech: canArtificialMorph | canartificialmorph |  |
link | Ability to obtain artificial morph with G-mode. For low-energy G-mode setups, turn around after reserves finish filling but before knockback frames expire (a 4-frame window when entering G-mode with 4 reserve energy). For high-energy (immobile) setups, instead turn around while taking knockback from the enemy that returns control to Samus (a 5-frame window) This results in Samus entering a morph ball state without needing to have collected or equipped Morph. See also: Tech Page |
||||
| Tech: canRemoteAcquire | canremoteacquire |  |
link | Ability to remotely acquire an item while exiting G-mode. This only works when in direct G-mode and with items that are visible (not in a shot block or Chozo Ball). Touch the item before PLMs are overloaded (touching the item will rapidly overload PLMs, but that's fine), then the item will be obtained wherever Samus is when exiting G-mode. See also: Tech Page |
||||
| Tech: canPowerBombItemOverloadPLMs | canpowerbombitemoverloadplms |  |
link | Ability to overload PLMs by having a Power Bomb explosion interact with an item, while being able to optimally place them to overload PLMs with as few Power Bombs as possible. The number of PLMs spawned is highly dependent on the distance between the bomb and the item. See also: Tech Page |
||||
| Tech: canSamusEaterTeleport | cansamuseaterteleport |  |
link | Ability to use a Samus Eater to teleport when exiting G-mode, just before touching a door transition, modifying where Samus is placed in the next room. Exiting G-mode will teleport Samus to position where she touched the Samus Eater. At the start of the door transition, Samus' X and Y pixel positions are reduced modulo 256 (the size of a screen), so the relative position within the screen is all that matters (not the absolute position in the room). The transition must be touched exactly 2 frames after control is regained after releasing X-Ray. See also: Tech Page |
||||
| Tech: canDownwardGModeSetup | candownwardgmodesetup |  |
link | Ability to setup R-mode or G-mode through a downward door or sand transition. Samus needs to be in a standing or walking position with no vertical speed on the first frame in the next room, while taking damage through the transition. See also: Tech Page |
||||
| Tech: canUpwardGModeSetup | canupwardgmodesetup |  |
link | Ability to setup R-mode or G-mode through an upward door. Samus needs to be in a standing or walking position with no vertical speed on the first frame in the next room, while taking damage through the transition. This is typically done by standing or crouching on an enemy as a platform beneath the transition and pressing forward to activate the transition. See also: Tech Page |
||||
| Tech: canBlueSuitGModeSetup | canbluesuitgmodesetup |  |
link | Ability to setup R-mode or G-mode while carrying a blue suit. In order to take damage from an enemy while having a blue suit, Samus needs to not have momentum. Entering a transition without momentum is done by positioning exactly 1 pixel from the transition. X-Ray can be used to slow down the process of positioning, stopping time to prevent the enemy from reaching Samus before she is in position. See also: Tech Page |
||||
| Tech: canAwakenZebes | canawakenzebes |  |
link | Understanding game behavior related to how the planet is awakened. The planet is awakened by unlocking any gray door locked by killing enemies in the room (not including bosses or minibosses). Pit Room, Baby Kraid Room, Metal Pirates Room, and Plasma Room are the places where this can be done in the randomizer. Awakening the planet causes enemies to spawn in Parlor, Climb, Morph Ball Room, Construction Zone, and Blue Brinstar Energy Tank Room. It also causes the item in the left side of Morph Ball Room and in The Final Missile to spawn. The item and enemies in Pit Room do not spawn until entering with Morph and Missiles collected, regardless of whether the planet is awake. If the quality-of-life option 'All items spawn from start' is enabled, as it is by default, then the items will already be spawned anyway, but awakening the planet can still matter because of its effects on enemies. See also: Tech Page |
||||
| Tech: canRiskPermanentLossOfAccess | canriskpermanentlossofaccess |  |
link | The acceptance that changes to game state can result in a strat becoming impossible. If that strat needed to be executed before the game state change, the game becomes incompletable. And that the "mistake" may not become visible until much later. See also: Tech Page |
||||
| Tech: canCeilingClip | canceilingclip |  |
link | Basic variant of jumping into a two block high space and performing the actions needed to clip up through a one-tile-thick ceiling. See also: Tech Page |
||||
| Tech: canXRayCeilingClip | canxrayceilingclip |  |
link | Setting up an enemy positioning to perform a ceiling clip, typically with a frozen enemy. Jump and Morph onto the enemy, perform an X-Ray standup, and then jump through. The enemy positioning will require approximately 1.5 to 2 tiles between the enemy and the ceiling. Just enough to unmorph while on top of it. See also: Tech Page |
||||
| Tech: canPreciseCeilingClip | canpreciseceilingclip |  |
link | Setting up an enemy positioning to perform a very precise ceiling clip, typically with a frozen enemy. The enemy positioning will require a 2-3 pixel precision range, several pixels lower than what is possible with an X-Ray standup. A crouch jump is then required to clip through. See also: Tech Page |
||||
| Tech: canHighPixelCeilingClip | canhighpixelceilingclip | link | Setting up an enemy positioning to perform a pixel precise ceiling clip, typically with a frozen enemy. This requires a 20 pixel gap between the enemy and ceiling, the same number of pixels as Samus' hitbox when in the aim down pose. To get on top of the enemy, either perform a very precise down grab onto it, down back onto it after unmorphing, or use a neutral damage boost to remain inside of the enemy then jump and aim down to land on it. If Samus is not standing, press forward or up to stand, then jump through. There are few examples where this is necessary, which include: extremely tight spaces where an enemy cannot be positioned lower for an easier clip, underwater without Gravity, or in many locations while preserving a flash suit. See also: Tech Page |
|||||
| Tech: canPartialFloorClip | canpartialfloorclip |  |
link | While standing upright in a two-tile gap between solid tiles, jump in such a way as to clip a pixel into the below floor as a setup to another tech. This is done by, in quick succession: jumping, aiming down, and then pressing forward. See also: Tech Page |
||||
| Tech: canCrystalFlash | cancrystalflash |  |
link | Performing a Crystal Flash (CF). Initiating the Crystal Flash requires energy at 50 or lower, empty Reserve energy, 1 Power Bomb to initiate, and holding L+R+Shoot+Down with no other inputs. A Crystal Flash will refill 1500 energy at the cost of 10 Missiles, 10 Supers, and 10 Power Bombs. The Crystal Flash will also put Samus in a standing position even if she is in a Morph tunnel. See also: Tech Page |
||||
| Tech: canHeatedCrystalFlash | canheatedcrystalflash |  |
link | Performing a Crystal Flash while taking environmental damage. In heat damage, this requires laying the Power Bomb while Samus' energy is between 43 and 88. See also: Tech Page |
||||
| Tech: canBombIntoCrystalFlashClip | canbombintocrystalflashclip |  |
link | Setting up a Crystal Flash in a 3 tile high space with bombs to clip into the above tile. This requires bombing once to place the power bomb against the ceiling, then bombing again to position Samus for the Crystal Flash. This trick has a 2 frame window. If below crumble blocks, hold down to break them. Usually only useful when the crumble blocks do not respawn. If below a single solid tile, Grapple can be used immediately when the Crystal Flash finishes to place Samus above it. See also: Tech Page |
||||
| Tech: canJumpIntoCrystalFlashClip | canjumpintocrystalflashclip |  |
link | Setting up a Crystal Flash by jumping and morphing. Once to place the Power Bomb, then again to activate the Crystal Flash. This trick has a 1 frame window. If below crumble blocks, hold down to break them. Usually only useful when the crumble blocks do not respawn. If below a single solid tile, Grapple can be used to place Samus above it. To do this, select Grapple as Samus' energy refills then hold down and mash shoot, the earlier the better. See also: Tech Page |
||||
| Tech: canRefillStation10PowerBombCrystalFlash | canrefillstation10powerbombcrystalflash |  |
link | Setting up a 10 Power Bomb Crystal Flash by using an ammo refill station that refills all ammo types. Press against the refill station with angle or by using it in order to position Samus. In quick succession, place a Power Bomb, refill at the refill station, then morph and Crystal Flash. The Power Bomb visually explodes during the dialogue box, but time is paused and there is no rush to exit the box. Holding an angle button and/or down while exiting the dialogue box is required, as it will prevent Samus from being boosted by the bomb. See also: Tech Page |
||||
| Tech: can10PowerBombCrystalFlash | can10powerbombcrystalflash |  |
link | Setting up a Crystal Flash with only a 10 Power Bomb capacity, by picking up a Power Bomb in between placing the first Power Bomb and activating the Crystal Flash. See also: Tech Page |
||||
| Tech: canHeated10PowerBombCrystalFlash | canheated10powerbombcrystalflash |  |
link | Setting up a 10 Power Bomb Crystal Flash while also carefully managing Samus' Energy in a heated environment. See also: Tech Page |
||||
| Tech: canTurnaroundAimCancel | canturnaroundaimcancel |  |
link | Canceling an aim angle while crouching and turning around, to wiggle to the right. See also: Tech Page |
||||
| Tech: canCameraManip | cancameramanip |  |
link | The ability to scroll the camera to bring enemies or projectiles on or off camera. Most enemes become inactive while off camera, and most projectiles cease to exist. This can be done by jumping in place; changing Samus' hitbox with aim down will scroll the camera lower. By running back and forth the camera will scroll horizontally; Moonwalk can be used to camera scroll without travelling as far. See also: Tech Page |
||||
| Tech: canDeepTransition | candeeptransition | link | The ability to trigger a door transition deeper than normal, resulting in a more distant spawn position in the next room. There are many possible ways that this could be achieved; this tech includes two methods: 1) performing a well-aligned horizontal shinespark; starting 1 or 2 pixels from the door is an example position that works; 2) using an unpause where the fade-in ends exactly on the frame when the transition would trigger, delaying the transition by a frame. For the shinespark version, about one third of positions will work, with working positions occuring in periodic windows that are each approximately two pixels wide, separated by bad windows that are approximately 4 pixels wide. The unpause version refers to a buffered technique of standing at a specific distance from the door, pausing, and then unpausing while holding forward and run. When starting facing the door, the position is approximately a 3-pixel window, at a distance of a 6-tile closed-end runway, with possible variations due to slopes. When starting facing away from the door (doing a turnaround while unpausing), the position is approximately a 2-pixel window, at a distance of about 3.7 tiles. See also: Tech Page |
|||||
| Tech: canSkipDoorLock | canskipdoorlock |  |
link | The ability to trigger a door transition without opening a door lock in front of it. Specific techniques for achieving this are covered in other tech. See also: Tech Page |
||||
| Tech: canUsePowerBombLag | canusepowerbomblag |  |
link | The ability to take advantage of the lag during a Power Bomb explosion in order to execute precise movement more easily. See also: Tech Page |
||||
| Tech: canCount | cancount |  |
link | The ability to keep an exact count while performing a long sequence of actions, for example while moondancing. See also: Tech Page |
||||
| Item: Power Beam | i_powerbeam | Array
(
[0] => powerbeam
)
|
link | redirect | Power Beam See also: Index Listing |
|||
| Item: Morph Ball | i_morph | Array
(
[0] => morph
)
|
link | redirect | Morph Ball See also: Index Listing |
|||
| Item: Bombs | i_bombs | Array
(
[0] => bombs
)
|
link | redirect | Bombs See also: Index Listing |
|||
| Item: Charge | i_charge | Array
(
[0] => charge
)
|
link | redirect | Charge See also: Index Listing |
|||
| Item: Hi Jump Boots | i_hijump | Array
(
[0] => hijump
)
|
link | redirect | Hi Jump Boots See also: Index Listing |
|||
| Item: Spazer | i_spazer | Array
(
[0] => spazer
)
|
link | redirect | Spazer See also: Index Listing |
|||
| Item: Varia | i_varia | Array
(
[0] => varia
)
|
link | redirect | Varia See also: Index Listing |
|||
| Item: Speed Booster | i_speedbooster | Array
(
[0] => speedbooster
)
|
link | redirect | Speed Booster See also: Index Listing |
|||
| Item: Ice | i_ice | Array
(
[0] => ice
)
|
link | redirect | Ice See also: Index Listing |
|||
| Item: Grappling Beam | i_grapple | Array
(
[0] => grapple
)
|
link | redirect | Grappling Beam See also: Index Listing |
|||
| Item: Wave | i_wave | Array
(
[0] => wave
)
|
link | redirect | Wave See also: Index Listing |
|||
| Item: X-Ray Scope | i_xrayscope | Array
(
[0] => xrayscope
)
|
link | redirect | X-Ray Scope See also: Index Listing |
|||
| Item: Gravity | i_gravity | Array
(
[0] => gravity
)
|
link | redirect | Gravity See also: Index Listing |
|||
| Item: Space Jump | i_spacejump | Array
(
[0] => spacejump
)
|
link | redirect | Space Jump See also: Index Listing |
|||
| Item: Spring Ball | i_springball | Array
(
[0] => springball
)
|
link | redirect | Spring Ball See also: Index Listing |
|||
| Item: Plasma | i_plasma | Array
(
[0] => plasma
)
|
link | redirect | Plasma See also: Index Listing |
|||
| Item: Screw Attack | i_screwattack | Array
(
[0] => screwattack
)
|
link | redirect | Screw Attack See also: Index Listing |
|||
| Item: Wall Jump | i_walljump | Array
(
[0] => walljump
)
|
link | redirect | Wall Jump See also: Index Listing |
|||
| Item: Blue Booster | i_bluebooster | Array
(
[0] => bluebooster
)
|
link | redirect | Blue Booster See also: Index Listing |
|||
| Item: Spark Booster | i_sparkbooster | Array
(
[0] => sparkbooster
)
|
link | redirect | Spark Booster See also: Index Listing |
|||
| Item: Energy Tank | i_etank | Array
(
[0] => etank
)
|
link | redirect | Energy Tank See also: Index Listing |
|||
| Item: Energy Tank | r_regularenergy | Array
(
[0] => regularenergy
)
|
link | redirect | Energy Tank See also: Index Listing |
|||
| Item: Super | i_super | Array
(
[0] => super
)
|
link | redirect | Super See also: Index Listing |
|||
| Item: Missile | i_missile | Array
(
[0] => missile
)
|
link | redirect | Missile See also: Index Listing |
|||
| Item: Reserve Tank | i_reservetank | Array
(
[0] => reservetank
)
|
link | redirect | Reserve Tank See also: Index Listing |
|||
| Item: Reserve Tank | r_reserveenergy | Array
(
[0] => reserveenergy
)
|
link | redirect | Reserve Tank See also: Index Listing |
|||
| Item: Power Bomb | i_powerbomb | Array
(
[0] => powerbomb
)
|
link | redirect | Power Bomb See also: Index Listing |
|||
| Alcoon | alcoon | link | redirect | Alcoon See also: Index Listing |
||||
| Beetom | beetom | link | redirect | Beetom See also: Index Listing |
||||
| Boyon | boyon | link | redirect | Boyon See also: Index Listing |
||||
| Choot | choot | link | redirect | Choot See also: Index Listing |
||||
| Geemer (blue) | geemerblue | link | redirect | Geemer (blue) See also: Index Listing |
||||
| Geemer (grey) | geemergrey | link | redirect | Geemer (grey) See also: Index Listing |
||||
| Geemer (orange) | geemerorange | link | redirect | Geemer (orange) See also: Index Listing |
||||
| Kago | kago | link | redirect | Kago See also: Index Listing |
||||
| Kamer | kamer | link | redirect | Kamer See also: Index Listing |
||||
| Kihunter (green) | kihuntergreen | link | redirect | Kihunter (green) See also: Index Listing |
||||
| Mellow | mellow | link | redirect | Mellow See also: Index Listing |
||||
| Reo | reo | link | redirect | Reo See also: Index Listing |
||||
| Ripper 2 (green) | ripper2green | link | redirect | Ripper 2 (green) See also: Index Listing |
||||
| Sciser | sciser | link | redirect | Sciser See also: Index Listing |
||||
| Skree | skree | link | redirect | Skree See also: Index Listing |
||||
| Skultera | skultera | link | redirect | Skultera See also: Index Listing |
||||
| Grey Space Pirate (standing) | greyspacepiratestanding | link | redirect | Grey Space Pirate (standing) See also: Index Listing |
||||
| Green Space Pirate (standing) | greenspacepiratestanding | link | redirect | Green Space Pirate (standing) See also: Index Listing |
||||
| Grey Space Pirate (wall) | greyspacepiratewall | link | redirect | Grey Space Pirate (wall) See also: Index Listing |
||||
| Tripper | tripper | link | redirect | Tripper See also: Index Listing |
||||
| Waver | waver | link | redirect | Waver See also: Index Listing |
||||
| Yapping Maw | yappingmaw | link | redirect | Yapping Maw See also: Index Listing |
||||
| Zeb | zeb | link | redirect | Zeb See also: Index Listing |
||||
| Zebbo | zebbo | link | redirect | Zebbo See also: Index Listing |
||||
| Boulder | boulder | link | redirect | Boulder See also: Index Listing |
||||
| Cacatac | cacatac | link | redirect | Cacatac See also: Index Listing |
||||
| Fireflea | fireflea | link | redirect | Fireflea See also: Index Listing |
||||
| Geega | geega | link | redirect | Geega See also: Index Listing |
||||
| Metaree | metaree | link | redirect | Metaree See also: Index Listing |
||||
| Mini-Kraid | mini-kraid | link | redirect | Mini-Kraid See also: Index Listing |
||||
| Puyo | puyo | link | redirect | Puyo See also: Index Listing |
||||
| Ripper | ripper | link | redirect | Ripper See also: Index Listing |
||||
| Ripper 2 (red) | ripper2red | link | redirect | Ripper 2 (red) See also: Index Listing |
||||
| Sm. Sidehopper | smsidehopper | link | redirect | Sm. Sidehopper See also: Index Listing |
||||
| Zeela | zeela | link | redirect | Zeela See also: Index Listing |
||||
| Zero | zero | link | redirect | Zero See also: Index Listing |
||||
| Atomic | atomic | link | redirect | Atomic See also: Index Listing |
||||
| Bull | bull | link | redirect | Bull See also: Index Listing |
||||
| Covern | covern | link | redirect | Covern See also: Index Listing |
||||
| Kihunter (yellow) | kihunteryellow | link | redirect | Kihunter (yellow) See also: Index Listing |
||||
| Workrobot | workrobot | link | redirect | Workrobot See also: Index Listing |
||||
| Evir | evir | link | redirect | Evir See also: Index Listing |
||||
| Kame (Tatori) | kametatori | link | redirect | Kame (Tatori) See also: Index Listing |
||||
| Kame Baby | kamebaby | link | redirect | Kame Baby See also: Index Listing |
||||
| Menu | menu | link | redirect | Menu See also: Index Listing |
||||
| Mochtroid | mochtroid | link | redirect | Mochtroid See also: Index Listing |
||||
| Oum | oum | link | redirect | Oum See also: Index Listing |
||||
| Owtch | owtch | link | redirect | Owtch See also: Index Listing |
||||
| Powamp | powamp | link | redirect | Powamp See also: Index Listing |
||||
| Shaktool | shaktool | link | redirect | Shaktool See also: Index Listing |
||||
| Pink Space Pirate (standing) | pinkspacepiratestanding | link | redirect | Pink Space Pirate (standing) See also: Index Listing |
||||
| Pink Space Pirate (wall) | pinkspacepiratewall | link | redirect | Pink Space Pirate (wall) See also: Index Listing |
||||
| Yard | yard | link | redirect | Yard See also: Index Listing |
||||
| Zoa | zoa | link | redirect | Zoa See also: Index Listing |
||||
| Dessgeega | dessgeega | link | redirect | Dessgeega See also: Index Listing |
||||
| Dragon | dragon | link | redirect | Dragon See also: Index Listing |
||||
| Fune | fune | link | redirect | Fune See also: Index Listing |
||||
| Gamet | gamet | link | redirect | Gamet See also: Index Listing |
||||
| Geruta | geruta | link | redirect | Geruta See also: Index Listing |
||||
| Holtz | holtz | link | redirect | Holtz See also: Index Listing |
||||
| Kihunter (red) | kihunterred | link | redirect | Kihunter (red) See also: Index Listing |
||||
| Magdollite | magdollite | link | redirect | Magdollite See also: Index Listing |
||||
| Mella | mella | link | redirect | Mella See also: Index Listing |
||||
| Multiviola | multiviola | link | redirect | Multiviola See also: Index Listing |
||||
| Namihe | namihe | link | redirect | Namihe See also: Index Listing |
||||
| Puromi | puromi | link | redirect | Puromi See also: Index Listing |
||||
| Sm. Dessgeega | smdessgeega | link | redirect | Sm. Dessgeega See also: Index Listing |
||||
| Sova | sova | link | redirect | Sova See also: Index Listing |
||||
| Red Space Pirate (standing) | redspacepiratestanding | link | redirect | Red Space Pirate (standing) See also: Index Listing |
||||
| Yellow Space Pirate (standing) | yellowspacepiratestanding | link | redirect | Yellow Space Pirate (standing) See also: Index Listing |
||||
| Yellow Space Pirate (wall) | yellowspacepiratewall | link | redirect | Yellow Space Pirate (wall) See also: Index Listing |
||||
| Space Pirate (fighting) | spacepiratefighting | link | redirect | Space Pirate (fighting) See also: Index Listing |
||||
| Squeept | squeept | link | redirect | Squeept See also: Index Listing |
||||
| Viola | viola | link | redirect | Viola See also: Index Listing |
||||
| Sidehopper | sidehopper | link | redirect | Sidehopper See also: Index Listing |
||||
| Metroid | metroid | link | redirect | Metroid See also: Index Listing |
||||
| Rinka | rinka | link | redirect | Rinka See also: Index Listing |
||||
| Tourian Space Pirate (all) | tourianspacepirateall | link | redirect | Tourian Space Pirate (all) See also: Index Listing |
||||
| Blue Sidehopper | bluesidehopper | link | redirect | Blue Sidehopper See also: Index Listing |
||||
| Custom Climb Pirate | customclimbpirate | link | redirect | Custom Climb Pirate See also: Index Listing |
||||
| Trapped Atomic | trappedatomic | link | redirect | Trapped Atomic See also: Index Listing |
||||
| Custom Covern (Bull) | customcovernbull | link | redirect | Custom Covern (Bull) See also: Index Listing |
||||
| Custom Covern (Atomic) | customcovernatomic | link | redirect | Custom Covern (Atomic) See also: Index Listing |
||||
| Kzan | kzan | link | redirect | Kzan See also: Index Listing |
||||
| Ceres Ridley | ceresridley | link | redirect | Ceres Ridley See also: Index Listing |
||||
| Bomb Torizo | bombtorizo | link | redirect | Bomb Torizo See also: Index Listing |
||||
| Spore Spawn | sporespawn | link | redirect | Spore Spawn See also: Index Listing |
||||
| Kraid | kraid | link | redirect | Kraid See also: Index Listing |
||||
| Crocomire | crocomire | link | redirect | Crocomire See also: Index Listing |
||||
| Phantoon | phantoon | link | redirect | Phantoon See also: Index Listing |
||||
| Botwoon 1 | botwoon1 | link | redirect | Botwoon 1 See also: Index Listing |
||||
| Botwoon 2 | botwoon2 | link | redirect | Botwoon 2 See also: Index Listing |
||||
| Reverse Botwoon 1 | reversebotwoon1 | link | redirect | Reverse Botwoon 1 See also: Index Listing |
||||
| Reverse Botwoon 2 | reversebotwoon2 | link | redirect | Reverse Botwoon 2 See also: Index Listing |
||||
| Draygon | draygon | link | redirect | Draygon See also: Index Listing |
||||
| Golden Torizo | goldentorizo | link | redirect | Golden Torizo See also: Index Listing |
||||
| Ridley | ridley | link | redirect | Ridley See also: Index Listing |
||||
| Mother Brain 1 | motherbrain1 | link | redirect | Mother Brain 1 See also: Index Listing |
||||
| Mother Brain 2 | motherbrain2 | link | redirect | Mother Brain 2 See also: Index Listing |
||||
| Mother Brain 3 | motherbrain3 | link | redirect | Mother Brain 3 See also: Index Listing |
||||
| 58 Escape | 58escape | Array
(
[0] => room5
)
|
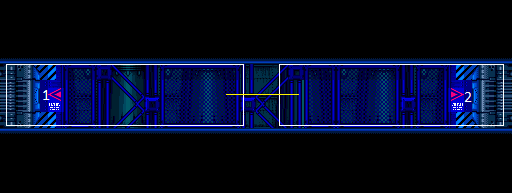 |
link | Ceres 58 EscapeWiki |
|||
| Acid Snakes Tunnel | acidsnakestunnel | Array
(
[0] => room119
)
|
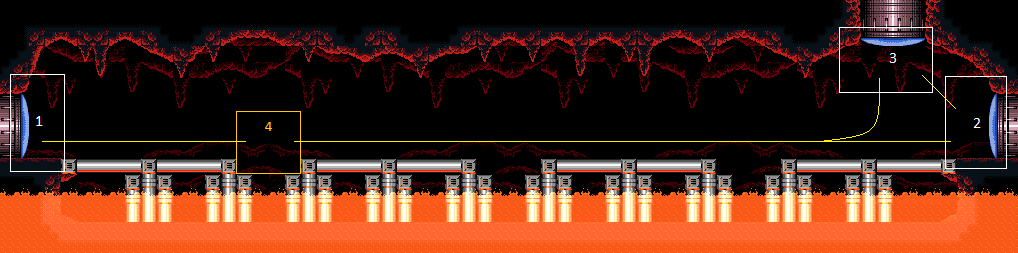 |
link | Norfair / East Acid Snakes TunnelWiki |
|||
| Acid Statue Room | acidstatueroom | Array
(
[0] => room149
)
|
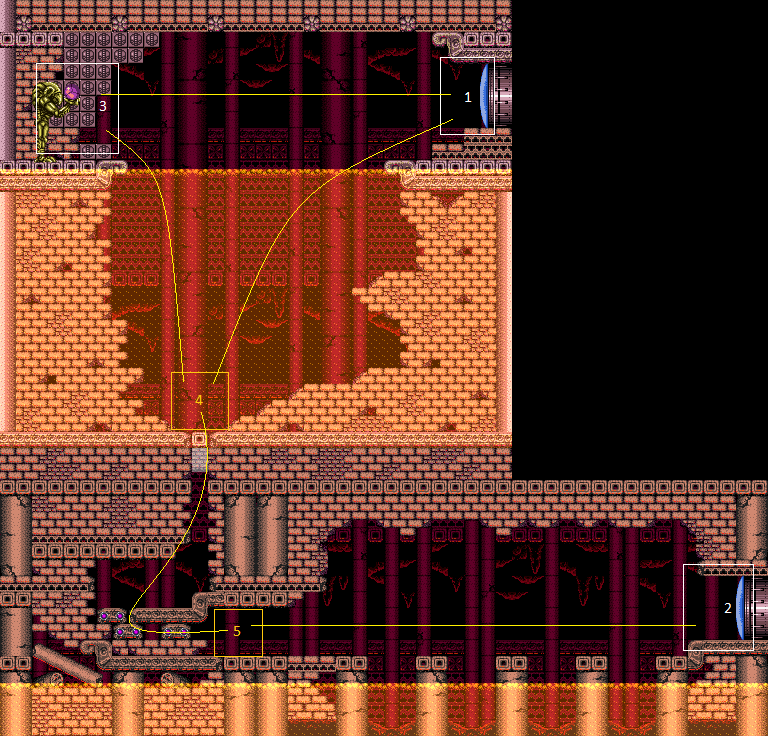 |
link | Lower Norfair / West Acid Statue RoomWiki |
|||
| Alpha Power Bomb Room | alphapowerbombroom | Array
(
[0] => room76
)
|
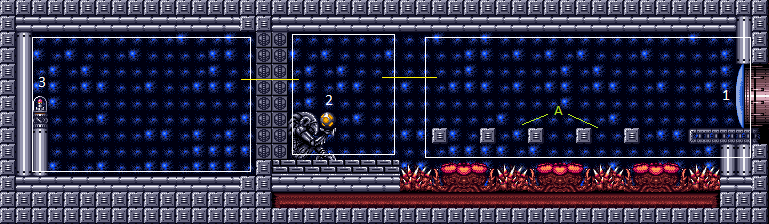 |
link | Brinstar / Red Alpha Power Bomb RoomWiki |
|||
| Amphitheatre | amphitheatre | Array
(
[0] => room136
)
|
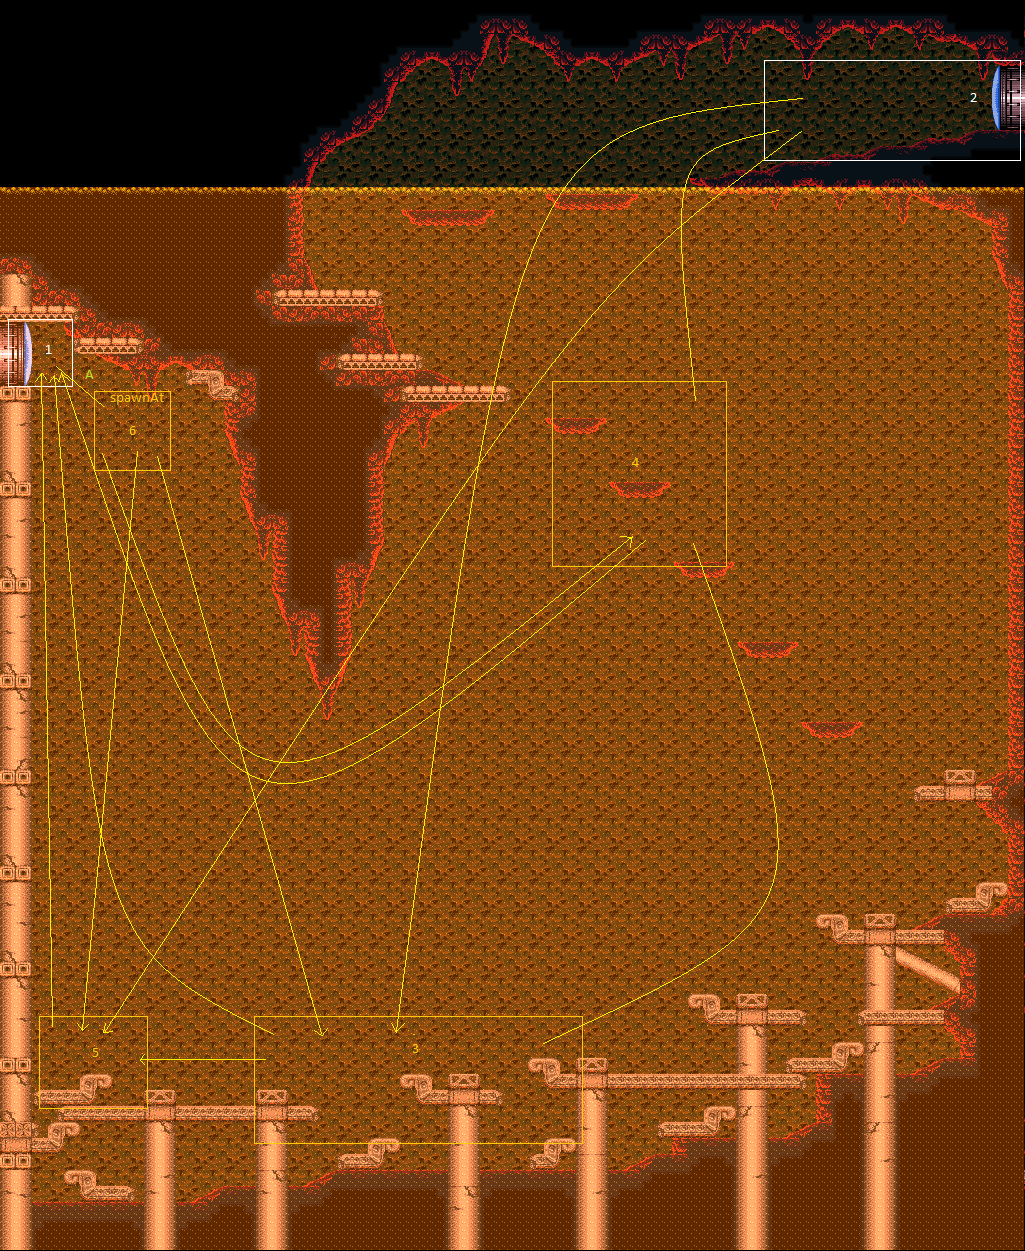 |
link | Lower Norfair / East AmphitheatreWiki |
|||
| Aqueduct | aqueduct | Array
(
[0] => room183
)
|
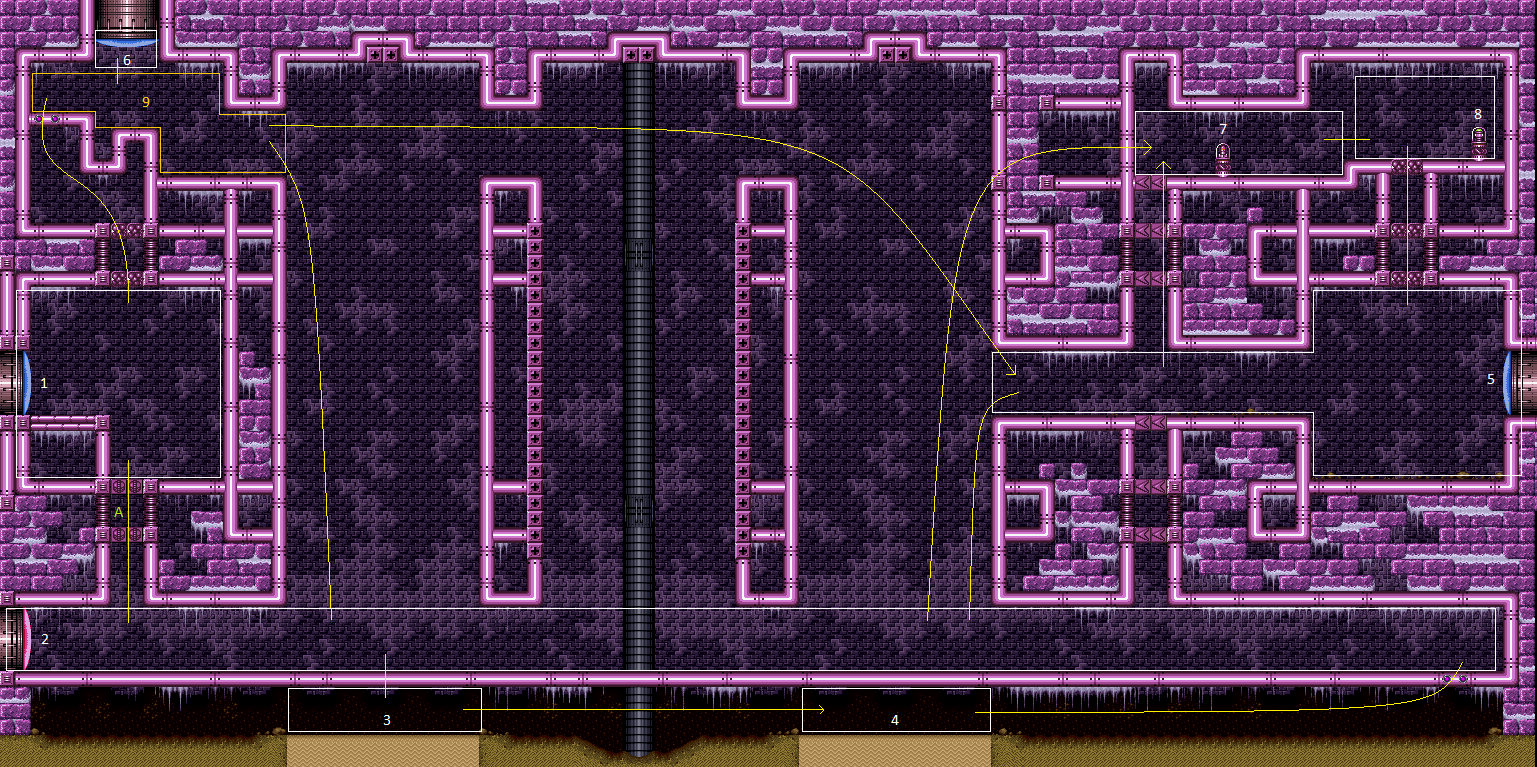 |
link | Maridia / Inner / Pink AqueductWiki |
|||
| Aqueduct Save Room | aqueductsaveroom | Array
(
[0] => room182
)
|
 |
link | Maridia / Inner / Pink Aqueduct Save RoomWiki |
|||
| Assembly Line | assemblyline | Array
(
[0] => room168
)
|
 |
link | Wrecked Ship Assembly LineWiki |
|||
| Attic | attic | Array
(
[0] => room160
)
|
 |
link | Wrecked Ship AtticWiki |
|||
| Baby Kraid Room | babykraidroom | Array
(
[0] => room82
)
|
 |
link | Brinstar / Kraid Baby Kraid RoomWiki |
|||
| Basement | basement | Array
(
[0] => room156
)
|
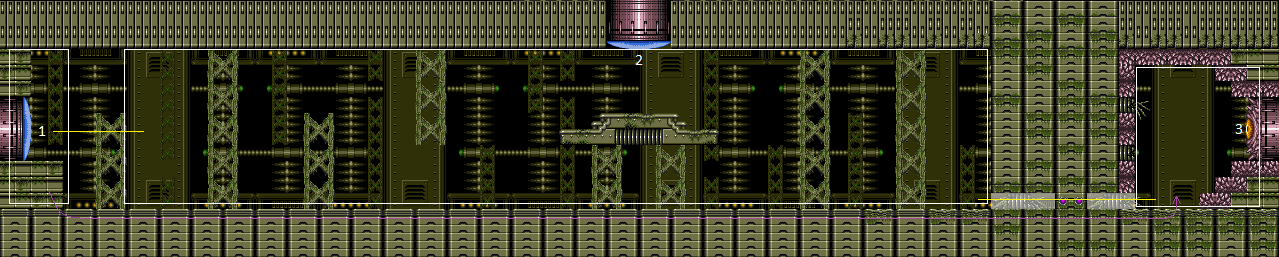 |
link | Wrecked Ship BasementWiki |
|||
| Bat Cave | batcave | Array
(
[0] => room100
)
|
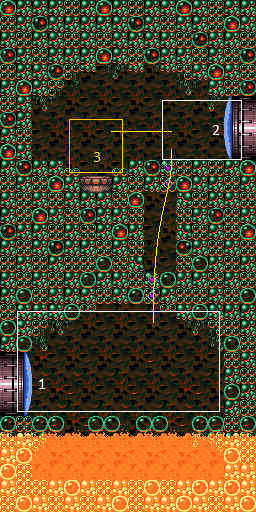 |
link | Norfair / East Bat CaveWiki |
|||
| Bat Room | batroom | Array
(
[0] => room69
)
|
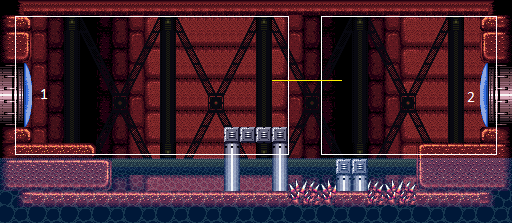 |
link | Brinstar / Red Bat RoomWiki |
|||
| Below Botwoon Energy Tank | belowbotwoonenergytank | Array
(
[0] => room205
)
|
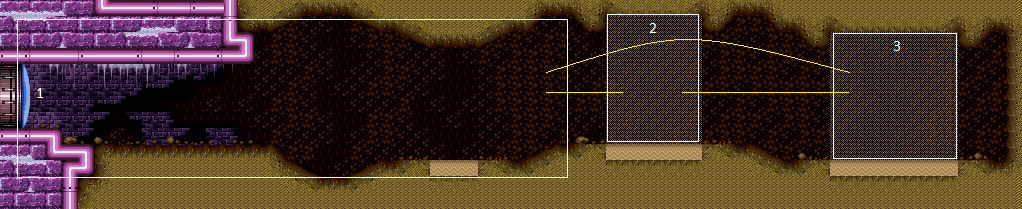 |
link | Maridia / Inner / Pink Below Botwoon Energy TankWiki |
|||
| Below Spazer | belowspazer | Array
(
[0] => room70
)
|
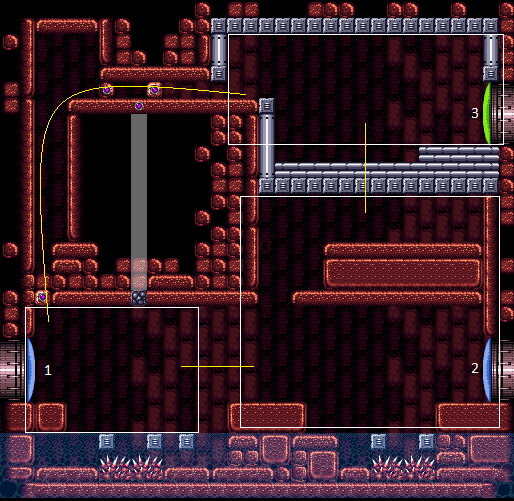 |
link | Brinstar / Red Below SpazerWiki |
|||
| Beta Power Bomb Room | betapowerbombroom | Array
(
[0] => room77
)
|
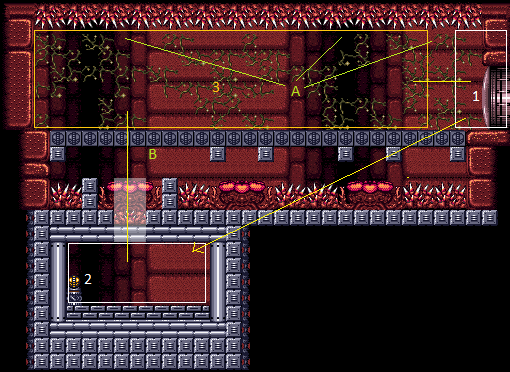 |
link | Brinstar / Red Beta Power Bomb RoomWiki |
|||
| Big Boy Room | bigboyroom | Array
(
[0] => room232
)
|
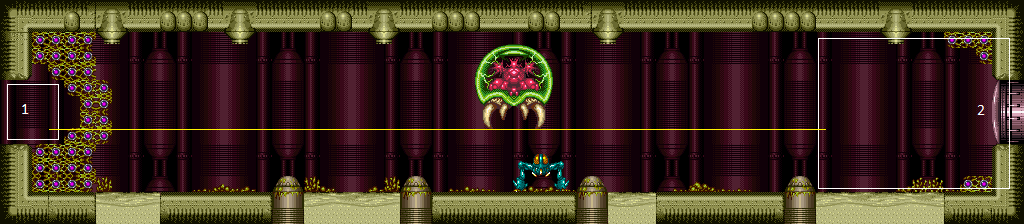 |
link | Tourian Big Boy RoomWiki |
|||
| Big Pink | bigpink | Array
(
[0] => room59
)
|
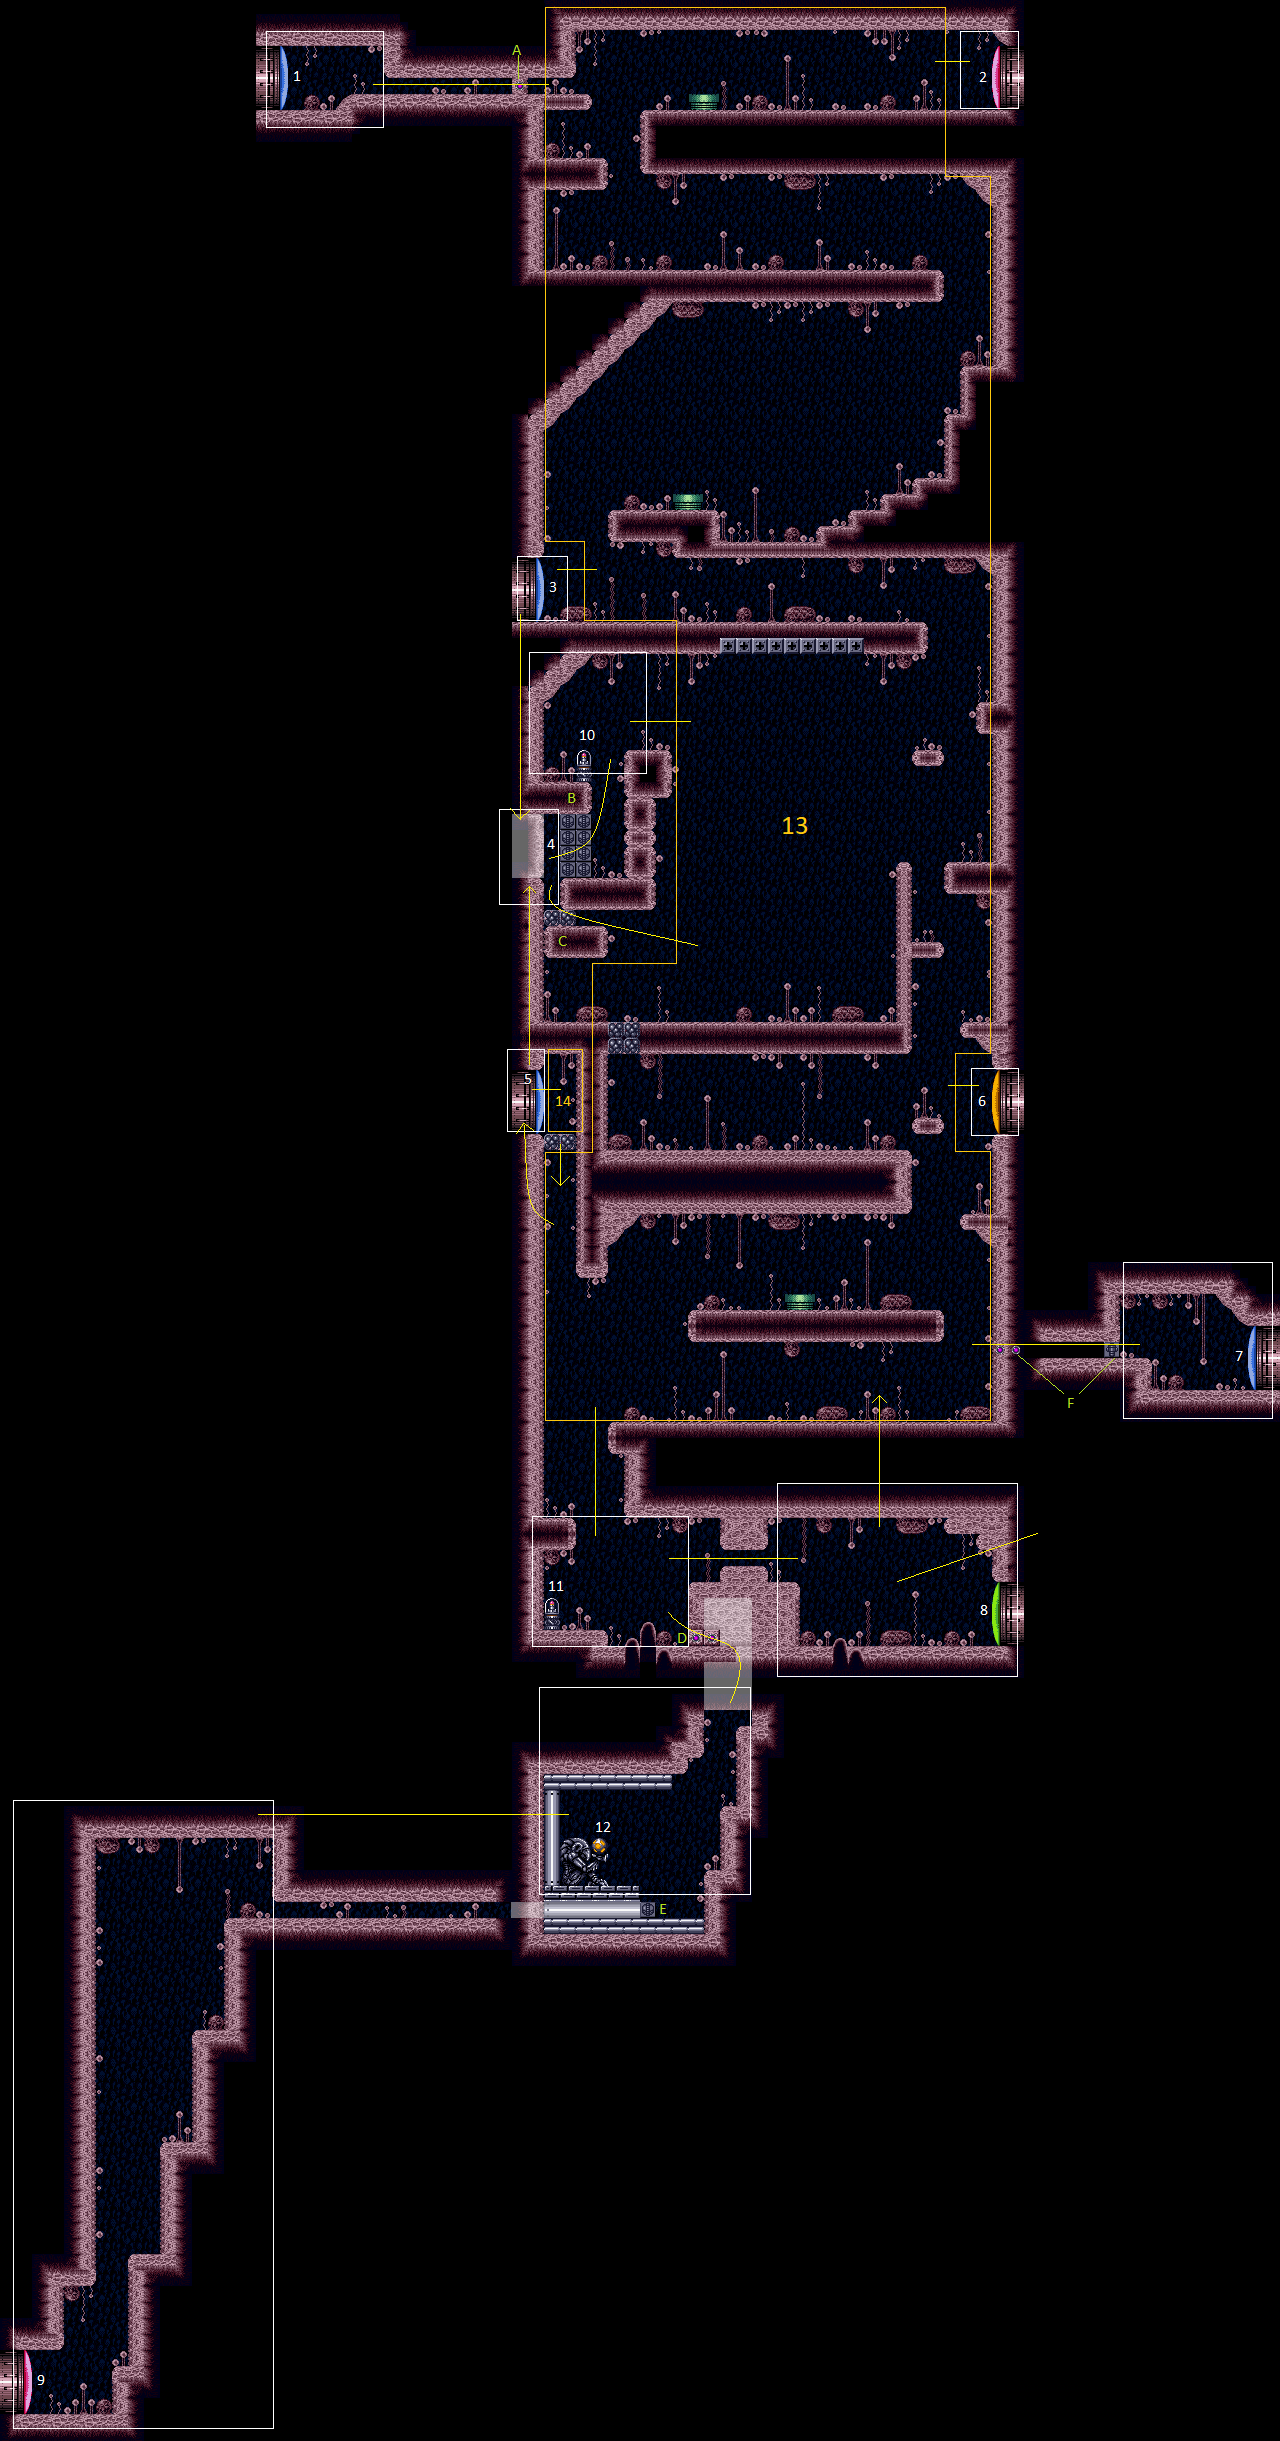 |
link | Brinstar / Pink Big PinkWiki |
|||
| Big Pink Save Room | bigpinksaveroom | Array
(
[0] => room318
)
|
 |
link | Brinstar / Pink Big Pink Save RoomWiki |
|||
| Billy Mays Room | billymaysroom | Array
(
[0] => room43
)
|
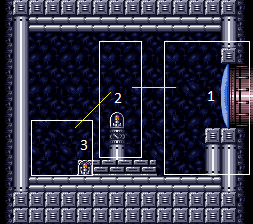 |
link | Brinstar / Blue Billy Mays RoomWiki |
|||
| Blue Brinstar Boulder Room | bluebrinstarboulderroom | Array
(
[0] => room42
)
|
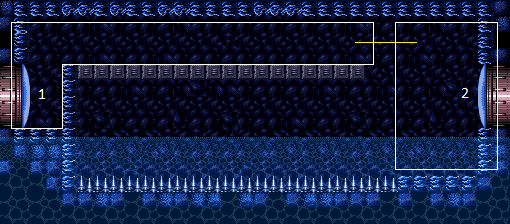 |
link | Brinstar / Blue Blue Brinstar Boulder RoomWiki |
|||
| Blue Brinstar Elevator Room | bluebrinstarelevatorroom | Array
(
[0] => room306
)
|
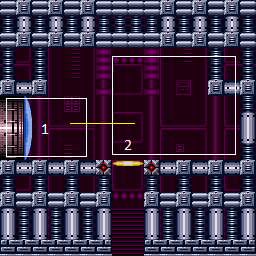 |
link | Crateria / Central Blue Brinstar Elevator RoomWiki |
|||
| Blue Brinstar Energy Tank Room | bluebrinstarenergytankroom | Array
(
[0] => room41
)
|
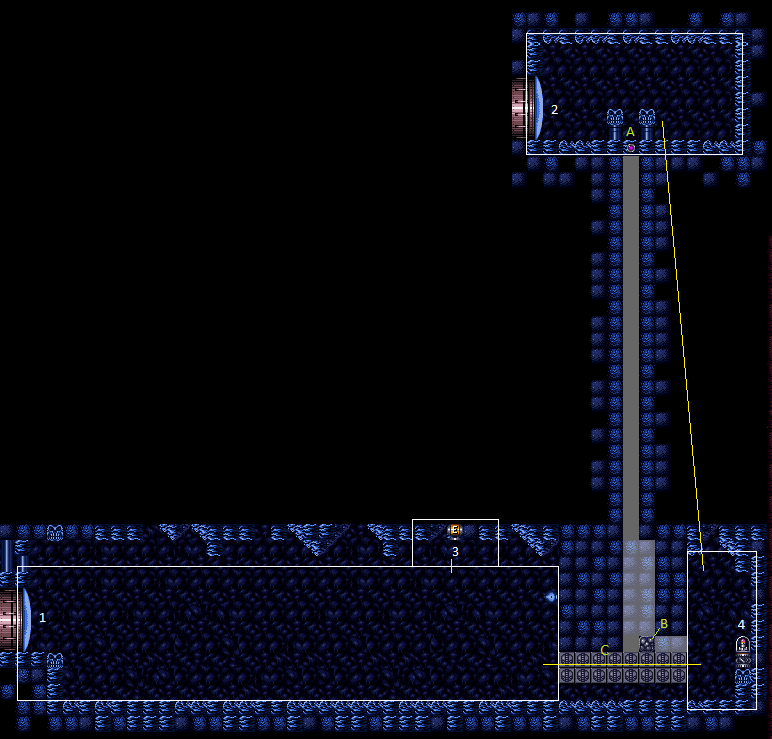 |
link | Brinstar / Blue Blue Brinstar Energy Tank RoomWiki |
|||
| Blue Hopper Room | bluehopperroom | Array
(
[0] => room230
)
|
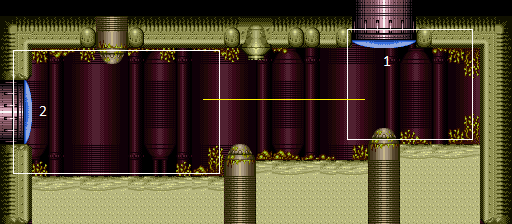 |
link | Tourian Blue Hopper RoomWiki |
|||
| Bomb Torizo Room | bombtorizoroom | Array
(
[0] => room19
)
|
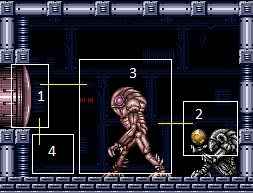 |
link | Crateria / Central Bomb Torizo RoomWiki |
|||
| Botwoon Energy Tank Room | botwoonenergytankroom | Array
(
[0] => room186
)
|
 |
link | Maridia / Inner / Pink Botwoon Energy Tank RoomWiki |
|||
| Botwoon Hallway | botwoonhallway | Array
(
[0] => room184
)
|
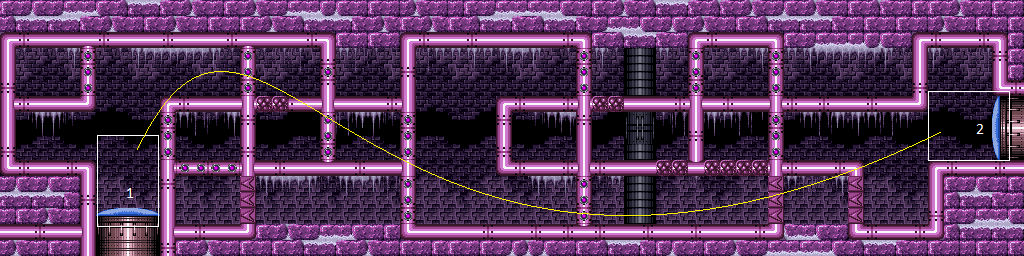 |
link | Maridia / Inner / Pink Botwoon HallwayWiki |
|||
| Botwoon Quicksand Room | botwoonquicksandroom | Array
(
[0] => room204
)
|
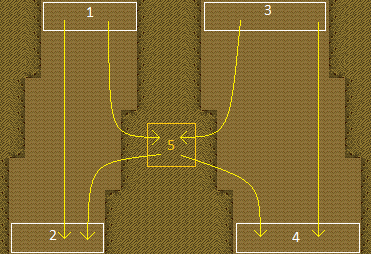 |
link | Maridia / Inner / Pink Botwoon Quicksand RoomWiki |
|||
| Botwoon's Room | botwoonsroom | Array
(
[0] => room185
)
|
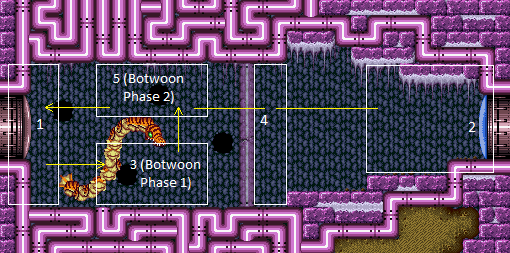 |
link | Maridia / Inner / Pink Botwoon's RoomWiki |
|||
| Bowling Alley | bowlingalley | Array
(
[0] => room161
)
|
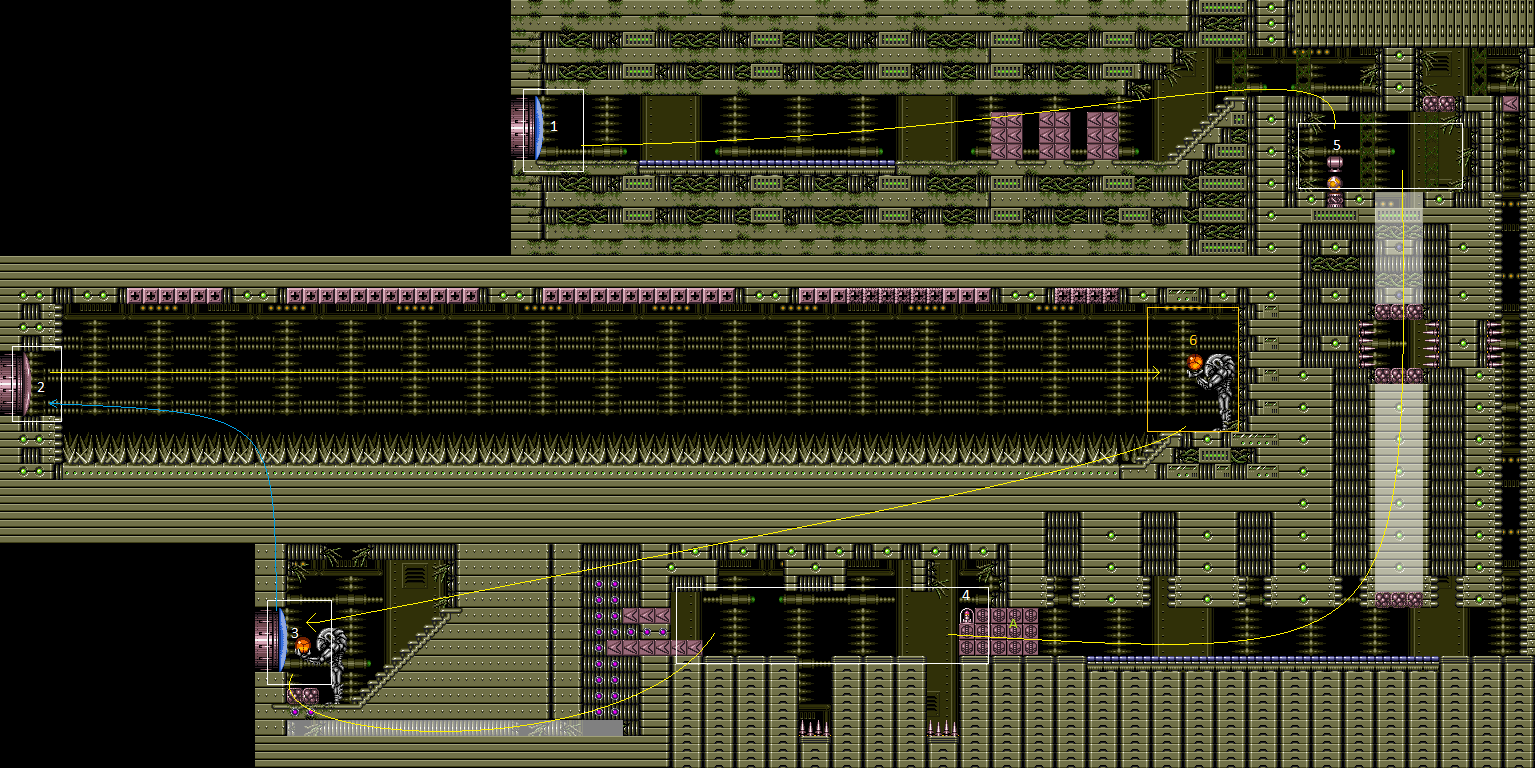 |
link | Wrecked Ship Bowling AlleyWiki |
|||
| Bowling Alley Path | bowlingalleypath | Array
(
[0] => room33
)
|
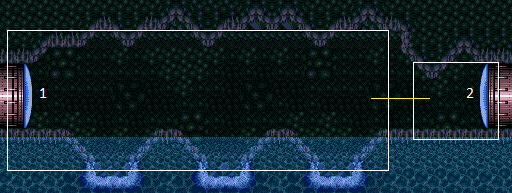 |
link | Crateria / East Bowling Alley PathWiki |
|||
| Boyon Gate Hall | boyongatehall | Array
(
[0] => room200
)
|
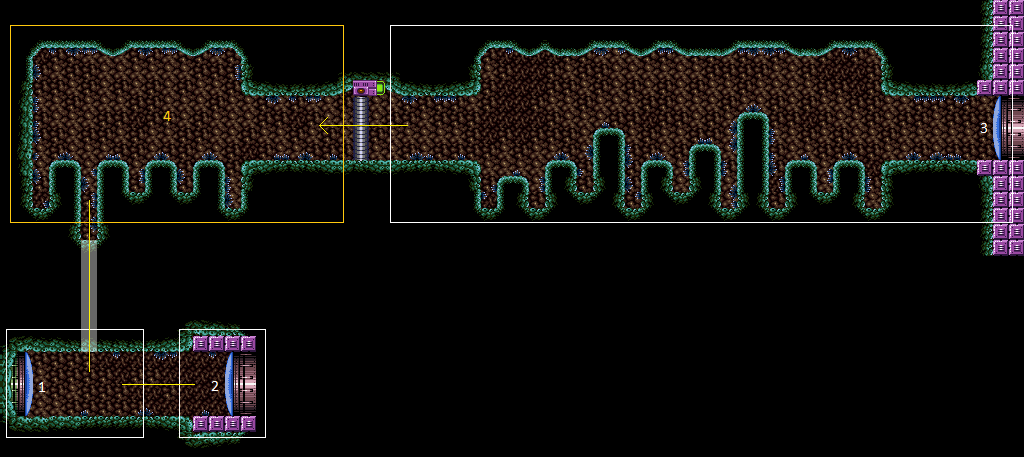 |
link | Maridia / Outer Boyon Gate HallWiki |
|||
| Brinstar Map Room | brinstarmaproom | Array
(
[0] => room48
)
|
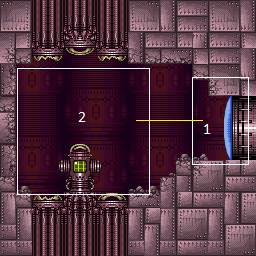 |
link | Brinstar / Green Brinstar Map RoomWiki |
|||
| Brinstar Pre Map Room | brinstarpremaproom | Array
(
[0] => room47
)
|
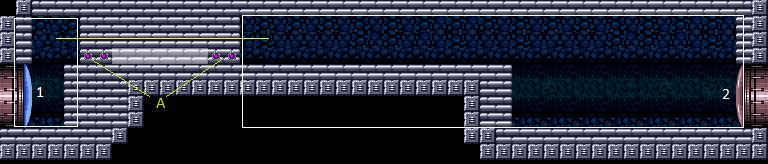 |
link | Brinstar / Green Brinstar Pre Map RoomWiki |
|||
| Brinstar Reserve Tank Room | brinstarreservetankroom | Array
(
[0] => room46
)
|
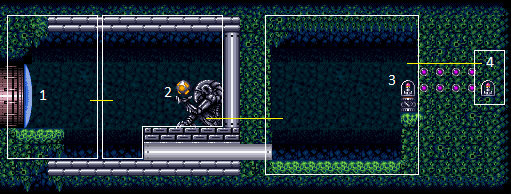 |
link | Brinstar / Green Brinstar Reserve Tank RoomWiki |
|||
| Bubble Mountain | bubblemountain | Array
(
[0] => room97
)
|
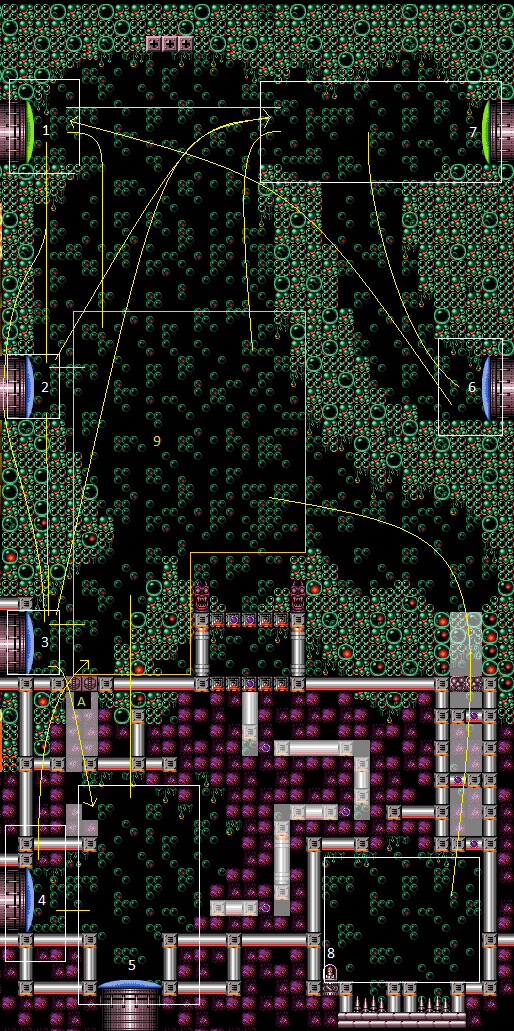 |
link | Norfair / East Bubble MountainWiki |
|||
| Bubble Mountain Save Room | bubblemountainsaveroom | Array
(
[0] => room307
)
|
 |
link | Norfair / East Bubble Mountain Save RoomWiki |
|||
| Bug Sand Hole | bugsandhole | Array
(
[0] => room211
)
|
 |
link | Maridia / Inner / Yellow Bug Sand HoleWiki |
|||
| Business Center | businesscenter | Array
(
[0] => room86
)
|
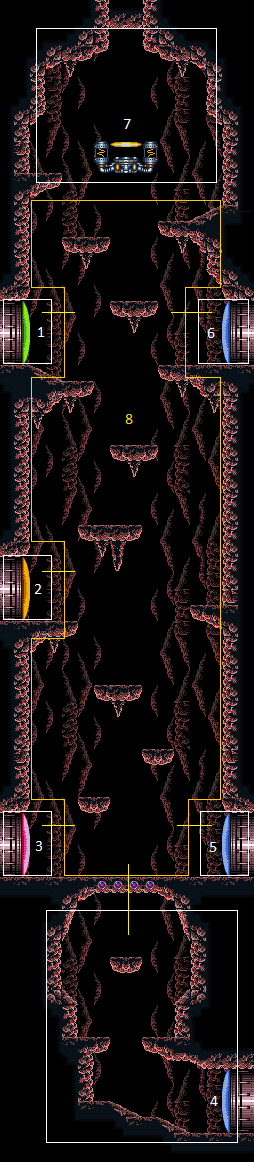 |
link | Norfair / West Business CenterWiki |
|||
| Butterfly Room | butterflyroom | Array
(
[0] => room213
)
|
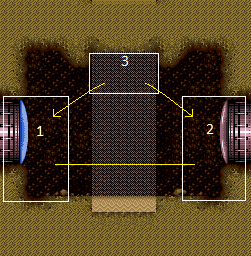 |
link | Maridia / Inner / Yellow Butterfly RoomWiki |
|||
| Caterpillar Room | caterpillarroom | Array
(
[0] => room75
)
|
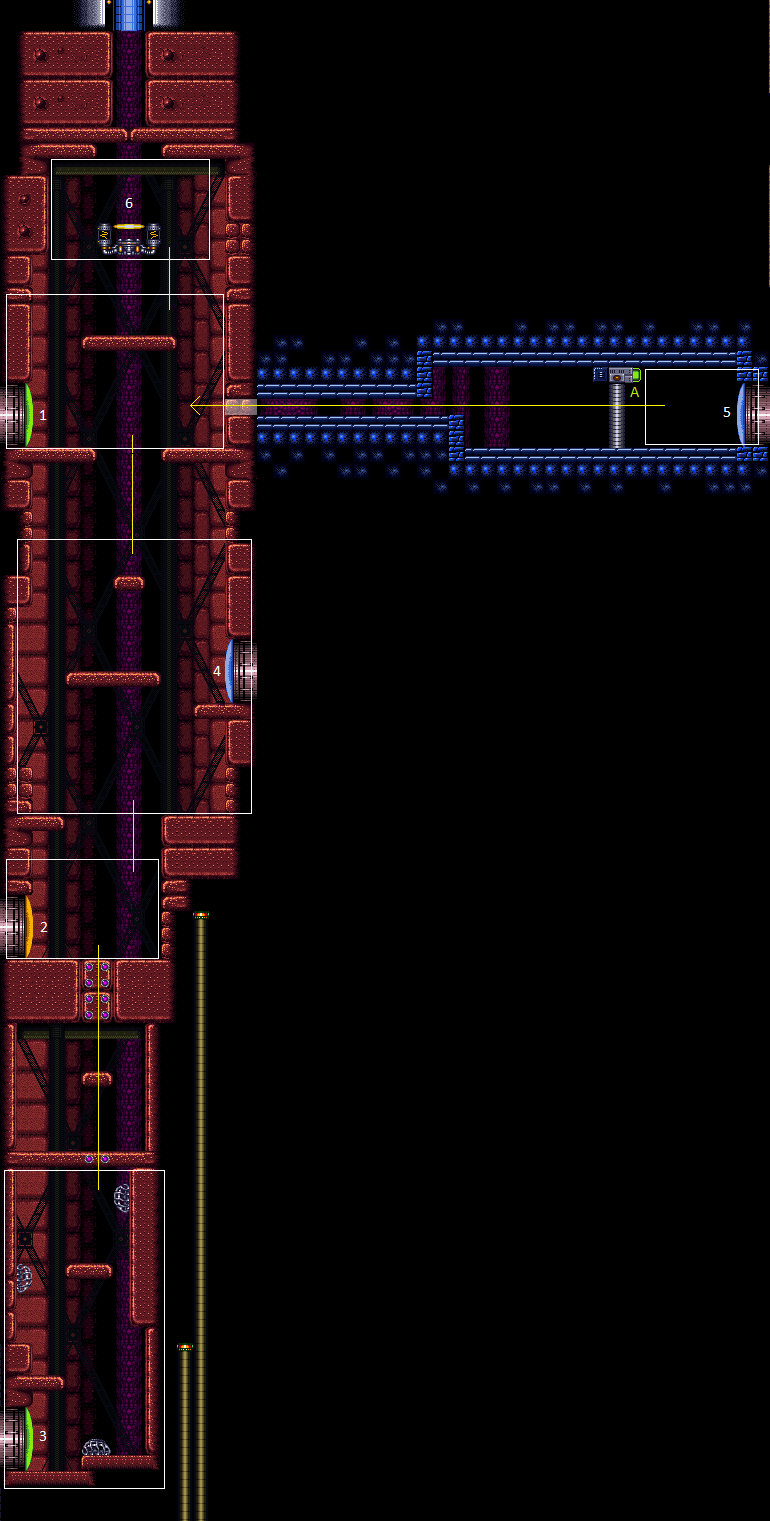 |
link | Brinstar / Red Caterpillar RoomWiki |
|||
| Caterpillar Save Room | caterpillarsaveroom | Array
(
[0] => room320
)
|
 |
link | Brinstar / Red Caterpillar Save RoomWiki |
|||
| Cathedral | cathedral | Array
(
[0] => room91
)
|
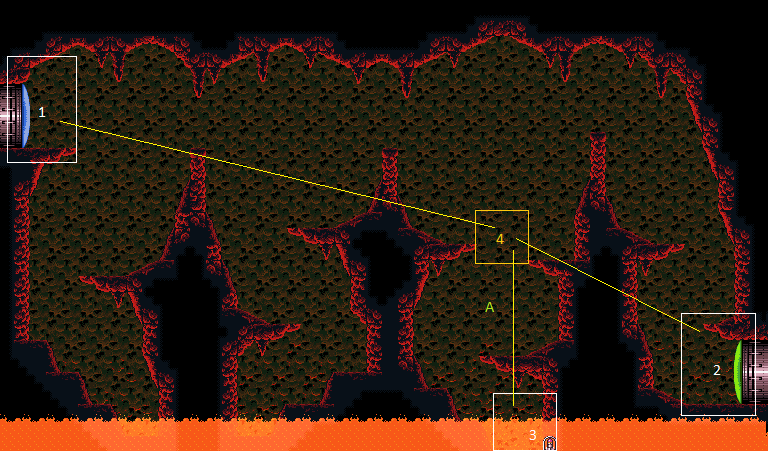 |
link | Norfair / East CathedralWiki |
|||
| Cathedral Entrance | cathedralentrance | Array
(
[0] => room90
)
|
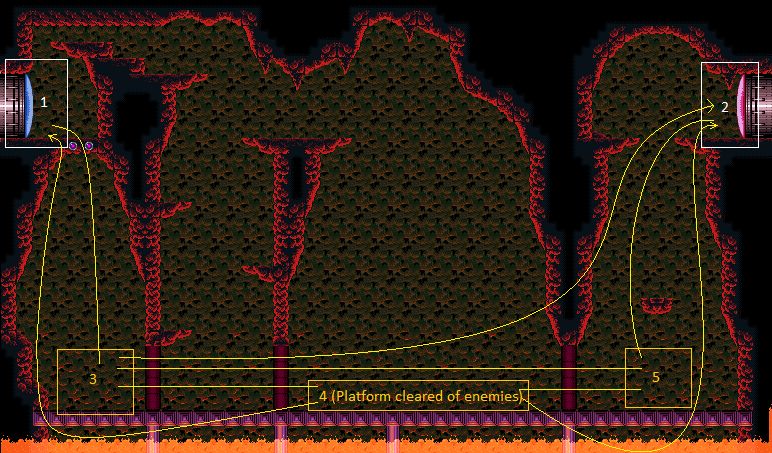 |
link | Norfair / East Cathedral EntranceWiki |
|||
| Ceres Elevator Room | cereselevatorroom | Array
(
[0] => room1
)
|
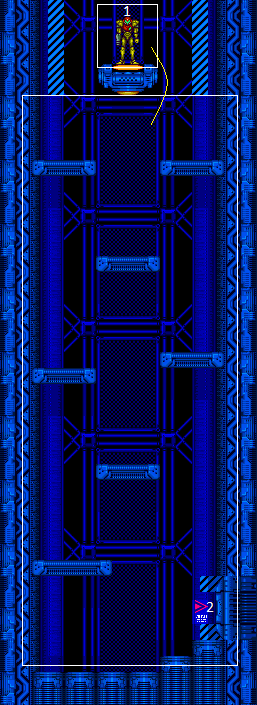 |
link | Ceres Ceres Elevator RoomWiki |
|||
| Ceres Ridley's Room | ceresridleysroom | Array
(
[0] => room6
)
|
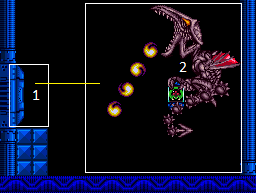 |
link | Ceres Ceres Ridley's RoomWiki |
|||
| Climb | climb | Array
(
[0] => room11
)
|
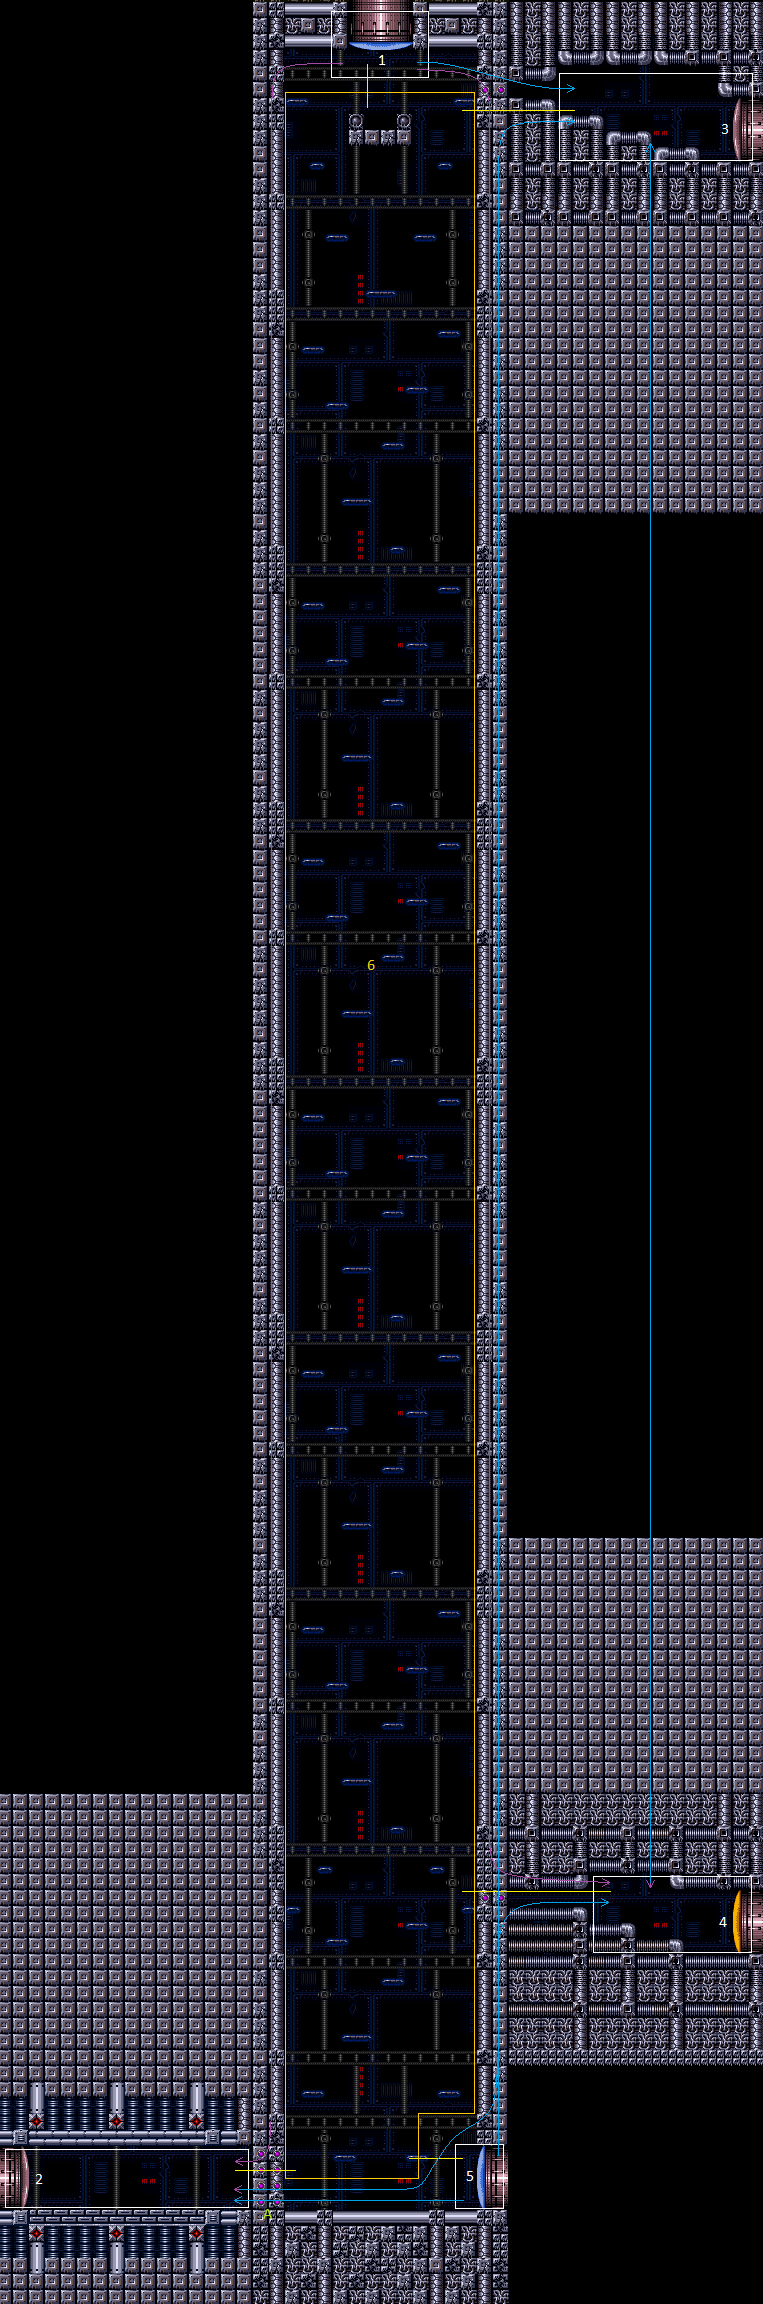 |
link | Crateria / Central ClimbWiki |
|||
| Colosseum | colosseum | Array
(
[0] => room189
)
|
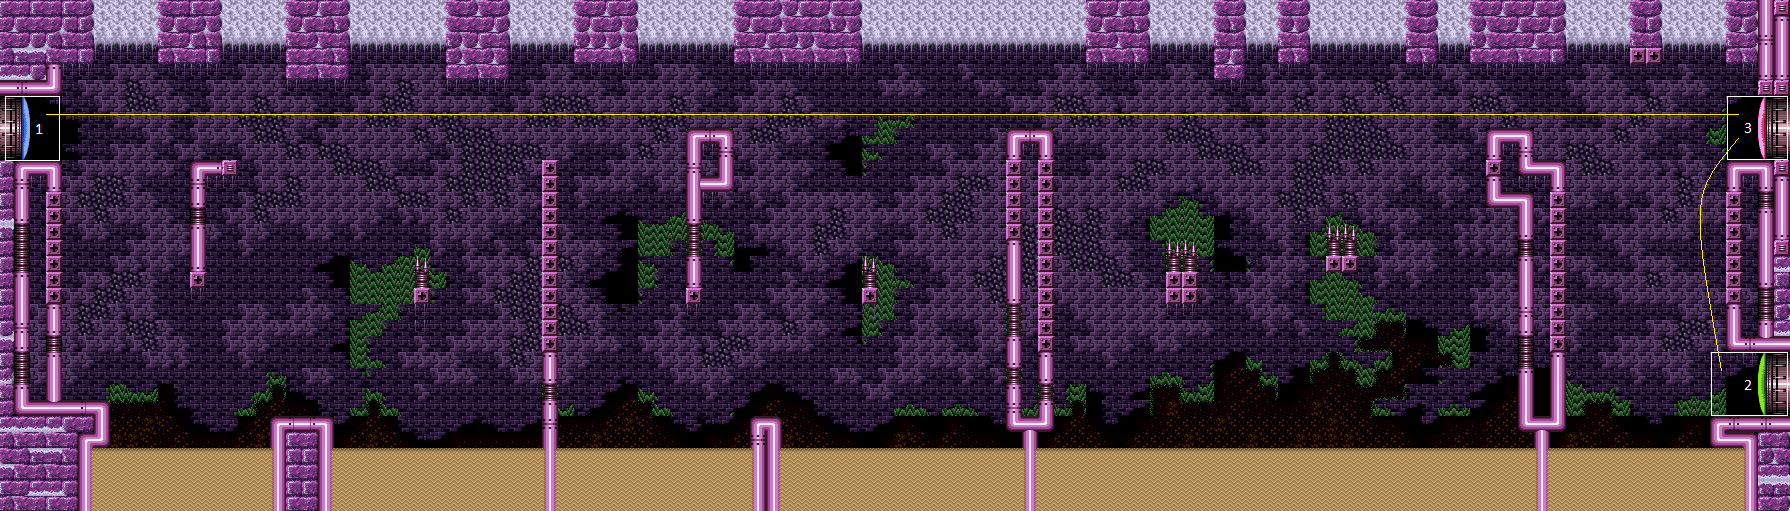 |
link | Maridia / Inner / Pink ColosseumWiki |
|||
| Construction Zone | constructionzone | Array
(
[0] => room39
)
|
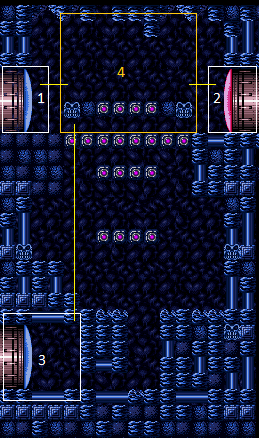 |
link | Brinstar / Blue Construction ZoneWiki |
|||
| Crab Hole | crabhole | Array
(
[0] => room201
)
|
 |
link | Maridia / Outer Crab HoleWiki |
|||
| Crab Maze | crabmaze | Array
(
[0] => room36
)
|
 |
link | Crateria / East Crab MazeWiki |
|||
| Crab Shaft | crabshaft | Array
(
[0] => room175
)
|
 |
link | Maridia / Inner / Pink Crab ShaftWiki |
|||
| Crab Tunnel | crabtunnel | Array
(
[0] => room176
)
|
 |
link | Maridia / Outer Crab TunnelWiki |
|||
| Crateria Kihunter Room | crateriakihunterroom | Array
(
[0] => room24
)
|
 |
link | Crateria / East Crateria Kihunter RoomWiki |
|||
| Crateria Map Room | crateriamaproom | Array
(
[0] => room15
)
|
 |
link | Crateria / Central Crateria Map RoomWiki |
|||
| Crateria Power Bomb Room | crateriapowerbombroom | Array
(
[0] => room28
)
|
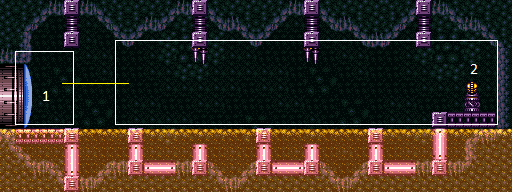 |
link | Crateria / Central Crateria Power Bomb RoomWiki |
|||
| Crateria Save Room | crateriasaveroom | Array
(
[0] => room16
)
|
 |
link | Crateria / Central Crateria Save RoomWiki |
|||
| Crateria Super Room | crateriasuperroom | Array
(
[0] => room29
)
|
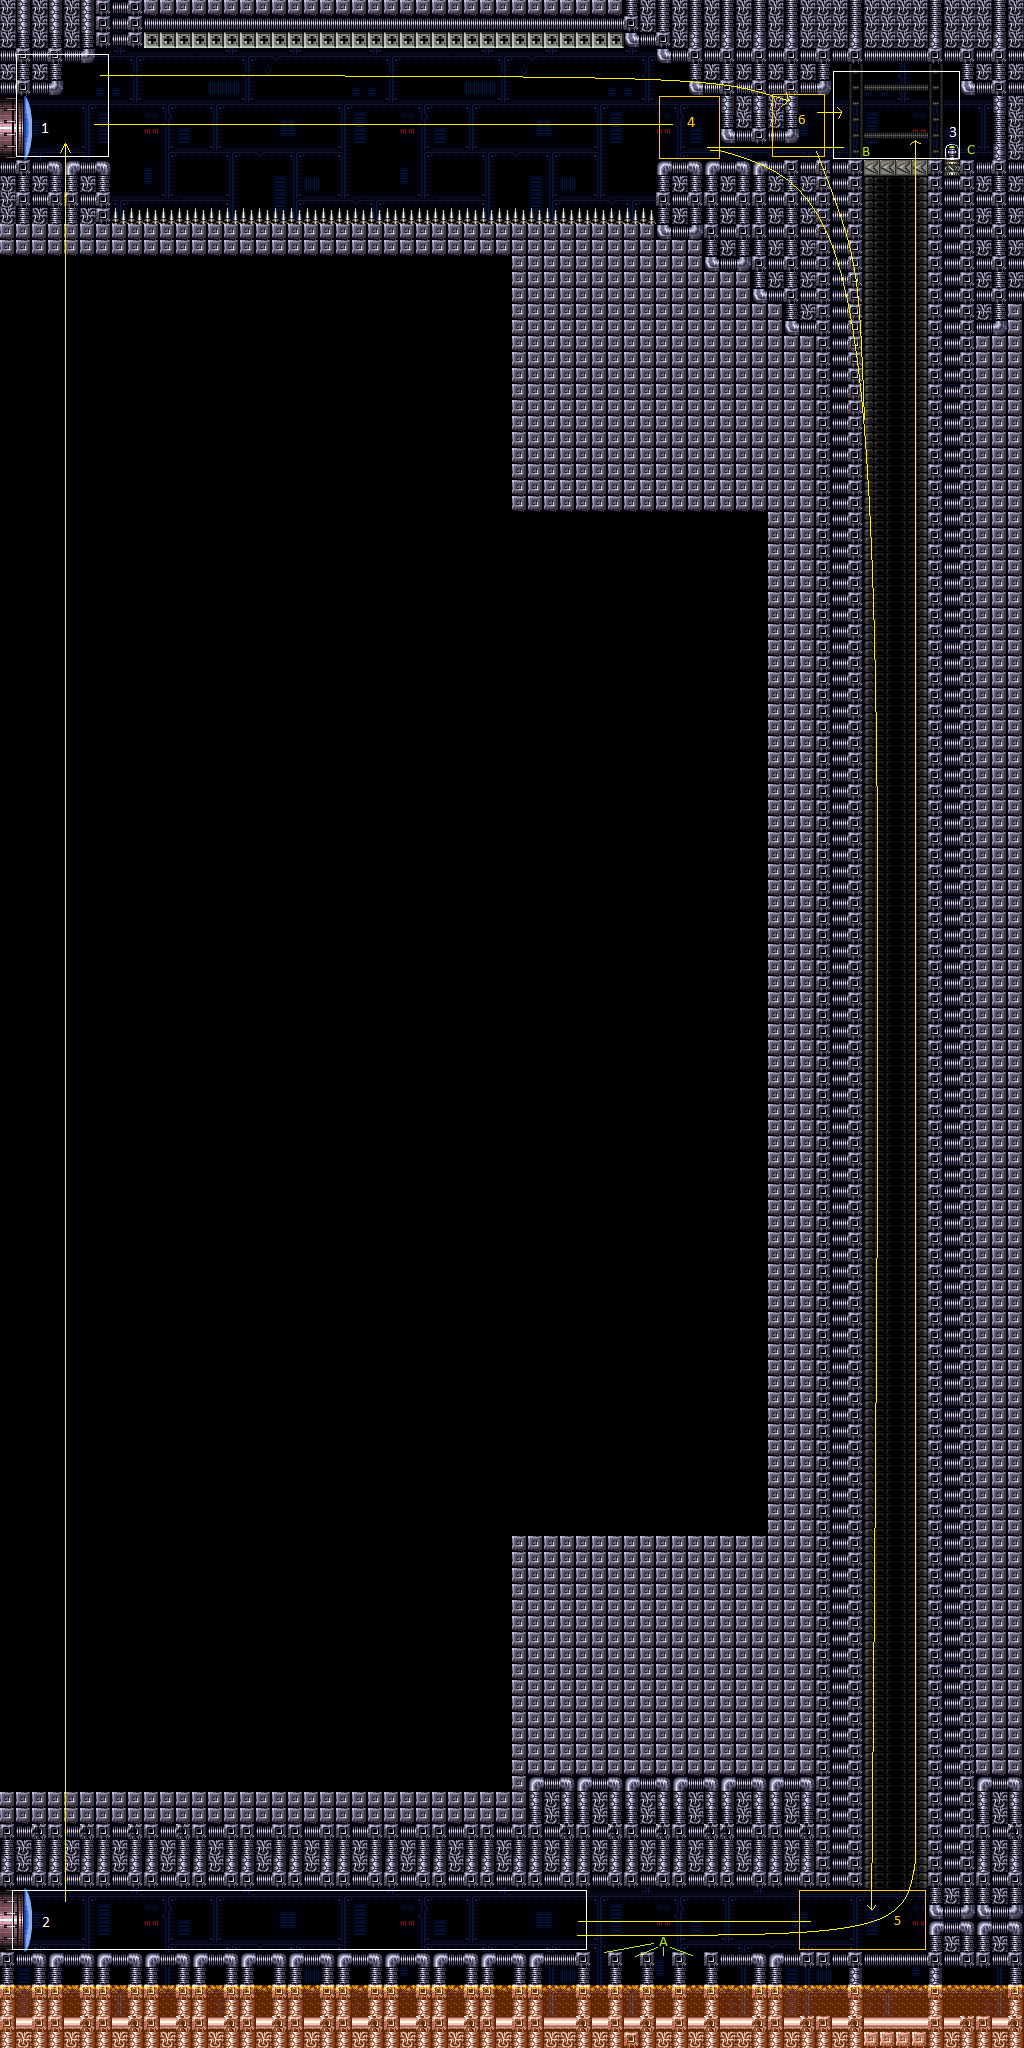 |
link | Crateria / Central Crateria Super RoomWiki |
|||
| Crateria Tube | crateriatube | Array
(
[0] => room9
)
|
 |
link | Crateria / Central Crateria TubeWiki |
|||
| Crocomire Escape | crocomireescape | Array
(
[0] => room121
)
|
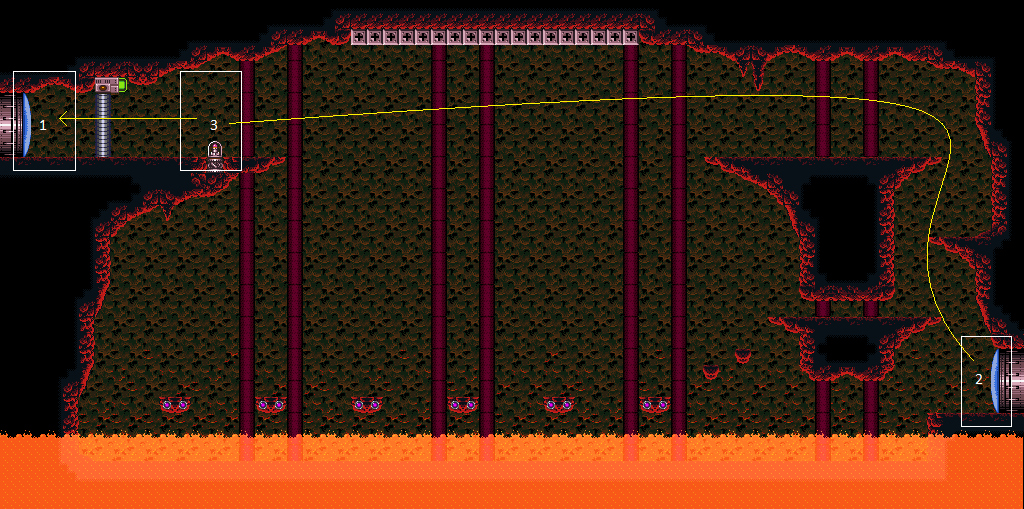 |
link | Norfair / West Crocomire EscapeWiki |
|||
| Crocomire Save Room | crocomiresaveroom | Array
(
[0] => room303
)
|
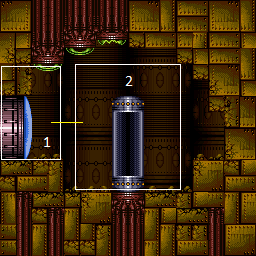 |
link | Norfair / West Crocomire Save RoomWiki |
|||
| Crocomire Speedway | crocomirespeedway | Array
(
[0] => room120
)
|
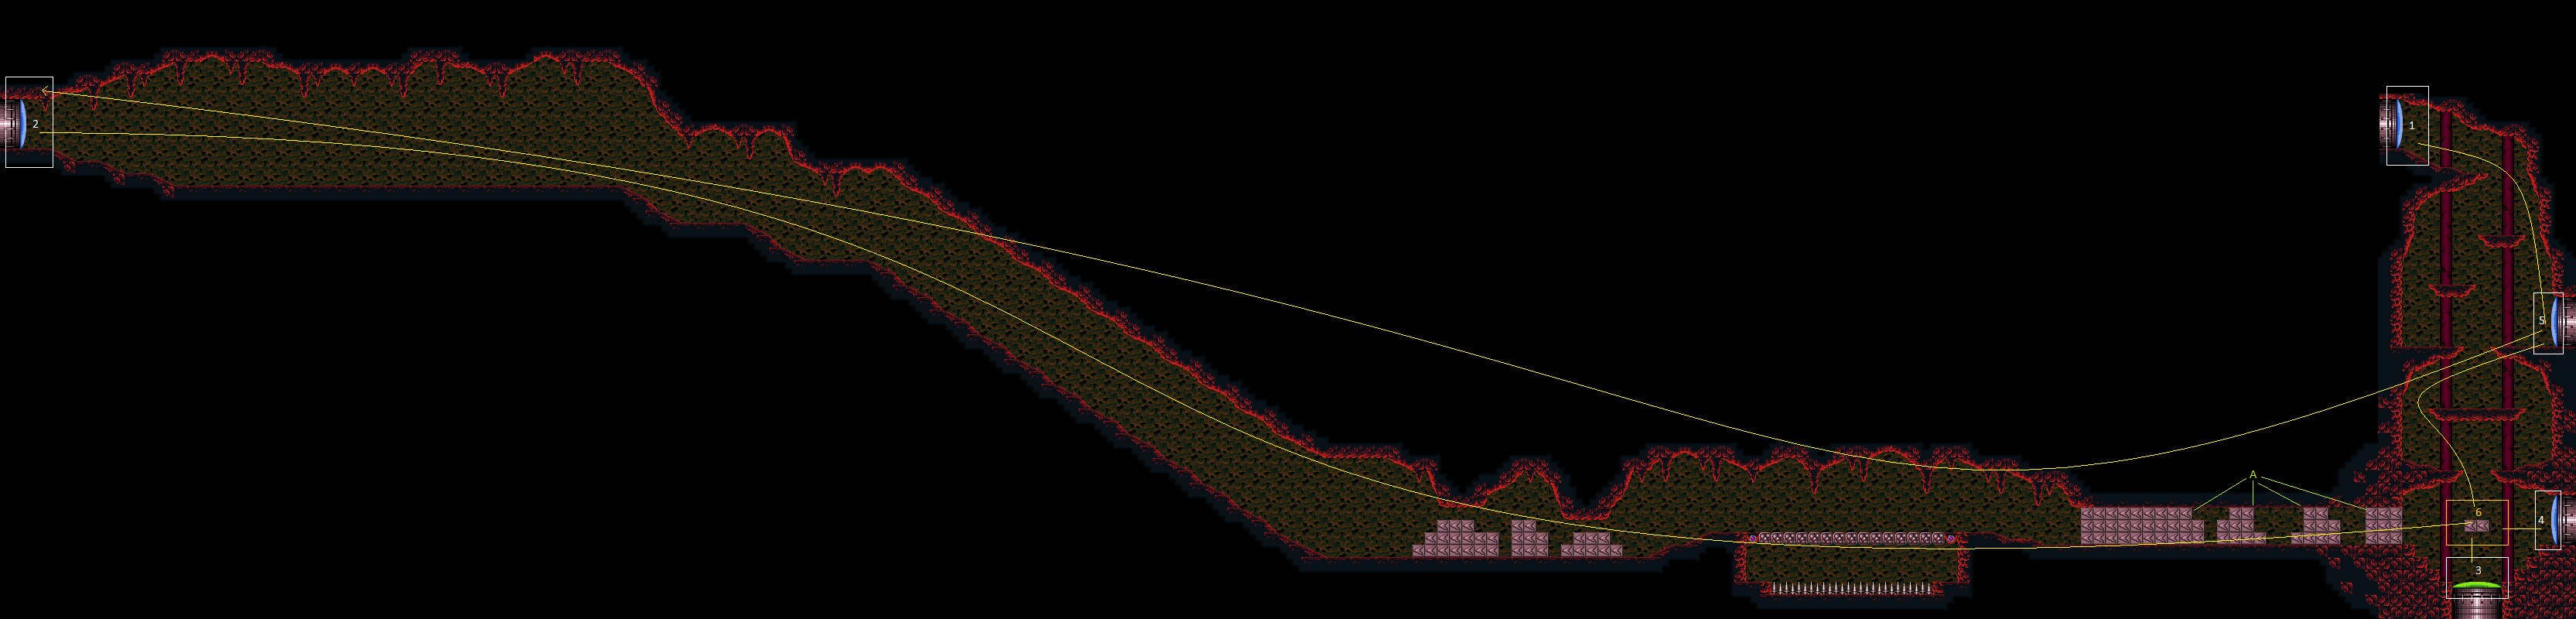 |
link | Norfair / West Crocomire SpeedwayWiki |
|||
| Crocomire's Room | crocomiresroom | Array
(
[0] => room122
)
|
 |
link | Norfair / Crocomire Crocomire's RoomWiki |
|||
| Crumble Shaft | crumbleshaft | Array
(
[0] => room111
)
|
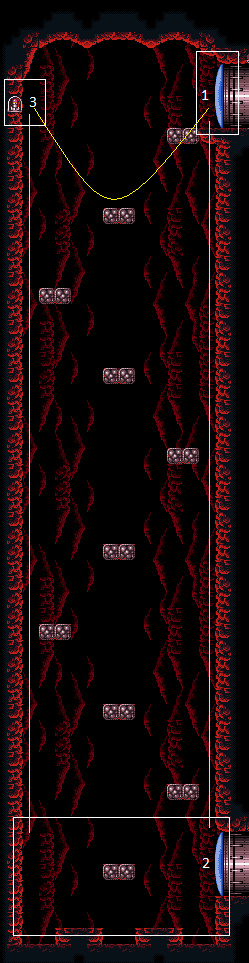 |
link | Norfair / West Crumble ShaftWiki |
|||
| Dachora Energy Refill | dachoraenergyrefill | Array
(
[0] => room317
)
|
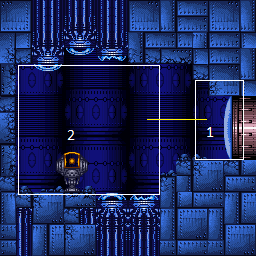 |
link | Brinstar / Pink Dachora Energy RefillWiki |
|||
| Dachora Room | dachoraroom | Array
(
[0] => room58
)
|
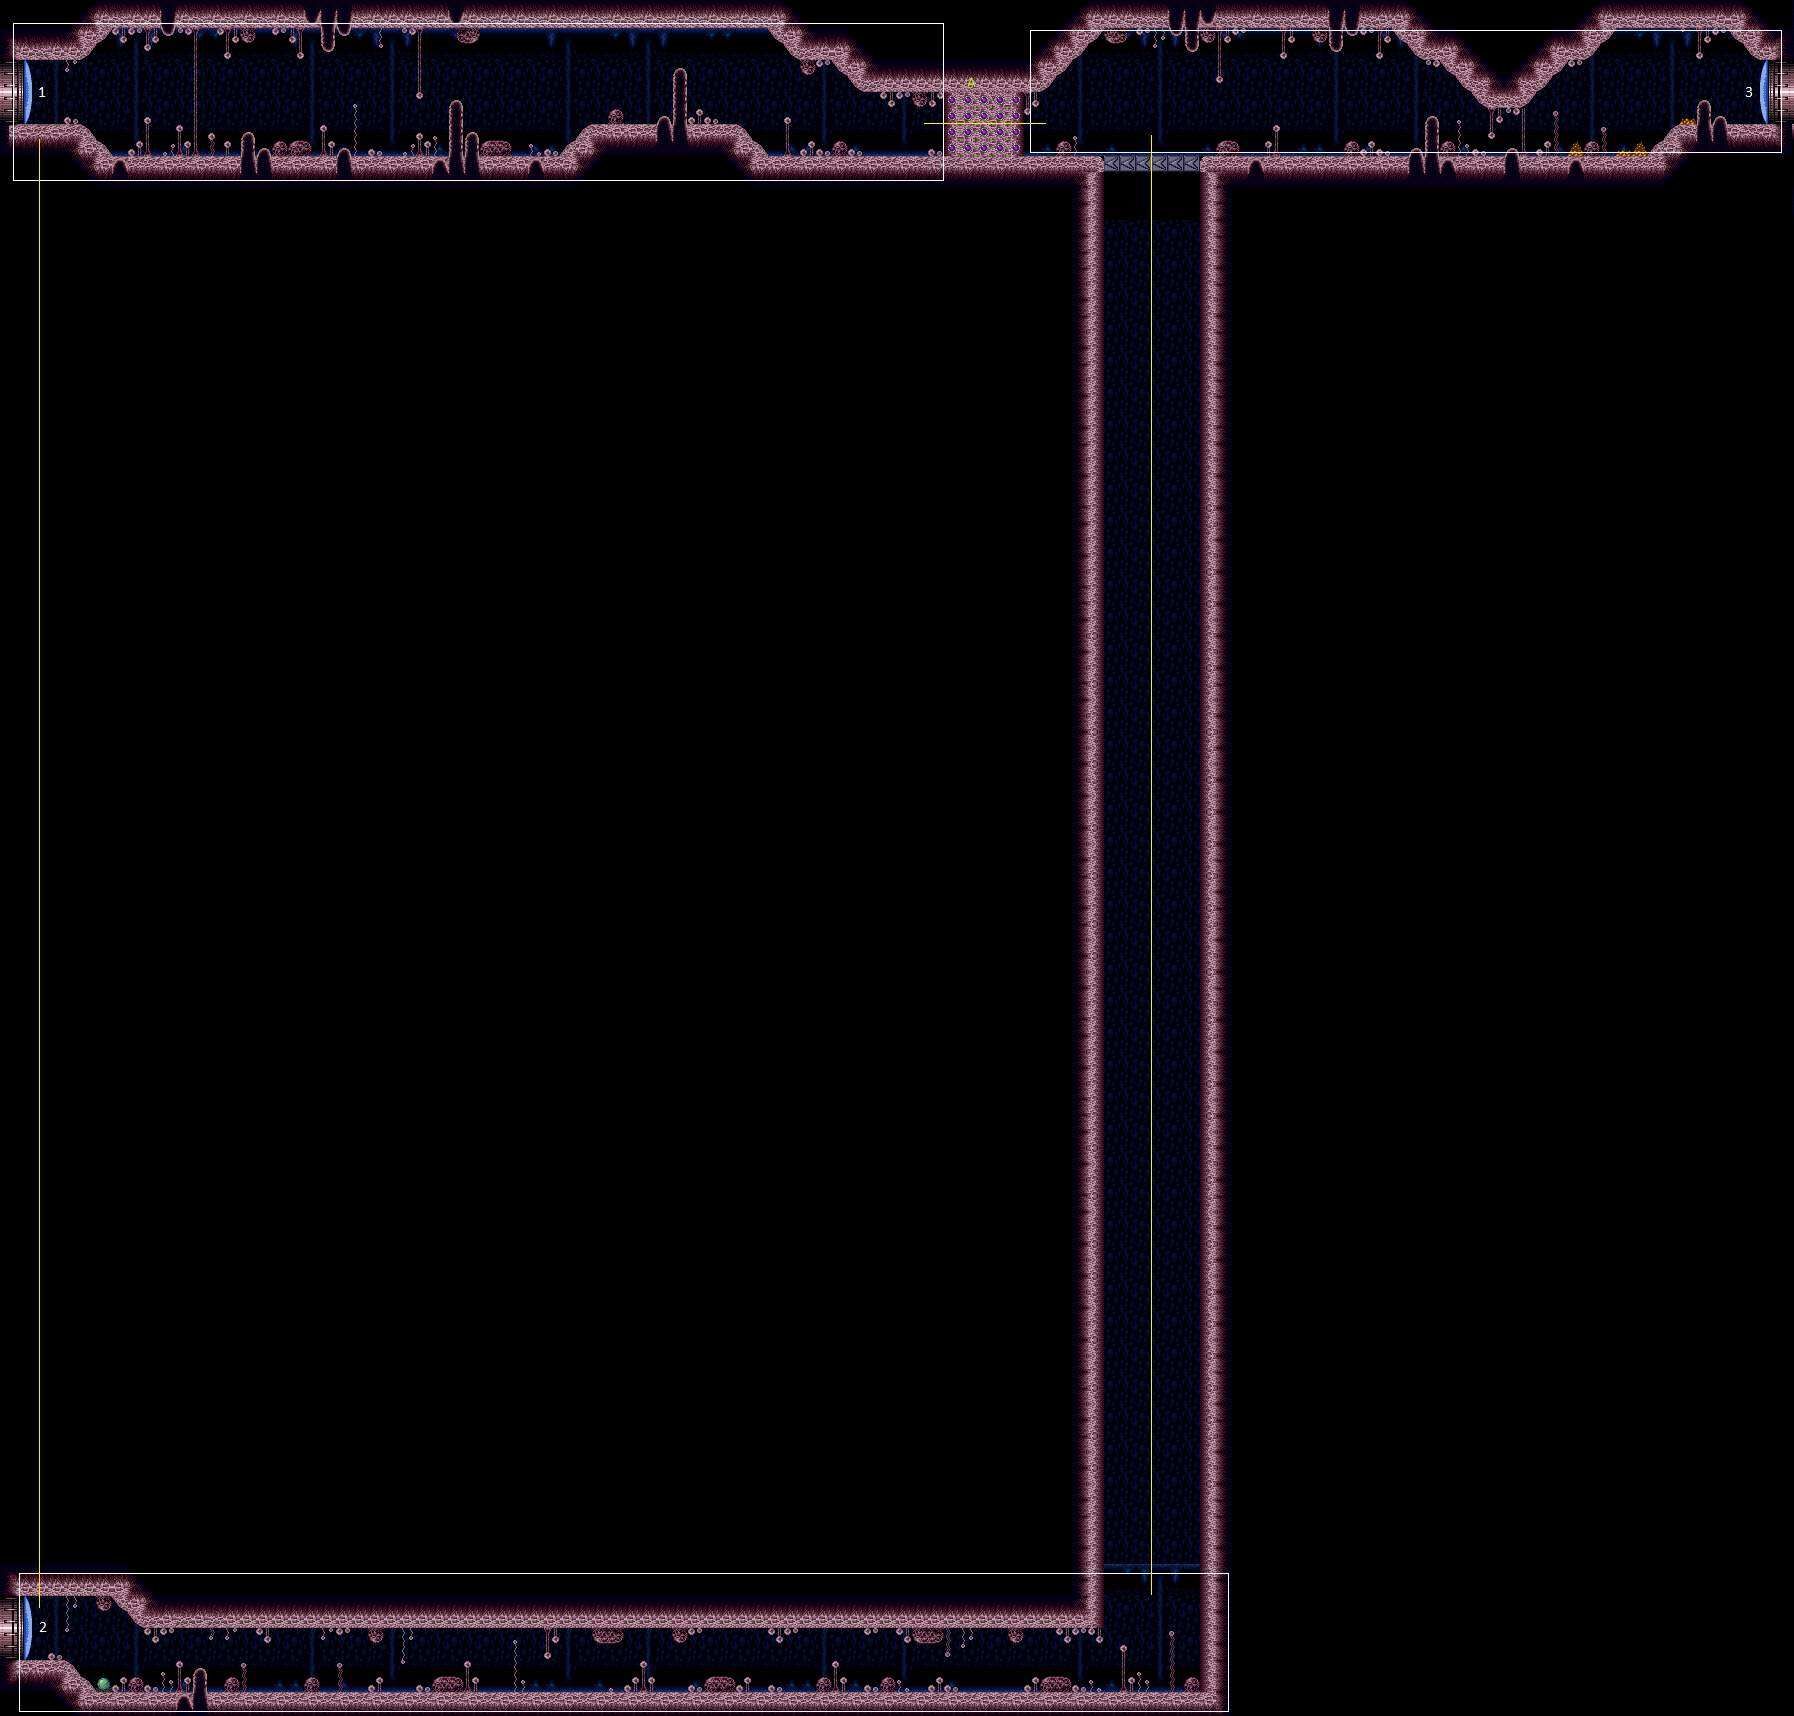 |
link | Brinstar / Pink Dachora RoomWiki |
|||
| Dead Scientist Room | deadscientistroom | Array
(
[0] => room4
)
|
 |
link | Ceres Dead Scientist RoomWiki |
|||
| Double Chamber | doublechamber | Array
(
[0] => room104
)
|
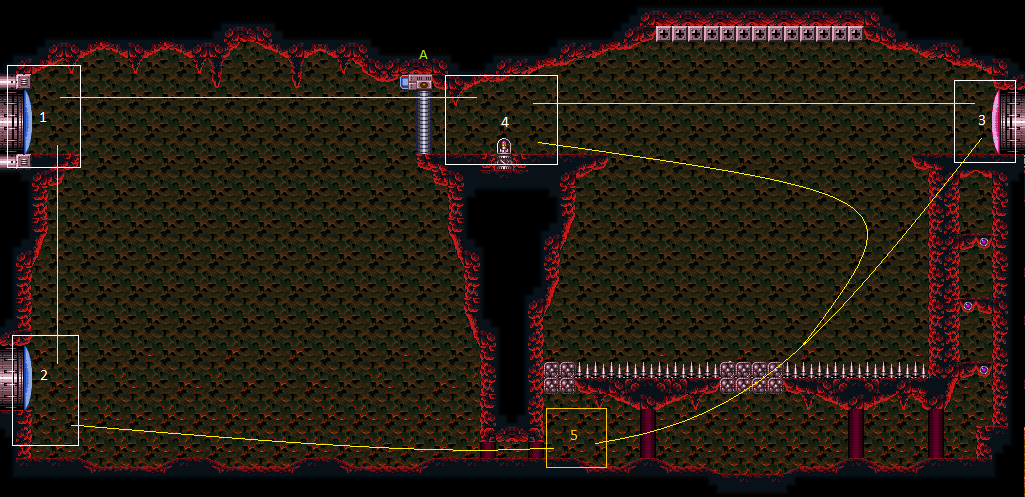 |
link | Norfair / East Double ChamberWiki |
|||
| Draygon Save Room | draygonsaveroom | Array
(
[0] => room190
)
|
 |
link | Maridia / Inner / Pink Draygon Save RoomWiki |
|||
| Draygon's Room | draygonsroom | Array
(
[0] => room193
)
|
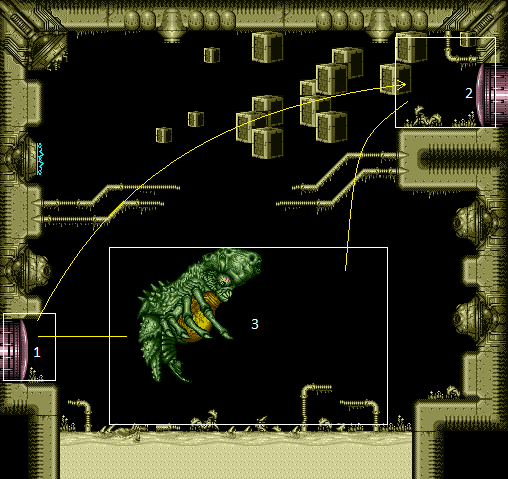 |
link | Maridia / Inner / Pink Draygon's RoomWiki |
|||
| Dust Torizo Room | dusttorizoroom | Array
(
[0] => room231
)
|
 |
link | Tourian Dust Torizo RoomWiki |
|||
| Early Supers Room | earlysupersroom | Array
(
[0] => room45
)
|
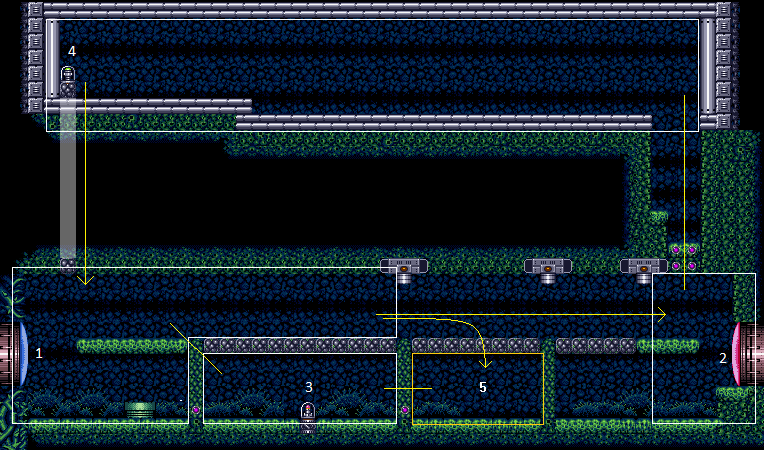 |
link | Brinstar / Green Early Supers RoomWiki |
|||
| East Aqueduct Quicksand Room | eastaqueductquicksandroom | Array
(
[0] => room207
)
|
 |
link | Maridia / Inner / Pink East Aqueduct Quicksand RoomWiki |
|||
| East Cactus Alley Room | eastcactusalleyroom | Array
(
[0] => room196
)
|
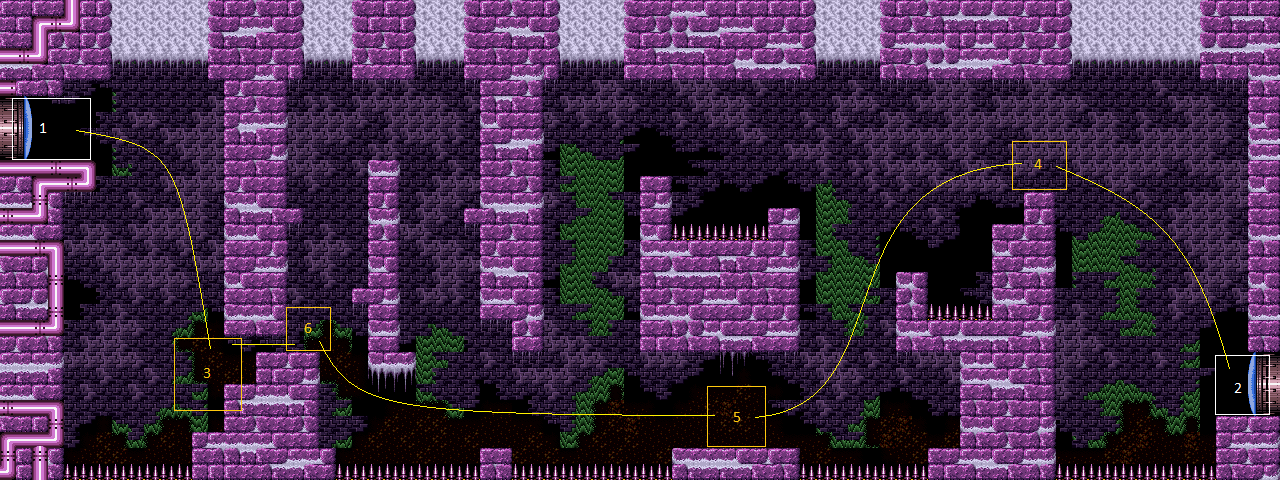 |
link | Maridia / Inner / Pink East Cactus Alley RoomWiki |
|||
| East Ocean | eastocean | Array
(
[0] => room34
)
|
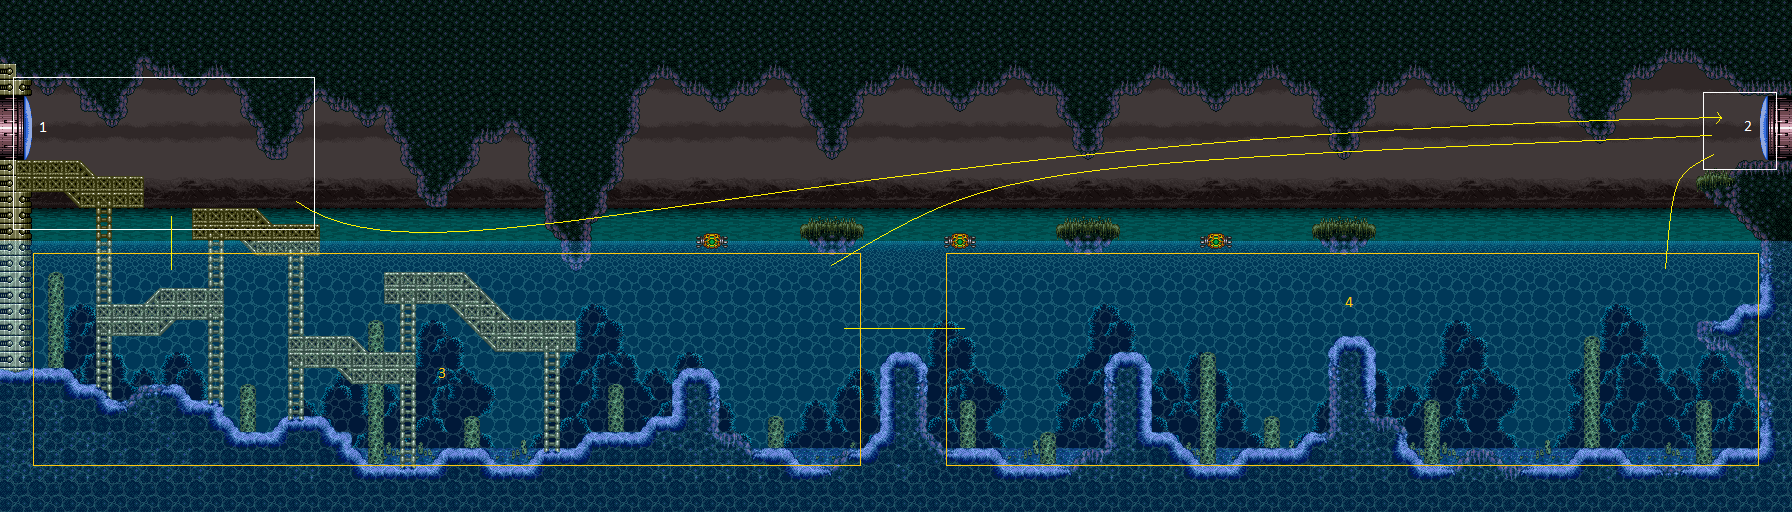 |
link | Crateria / East East OceanWiki |
|||
| East Pants Room | eastpantsroom | Array
(
[0] => room322
)
|
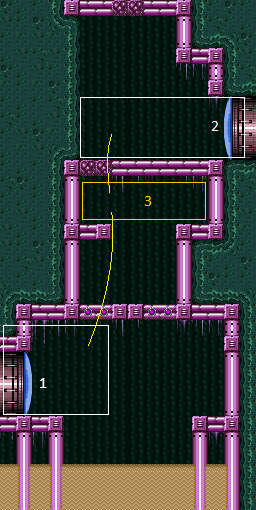 |
link | Maridia / Inner / Green East Pants RoomWiki |
|||
| East Sand Hall | eastsandhall | Array
(
[0] => room210
)
|
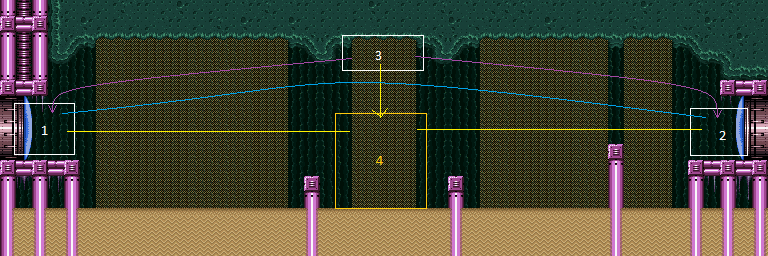 |
link | Maridia / Inner / Green East Sand HallWiki |
|||
| East Sand Hole | eastsandhole | Array
(
[0] => room208
)
|
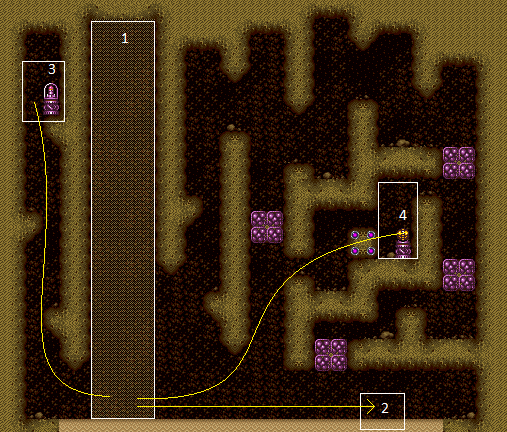 |
link | Maridia / Inner / Pink East Sand HoleWiki |
|||
| Electric Death Room | electricdeathroom | Array
(
[0] => room166
)
|
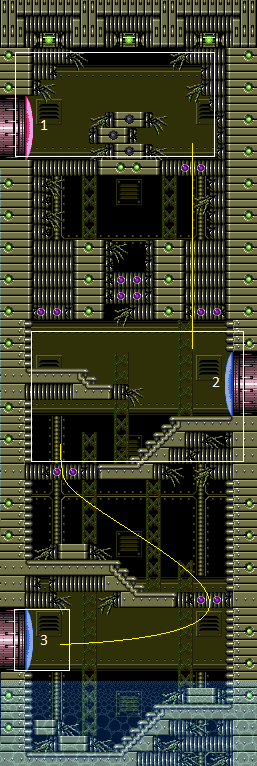 |
link | Wrecked Ship Electric Death RoomWiki |
|||
| Etecoon Energy Tank Room | etecoonenergytankroom | Array
(
[0] => room51
)
|
 |
link | Brinstar / Green Etecoon Energy Tank RoomWiki |
|||
| Etecoon Save Room | etecoonsaveroom | Array
(
[0] => room315
)
|
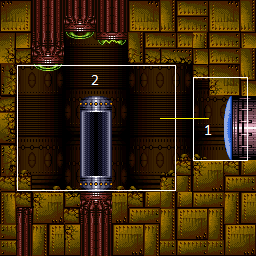 |
link | Brinstar / Green Etecoon Save RoomWiki |
|||
| Etecoon Super Room | etecoonsuperroom | Array
(
[0] => room52
)
|
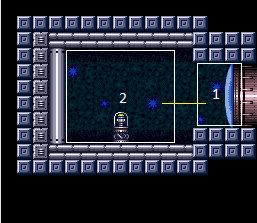 |
link | Brinstar / Green Etecoon Super RoomWiki |
|||
| Falling Tile Room | fallingtileroom | Array
(
[0] => room2
)
|
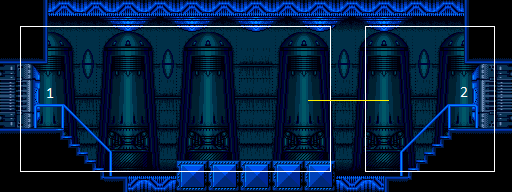 |
link | Ceres Falling Tile RoomWiki |
|||
| Fast Pillars Setup Room | fastpillarssetuproom | Array
(
[0] => room133
)
|
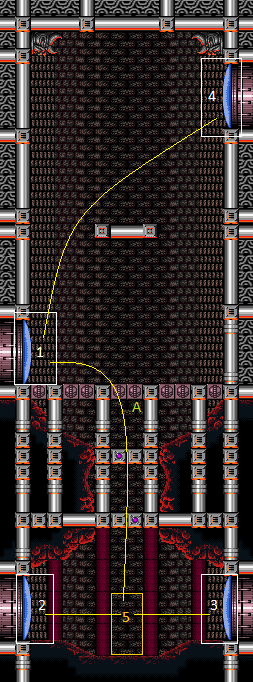 |
link | Lower Norfair / East Fast Pillars Setup RoomWiki |
|||
| Fast Ripper Room | fastripperroom | Array
(
[0] => room153
)
|
 |
link | Lower Norfair / West Fast Ripper RoomWiki |
|||
| Final Missile Bombway | finalmissilebombway | Array
(
[0] => room18
)
|
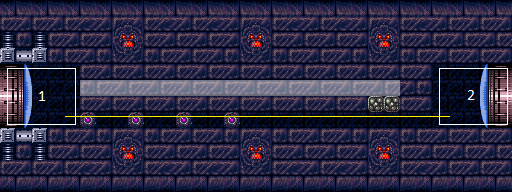 |
link | Crateria / Central Final Missile BombwayWiki |
|||
| First Missile Room | firstmissileroom | Array
(
[0] => room40
)
|
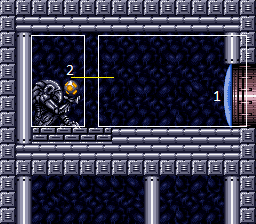 |
link | Brinstar / Blue First Missile RoomWiki |
|||
| Fish Tank | fishtank | Array
(
[0] => room173
)
|
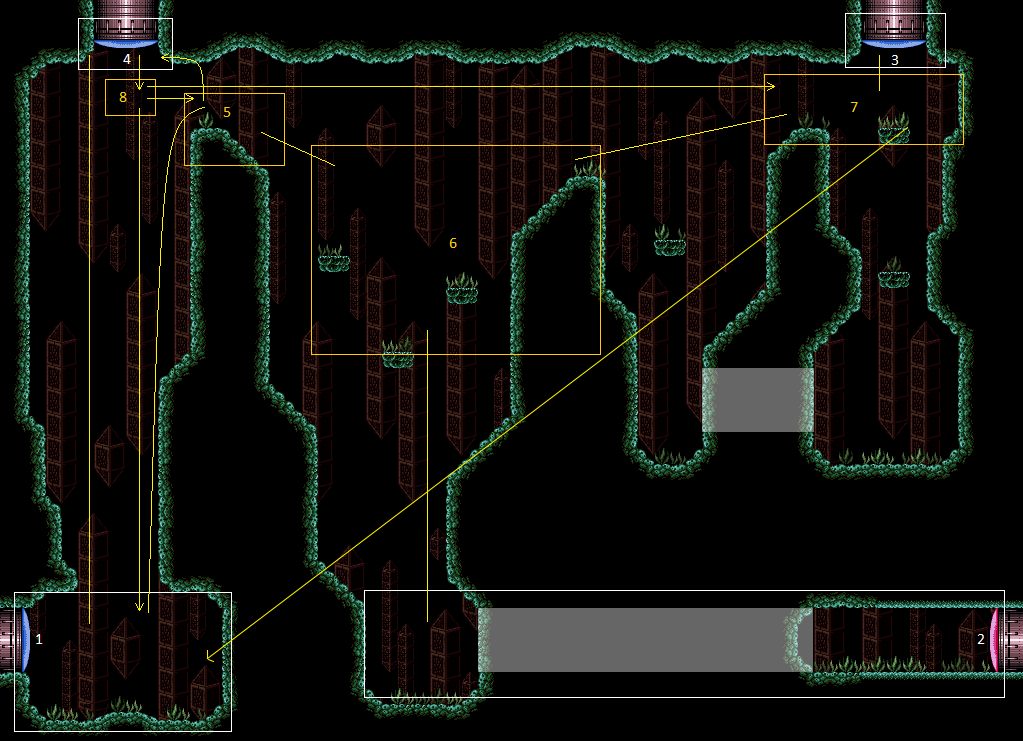 |
link | Maridia / Outer Fish TankWiki |
|||
| Flyway | flyway | Array
(
[0] => room13
)
|
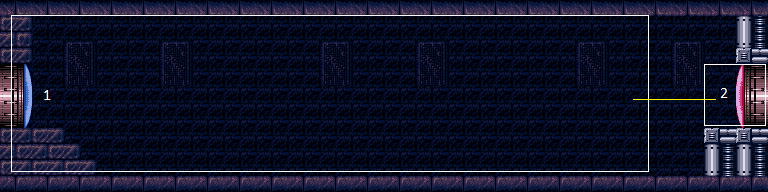 |
link | Crateria / Central FlywayWiki |
|||
| Forgotten Highway Elbow | forgottenhighwayelbow | Array
(
[0] => room305
)
|
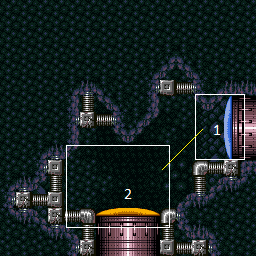 |
link | Crateria / East Forgotten Highway ElbowWiki |
|||
| Forgotten Highway Elevator | forgottenhighwayelevator | Array
(
[0] => room37
)
|
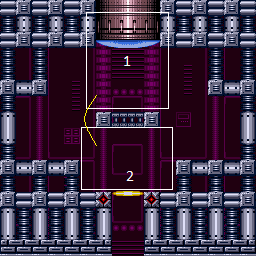 |
link | Crateria / East Forgotten Highway ElevatorWiki |
|||
| Forgotten Highway Kago Room | forgottenhighwaykagoroom | Array
(
[0] => room35
)
|
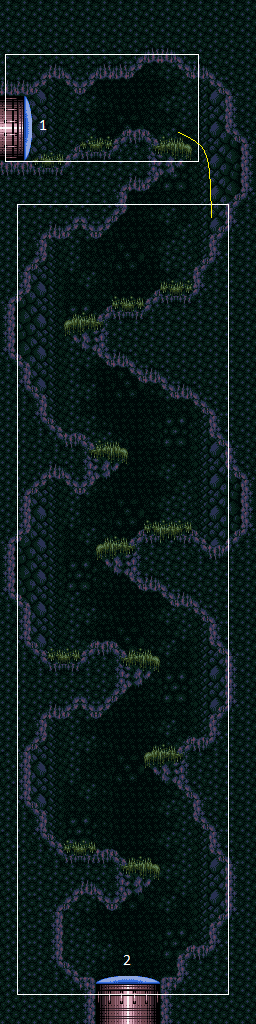 |
link | Crateria / East Forgotten Highway Kago RoomWiki |
|||
| Forgotten Highway Save Room | forgottenhighwaysaveroom | Array
(
[0] => room216
)
|
 |
link | Maridia / Inner / Yellow Forgotten Highway Save RoomWiki |
|||
| Frog Savestation | frogsavestation | Array
(
[0] => room302
)
|
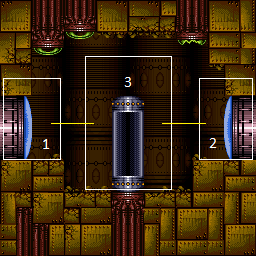 |
link | Norfair / East Frog SavestationWiki |
|||
| Frog Speedway | frogspeedway | Array
(
[0] => room93
)
|
 |
link | Norfair / East Frog SpeedwayWiki |
|||
| Gauntlet Energy Tank Room | gauntletenergytankroom | Array
(
[0] => room31
)
|
 |
link | Crateria / West Gauntlet Energy Tank RoomWiki |
|||
| Gauntlet Entrance | gauntletentrance | Array
(
[0] => room30
)
|
 |
link | Crateria / West Gauntlet EntranceWiki |
|||
| Glass Tunnel | glasstunnel | Array
(
[0] => room170
)
|
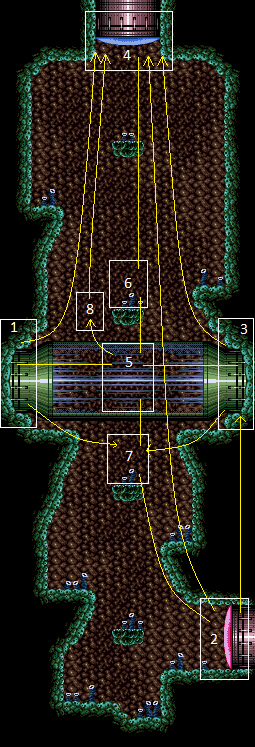 |
link | Maridia / Outer Glass TunnelWiki |
|||
| Glass Tunnel Save Room | glasstunnelsaveroom | Array
(
[0] => room171
)
|
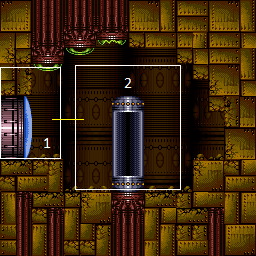 |
link | Maridia / Outer Glass Tunnel Save RoomWiki |
|||
| Golden Torizo Energy Recharge | goldentorizoenergyrecharge | Array
(
[0] => room152
)
|
 |
link | Lower Norfair / West Golden Torizo Energy RechargeWiki |
|||
| Golden Torizo's Room | goldentorizosroom | Array
(
[0] => room150
)
|
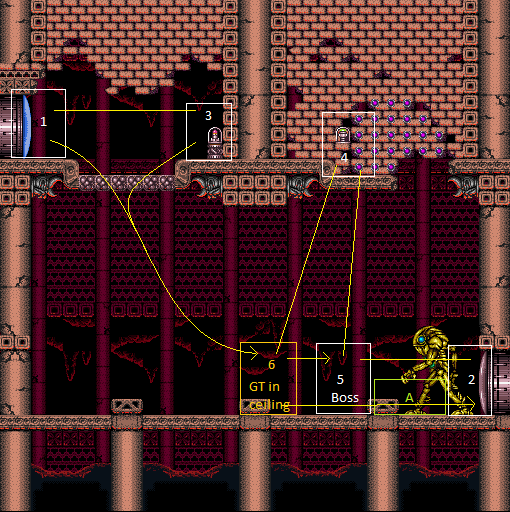 |
link | Lower Norfair / West Golden Torizo's RoomWiki |
|||
| Grapple Beam Room | grapplebeamroom | Array
(
[0] => room128
)
|
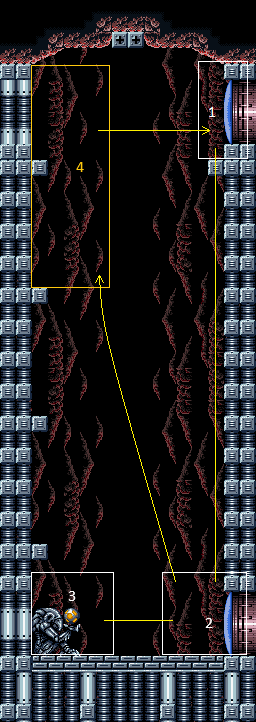 |
link | Norfair / Crocomire Grapple Beam RoomWiki |
|||
| Grapple Tutorial Room 1 | grappletutorialroom1 | Array
(
[0] => room129
)
|
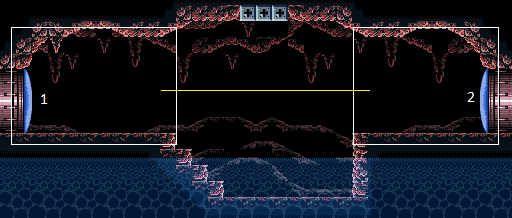 |
link | Norfair / Crocomire Grapple Tutorial Room 1Wiki |
|||
| Grapple Tutorial Room 2 | grappletutorialroom2 | Array
(
[0] => room130
)
|
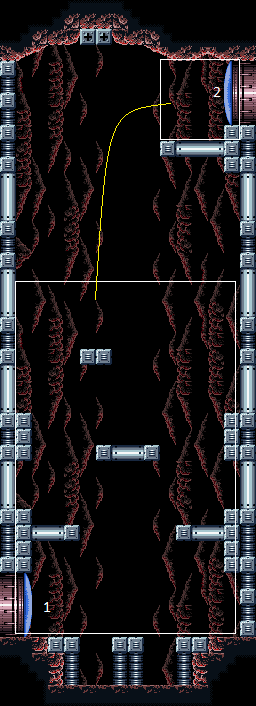 |
link | Norfair / Crocomire Grapple Tutorial Room 2Wiki |
|||
| Grapple Tutorial Room 3 | grappletutorialroom3 | Array
(
[0] => room131
)
|
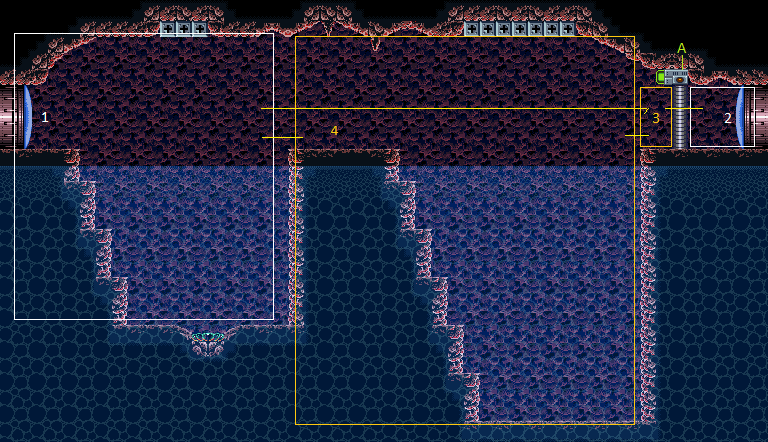 |
link | Norfair / Crocomire Grapple Tutorial Room 3Wiki |
|||
| Gravity Suit Room | gravitysuitroom | Array
(
[0] => room162
)
|
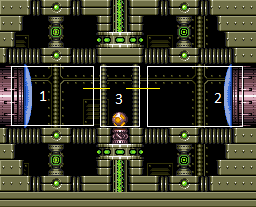 |
link | Wrecked Ship Gravity Suit RoomWiki |
|||
| Green Brinstar Beetom Room | greenbrinstarbeetomroom | Array
(
[0] => room50
)
|
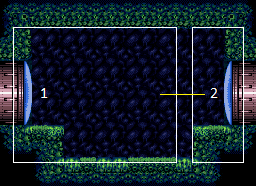 |
link | Brinstar / Green Green Brinstar Beetom RoomWiki |
|||
| Green Brinstar Elevator Room | greenbrinstarelevatorroom | Array
(
[0] => room23
)
|
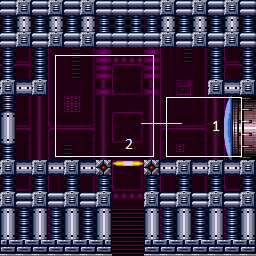 |
link | Crateria / West Green Brinstar Elevator RoomWiki |
|||
| Green Brinstar Fireflea Room | greenbrinstarfireflearoom | Array
(
[0] => room49
)
|
 |
link | Brinstar / Green Green Brinstar Fireflea RoomWiki |
|||
| Green Brinstar Main Shaft | greenbrinstarmainshaft | Array
(
[0] => etecoonroom
[1] => greenbrinstarmainshaft
[2] => room44
)
|
 |
link | Brinstar / Green Green Brinstar Main ShaftWiki |
|||
| Green Brinstar Main Shaft Save Room | greenbrinstarmainshaftsaveroom | Array
(
[0] => room314
)
|
 |
link | Brinstar / Green Green Brinstar Main Shaft Save RoomWiki |
|||
| Green Brinstar Missile Refill | greenbrinstarmissilerefill | Array
(
[0] => room316
)
|
 |
link | Brinstar / Green Green Brinstar Missile RefillWiki |
|||
| Green Bubbles Missile Room | greenbubblesmissileroom | Array
(
[0] => room98
)
|
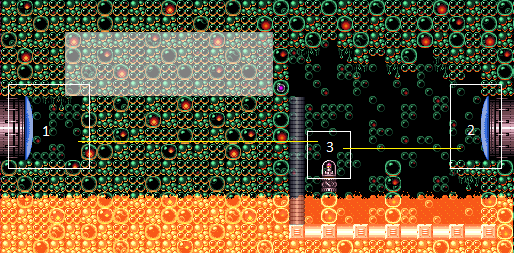 |
link | Norfair / East Green Bubbles Missile RoomWiki |
|||
| Green Hill Zone | greenhillzone | Array
(
[0] => room54
)
|
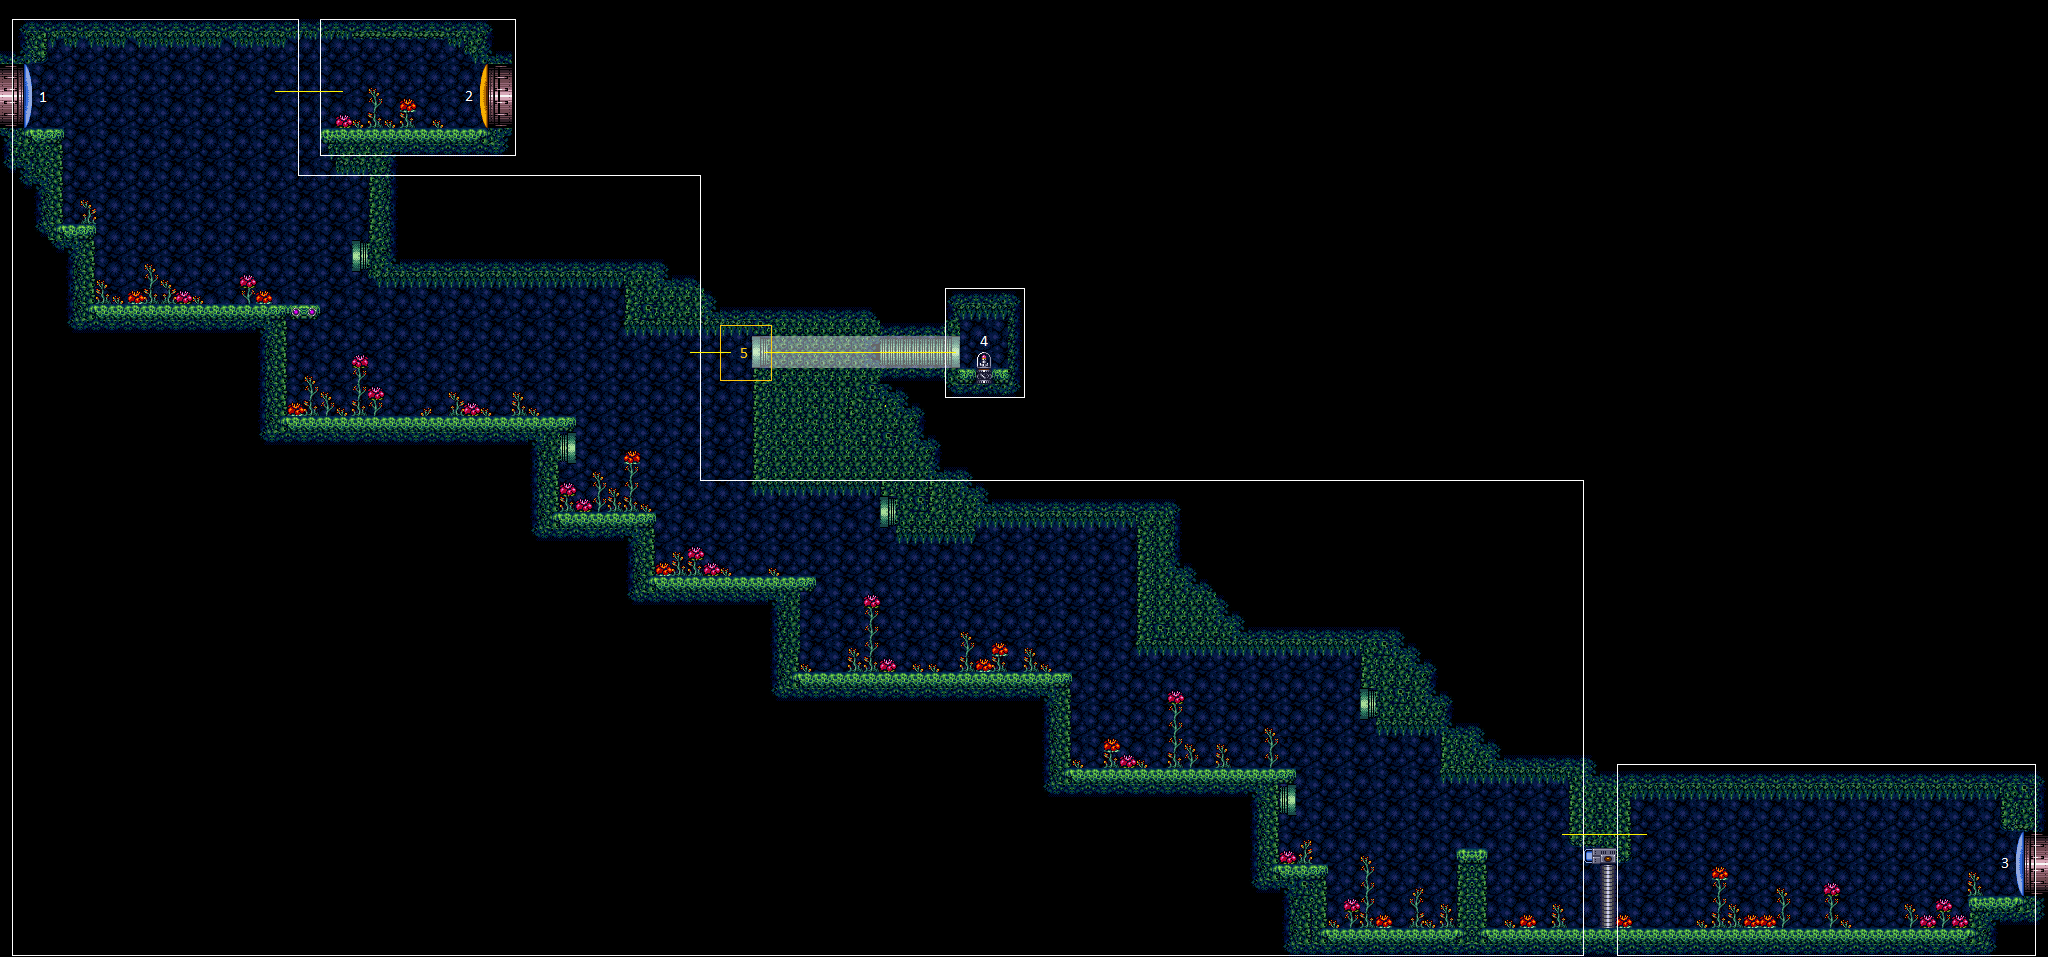 |
link | Brinstar / Green Green Hill ZoneWiki |
|||
| Green Pirates Shaft | greenpiratesshaft | Array
(
[0] => room21
)
|
 |
link | Crateria / West Green Pirates ShaftWiki |
|||
| Halfie Climb Room | halfieclimbroom | Array
(
[0] => room187
)
|
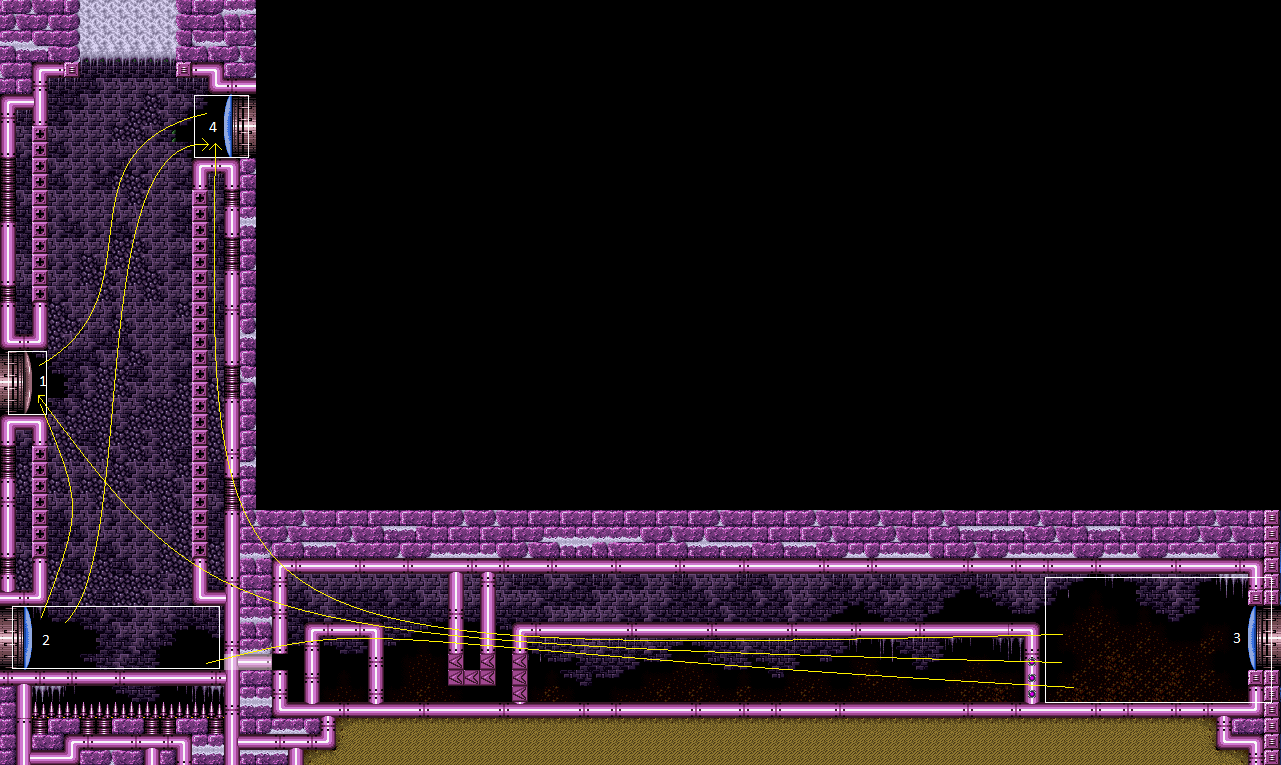 |
link | Maridia / Inner / Pink Halfie Climb RoomWiki |
|||
| Hellway | hellway | Array
(
[0] => room74
)
|
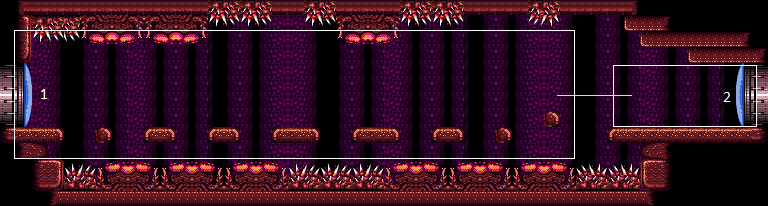 |
link | Brinstar / Red HellwayWiki |
|||
| Hi Jump Boots Room | hijumpbootsroom | Array
(
[0] => room89
)
|
 |
link | Norfair / West Hi Jump Boots RoomWiki |
|||
| Hi Jump Energy Tank Room | hijumpenergytankroom | Array
(
[0] => room88
)
|
 |
link | Norfair / West Hi Jump Energy Tank RoomWiki |
|||
| Homing Geemer Room | hominggeemerroom | Array
(
[0] => room313
)
|
 |
link | Crateria / East Homing Geemer RoomWiki |
|||
| Hopper Energy Tank Room | hopperenergytankroom | Array
(
[0] => room62
)
|
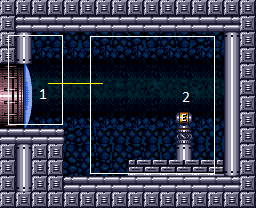 |
link | Brinstar / Pink Hopper Energy Tank RoomWiki |
|||
| Ice Beam Acid Room | icebeamacidroom | Array
(
[0] => room107
)
|
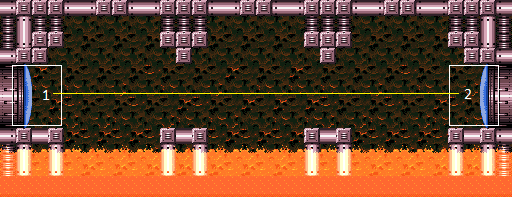 |
link | Norfair / West Ice Beam Acid RoomWiki |
|||
| Ice Beam Gate Room | icebeamgateroom | Array
(
[0] => room106
)
|
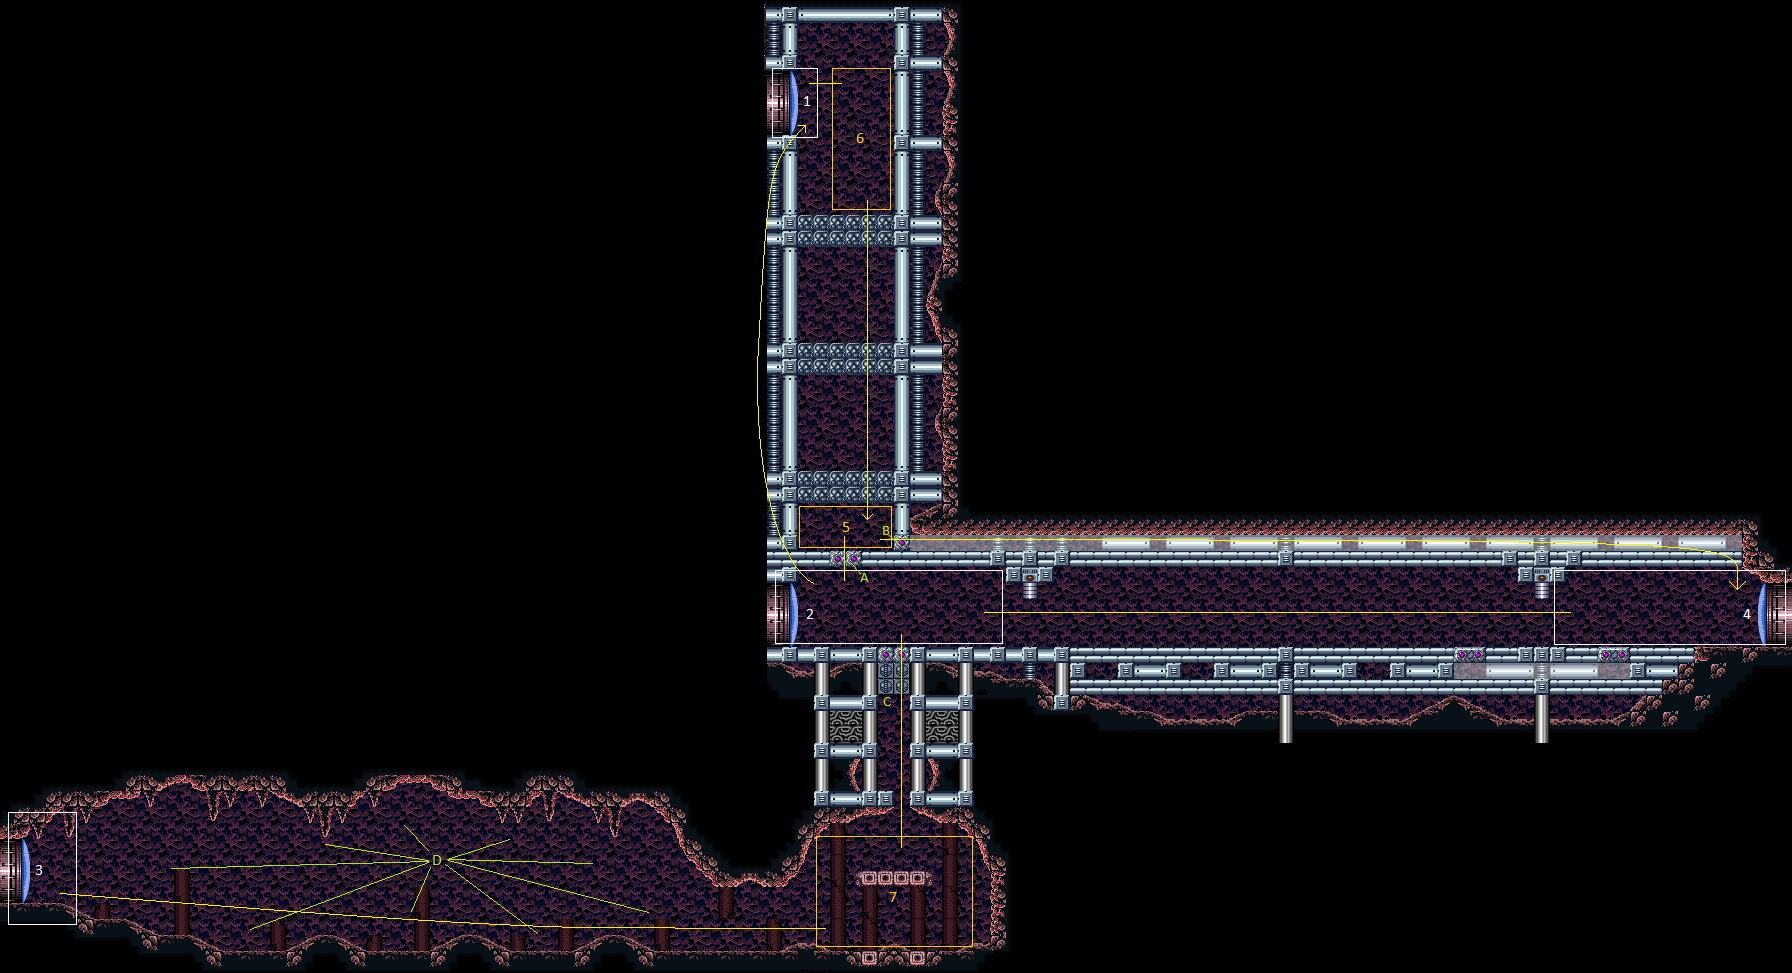 |
link | Norfair / West Ice Beam Gate RoomWiki |
|||
| Ice Beam Room | icebeamroom | Array
(
[0] => room109
)
|
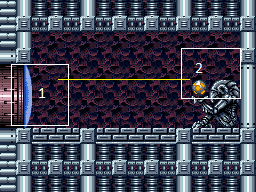 |
link | Norfair / West Ice Beam RoomWiki |
|||
| Ice Beam Snake Room | icebeamsnakeroom | Array
(
[0] => room108
)
|
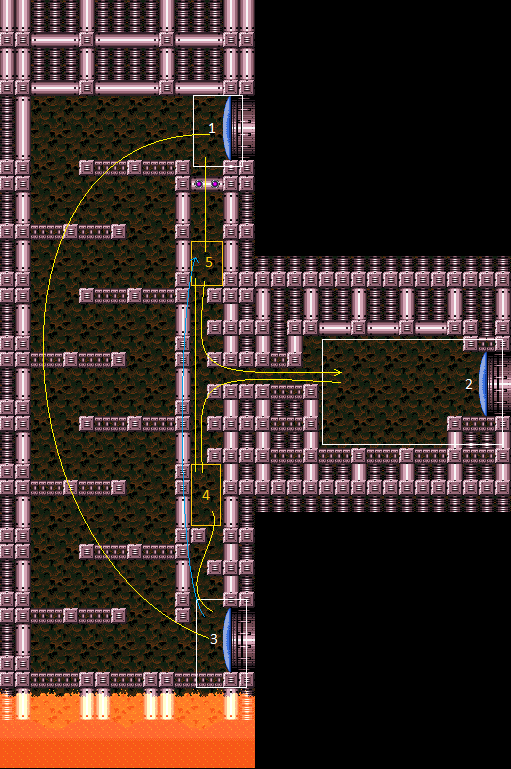 |
link | Norfair / West Ice Beam Snake RoomWiki |
|||
| Ice Beam Tutorial Room | icebeamtutorialroom | Array
(
[0] => room110
)
|
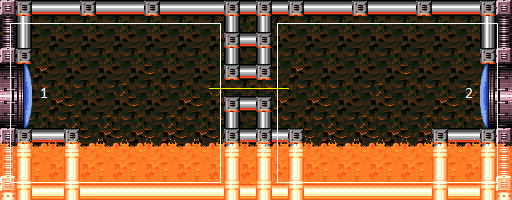 |
link | Norfair / West Ice Beam Tutorial RoomWiki |
|||
| Kassiuz Room | kassiuzroom | Array
(
[0] => room217
)
|
 |
link | Maridia / Inner / Yellow Kassiuz RoomWiki |
|||
| Kraid Eye Door Room | kraideyedoorroom | Array
(
[0] => room83
)
|
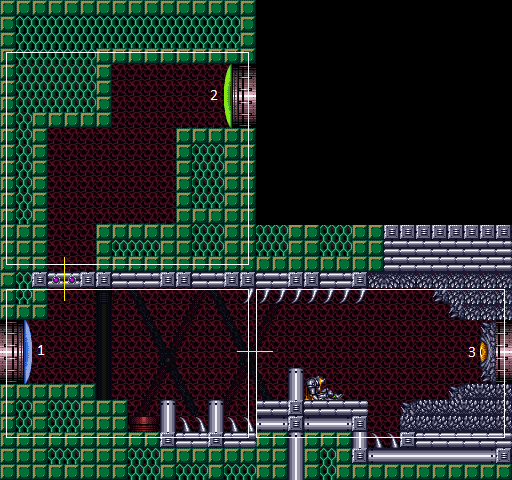 |
link | Brinstar / Kraid Kraid Eye Door RoomWiki |
|||
| Kraid Recharge Station | kraidrechargestation | Array
(
[0] => room301
)
|
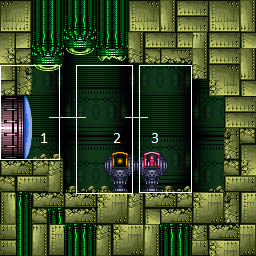 |
link | Brinstar / Kraid Kraid Recharge StationWiki |
|||
| Kraid Room | kraidroom | Array
(
[0] => room84
)
|
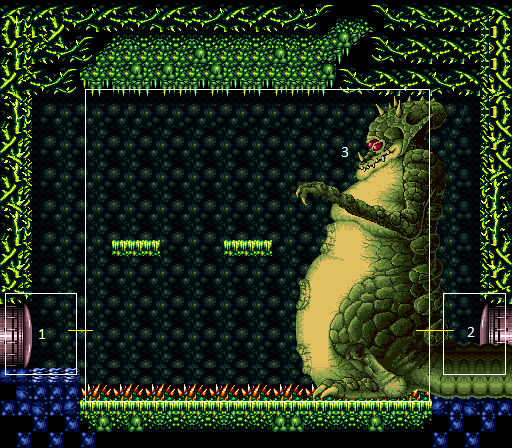 |
link | Brinstar / Kraid Kraid RoomWiki |
|||
| Kraid Save Room | kraidsaveroom | Array
(
[0] => room300
)
|
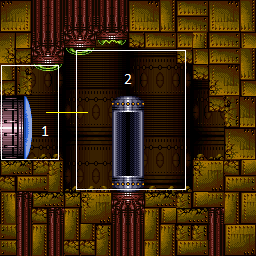 |
link | Brinstar / Kraid Kraid Save RoomWiki |
|||
| Kronic Boost Room | kronicboostroom | Array
(
[0] => room113
)
|
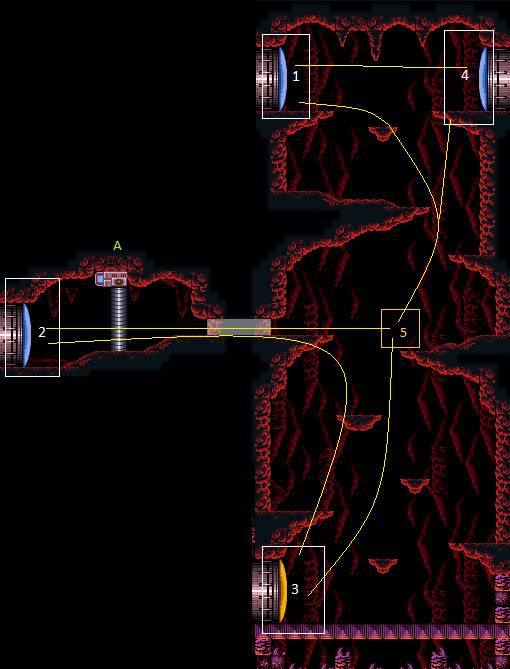 |
link | Norfair / East Kronic Boost RoomWiki |
|||
| Landing Site | landingsite | Array
(
[0] => room8
)
|
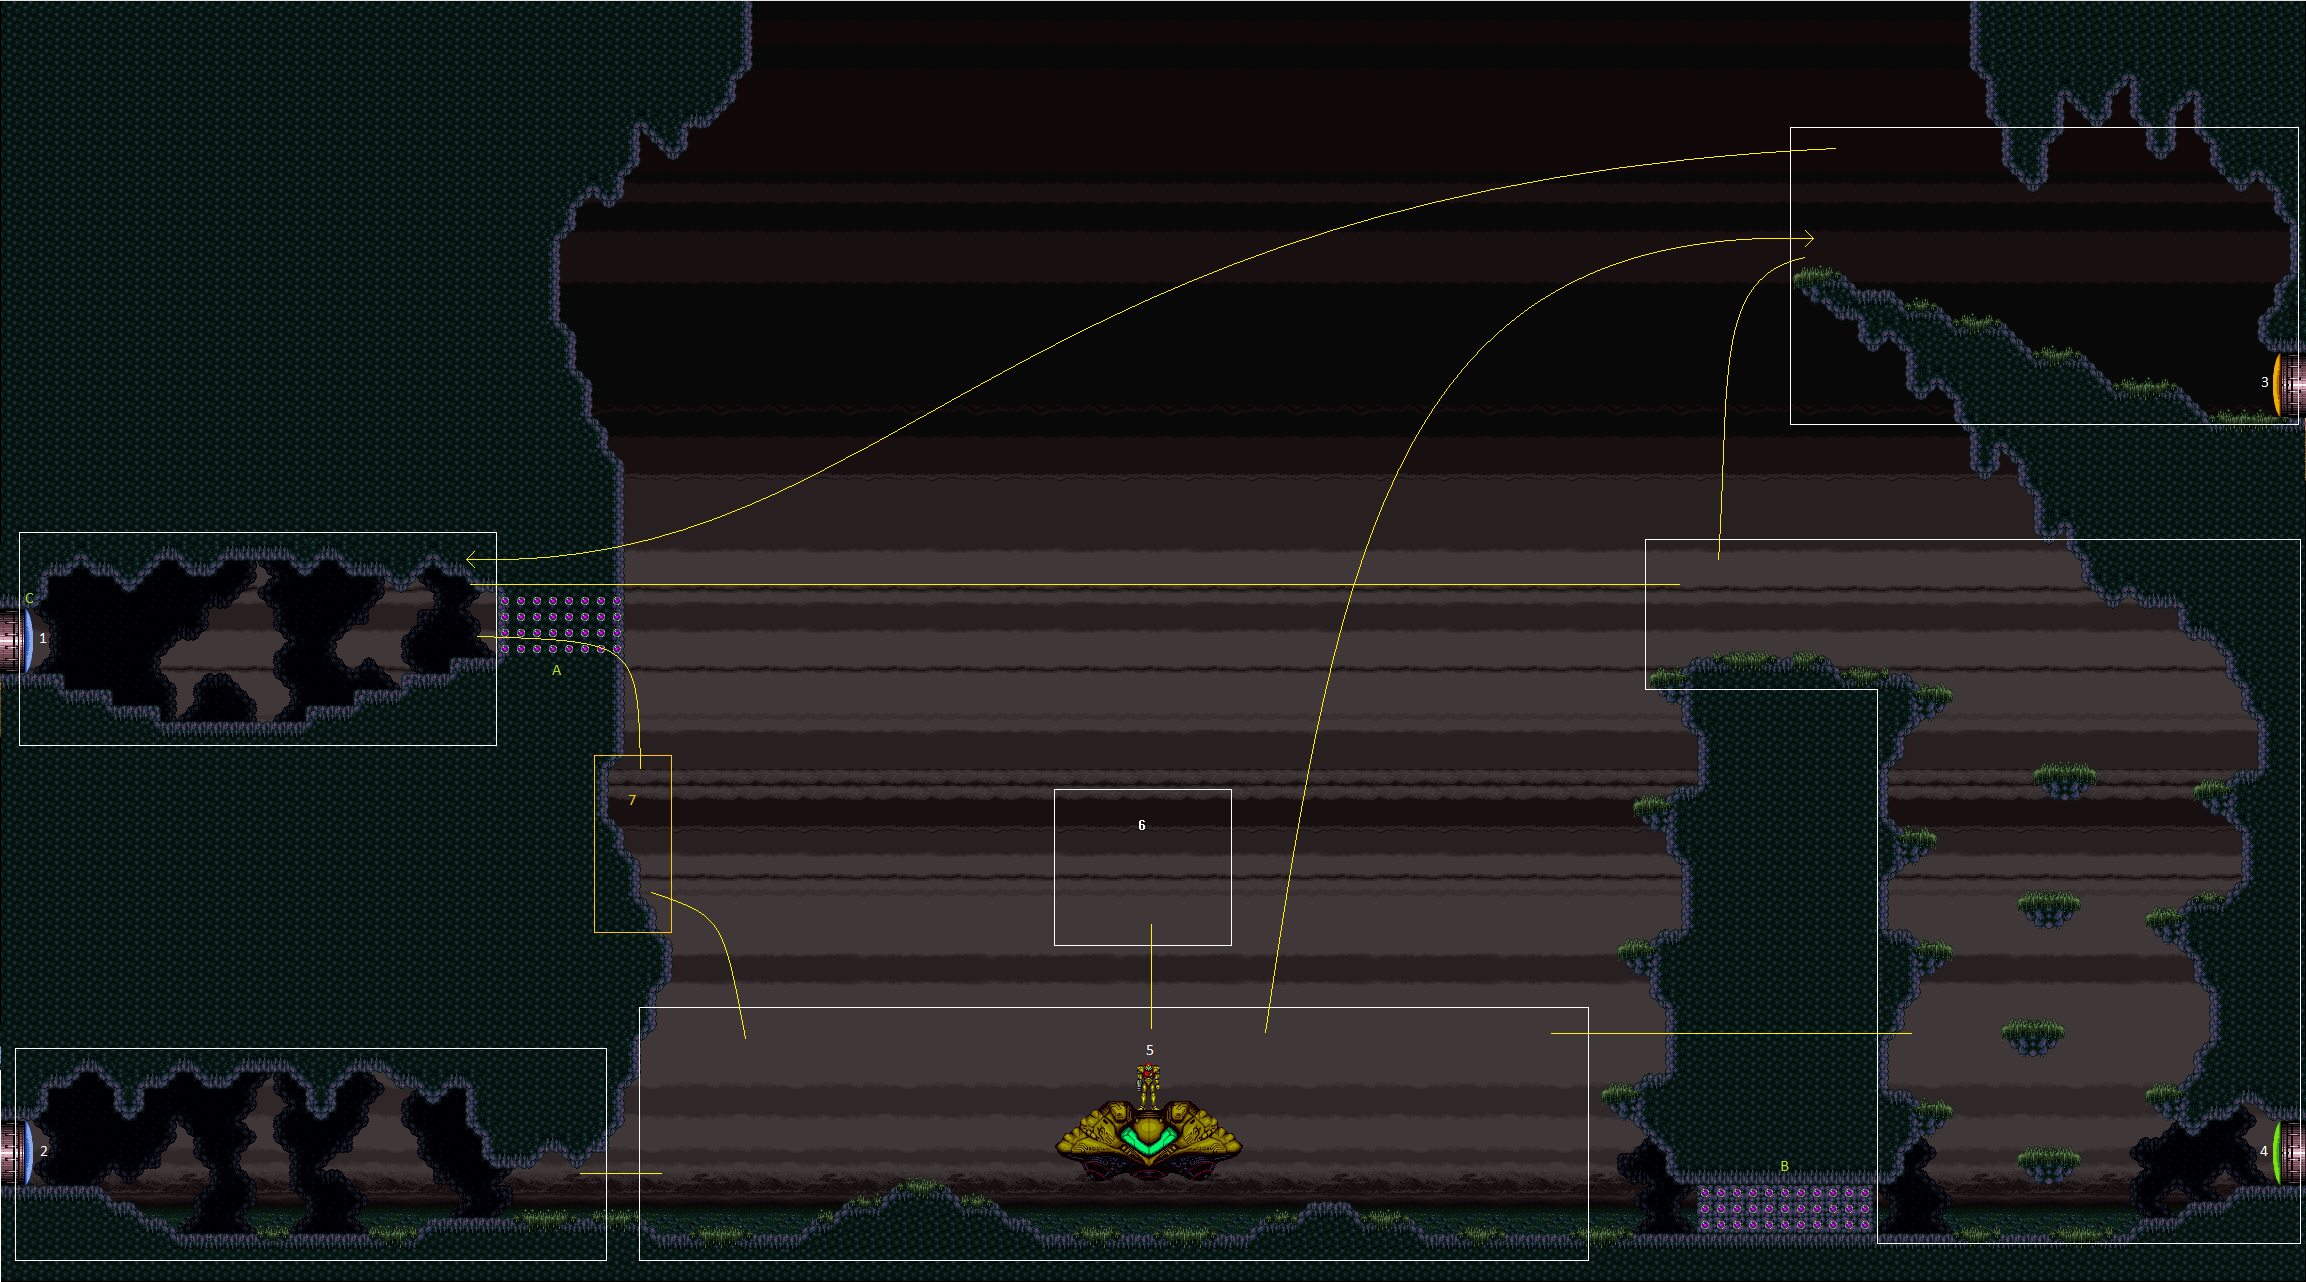 |
link | Crateria / Central Landing SiteWiki |
|||
| Lava Dive Room | lavadiveroom | Array
(
[0] => room115
)
|
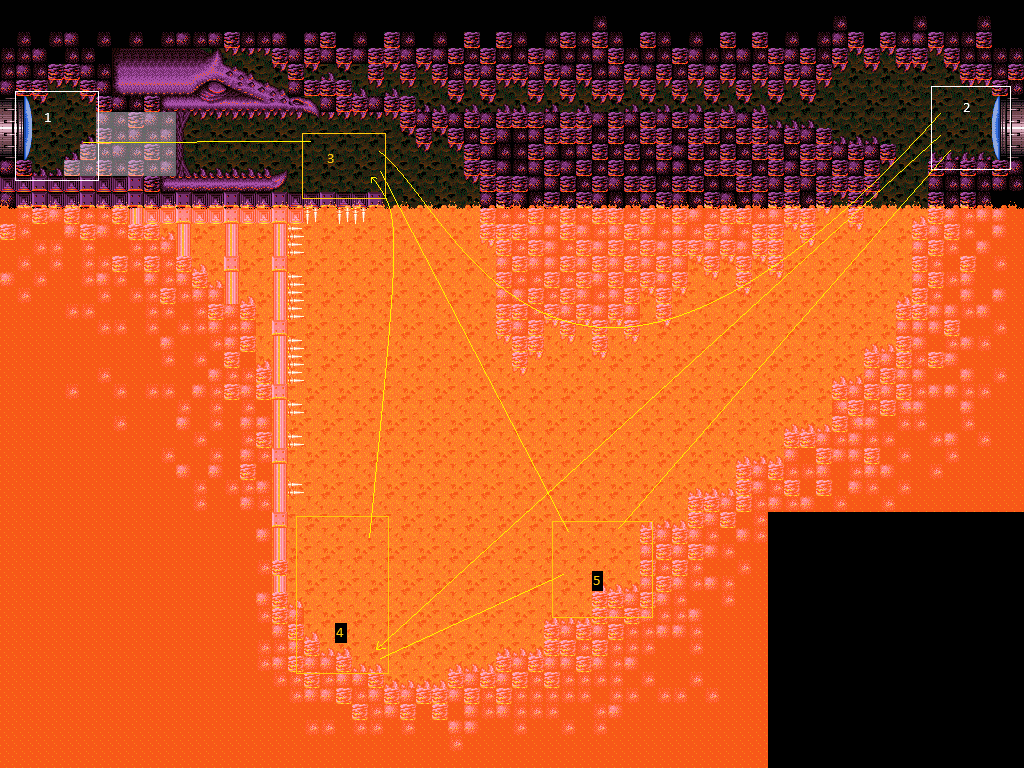 |
link | Norfair / East Lava Dive RoomWiki |
|||
| Lower Mushrooms | lowermushrooms | Array
(
[0] => room22
)
|
 |
link | Crateria / West Lower MushroomsWiki |
|||
| Lower Norfair Elevator | lowernorfairelevator | Array
(
[0] => room309
)
|
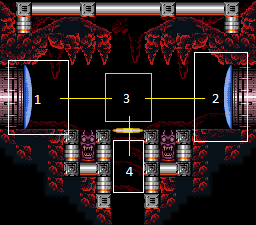 |
link | Norfair / East Lower Norfair ElevatorWiki |
|||
| Lower Norfair Elevator Save Room | lowernorfairelevatorsaveroom | Array
(
[0] => room310
)
|
 |
link | Norfair / East Lower Norfair Elevator Save RoomWiki |
|||
| Lower Norfair Escape Power Bomb Room | lowernorfairescapepowerbombroom | Array
(
[0] => room147
)
|
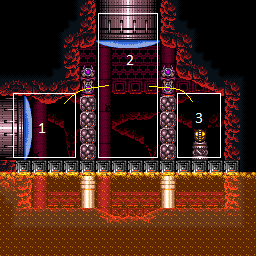 |
link | Lower Norfair / East Lower Norfair Escape Power Bomb RoomWiki |
|||
| Lower Norfair Farming Room | lowernorfairfarmingroom | Array
(
[0] => room141
)
|
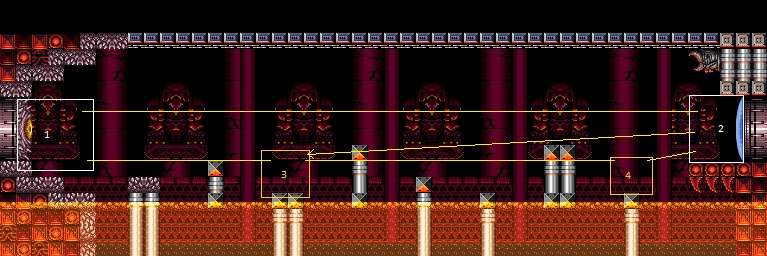 |
link | Lower Norfair / East Lower Norfair Farming RoomWiki |
|||
| Lower Norfair Fireflea Room | lowernorfairfireflearoom | Array
(
[0] => room145
)
|
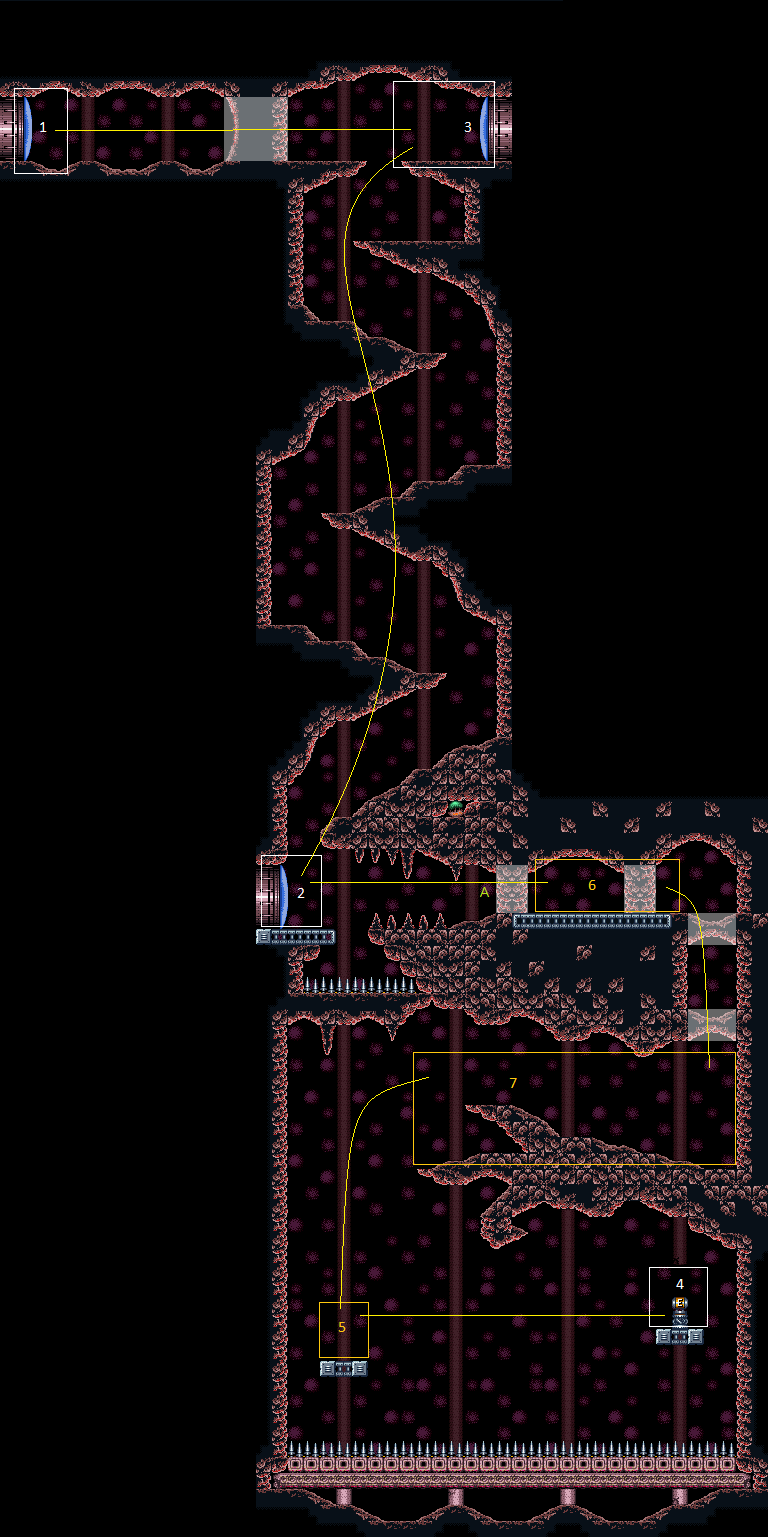 |
link | Lower Norfair / East Lower Norfair Fireflea RoomWiki |
|||
| Lower Norfair Spring Ball Maze Room | lowernorfairspringballmazeroom | Array
(
[0] => room146
)
|
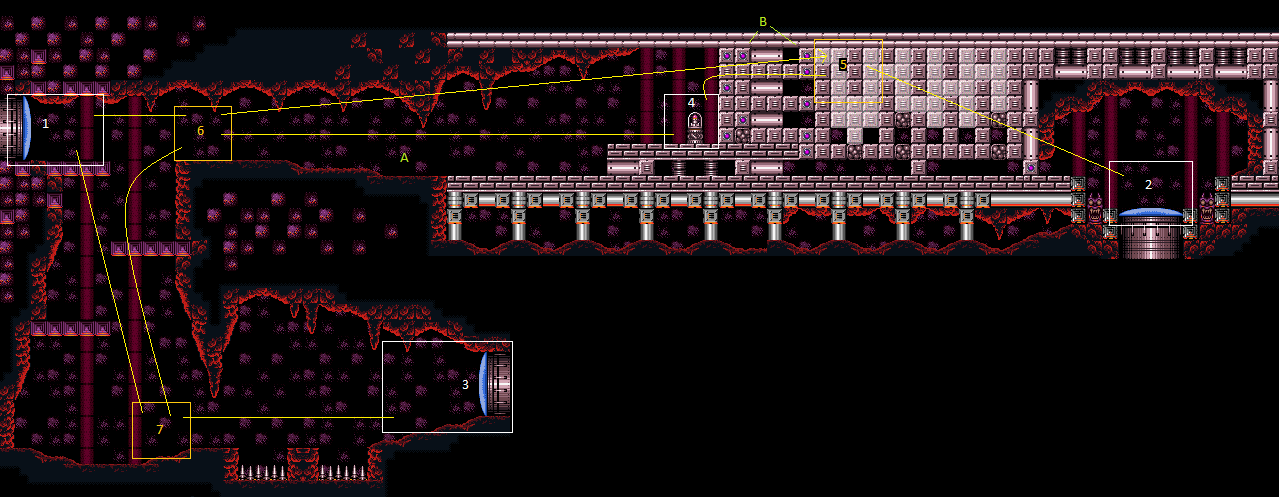 |
link | Lower Norfair / East Lower Norfair Spring Ball Maze RoomWiki |
|||
| Lower Tourian Save Room | lowertouriansaveroom | Array
(
[0] => room237
)
|
 |
link | Tourian Lower Tourian Save RoomWiki |
|||
| Magdollite Tunnel | magdollitetunnel | Array
(
[0] => room114
)
|
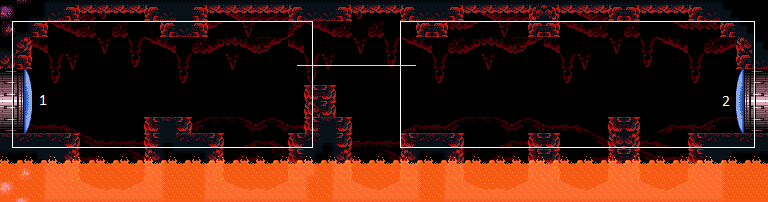 |
link | Norfair / East Magdollite TunnelWiki |
|||
| Magnet Stairs Room | magnetstairsroom | Array
(
[0] => room3
)
|
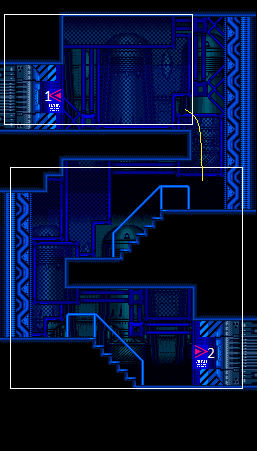 |
link | Ceres Magnet Stairs RoomWiki |
|||
| Main Hall | mainhall | Array
(
[0] => room132
)
|
 |
link | Lower Norfair / East Main HallWiki |
|||
| Main Street | mainstreet | Array
(
[0] => room172
)
|
 |
link | Maridia / Outer Main StreetWiki |
|||
| Mama Turtle Room | mamaturtleroom | Array
(
[0] => room178
)
|
 |
link | Maridia / Outer Mama Turtle RoomWiki |
|||
| Maridia Elevator Room | maridiaelevatorroom | Array
(
[0] => room215
)
|
 |
link | Maridia / Inner / Yellow Maridia Elevator RoomWiki |
|||
| Maridia Health Refill Room | maridiahealthrefillroom | Array
(
[0] => room191
)
|
 |
link | Maridia / Inner / Pink Maridia Health Refill RoomWiki |
|||
| Maridia Map Room | maridiamaproom | Array
(
[0] => room203
)
|
 |
link | Maridia / Outer Maridia Map RoomWiki |
|||
| Maridia Missile Refill Room | maridiamissilerefillroom | Array
(
[0] => room188
)
|
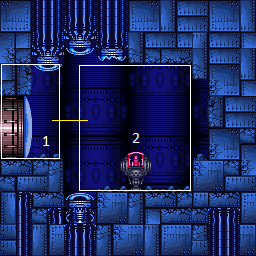 |
link | Maridia / Inner / Pink Maridia Missile Refill RoomWiki |
|||
| Metal Pirates Room | metalpiratesroom | Array
(
[0] => room139
)
|
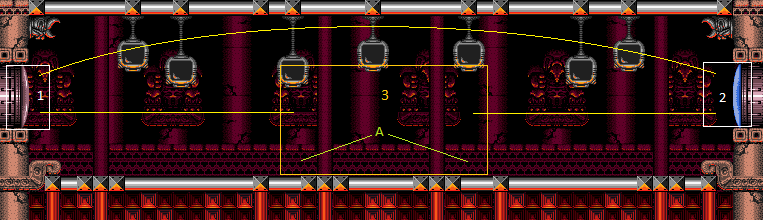 |
link | Lower Norfair / East Metal Pirates RoomWiki |
|||
| Metroid Room 1 | metroidroom1 | Array
(
[0] => room226
)
|
 |
link | Tourian Metroid Room 1Wiki |
|||
| Metroid Room 2 | metroidroom2 | Array
(
[0] => room227
)
|
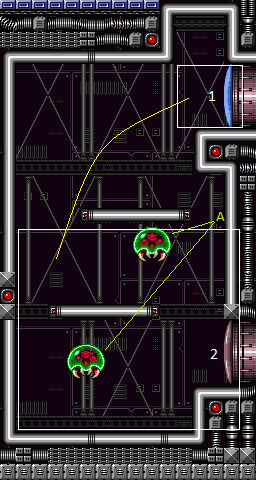 |
link | Tourian Metroid Room 2Wiki |
|||
| Metroid Room 3 | metroidroom3 | Array
(
[0] => room228
)
|
 |
link | Tourian Metroid Room 3Wiki |
|||
| Metroid Room 4 | metroidroom4 | Array
(
[0] => room229
)
|
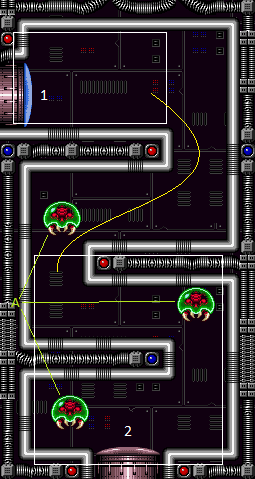 |
link | Tourian Metroid Room 4Wiki |
|||
| Mickey Mouse Room | mickeymouseroom | Array
(
[0] => room144
)
|
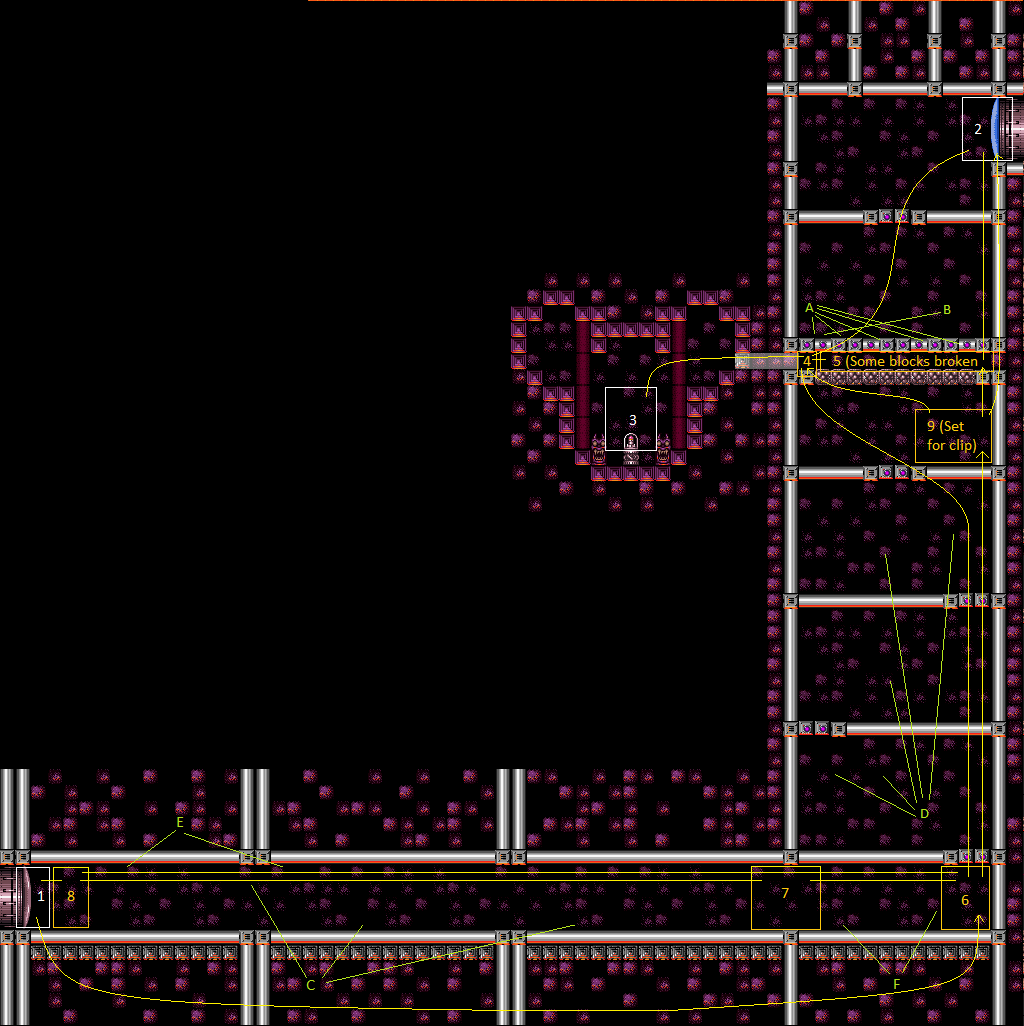 |
link | Lower Norfair / East Mickey Mouse RoomWiki |
|||
| Morph Ball Room | morphballroom | Array
(
[0] => room38
)
|
 |
link | Brinstar / Blue Morph Ball RoomWiki |
|||
| Mother Brain Room | motherbrainroom | Array
(
[0] => room238
)
|
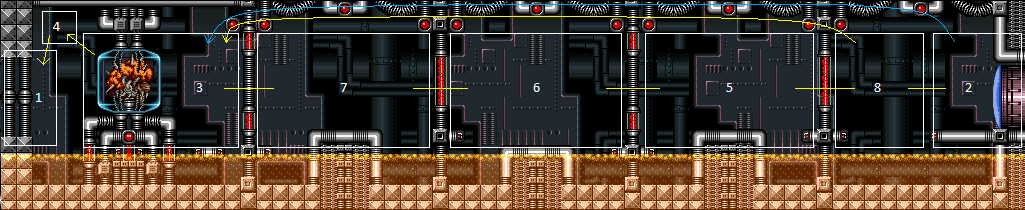 |
link | Tourian Mother Brain RoomWiki |
|||
| Mt Everest | mteverest | Array
(
[0] => room174
)
|
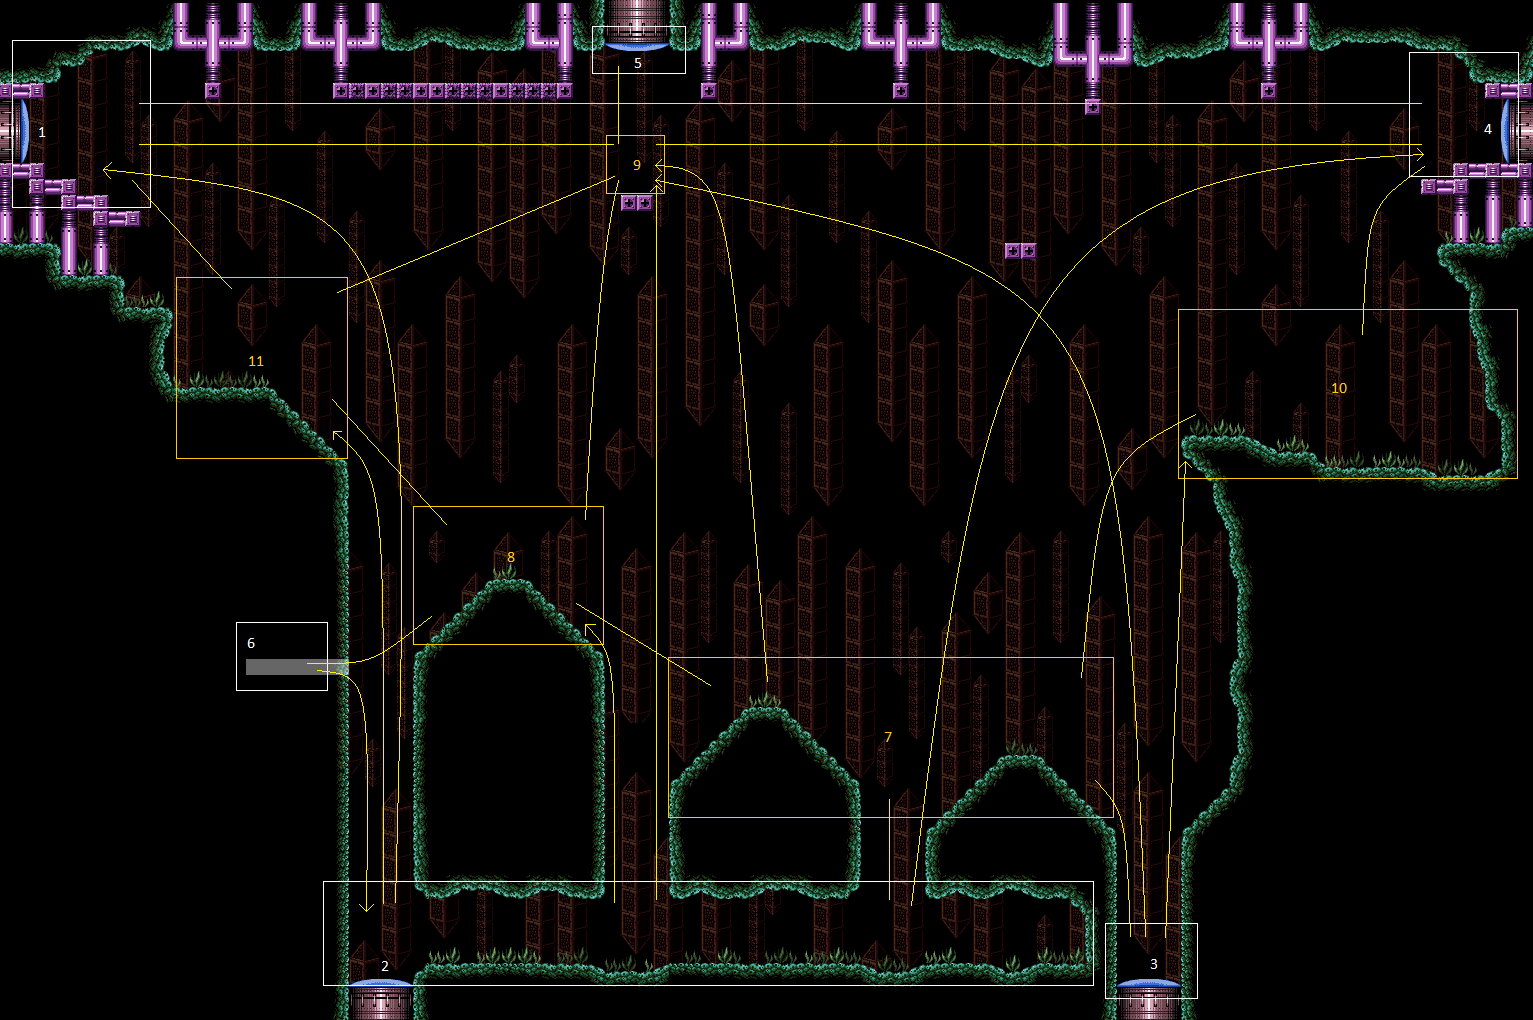 |
link | Maridia / Outer Mt EverestWiki |
|||
| Noob Bridge | noobbridge | Array
(
[0] => room55
)
|
 |
link | Brinstar / Green Noob BridgeWiki |
|||
| Norfair Map Room | norfairmaproom | Array
(
[0] => room87
)
|
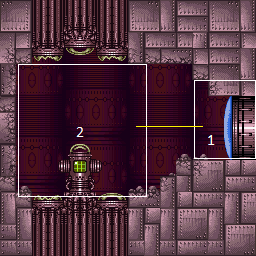 |
link | Norfair / West Norfair Map RoomWiki |
|||
| Norfair Reserve Tank Room | norfairreservetankroom | Array
(
[0] => room99
)
|
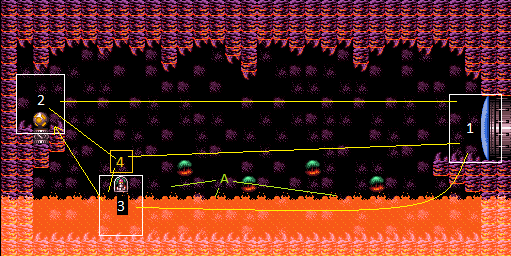 |
link | Norfair / East Norfair Reserve Tank RoomWiki |
|||
| Northwest Maridia Bug Room | northwestmaridiabugroom | Array
(
[0] => room180
)
|
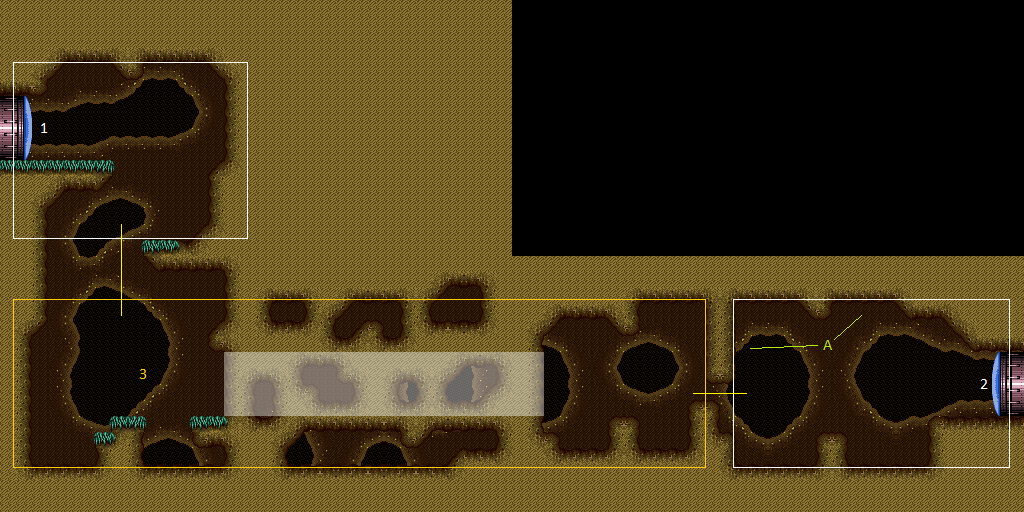 |
link | Maridia / Inner / Yellow Northwest Maridia Bug RoomWiki |
|||
| Nutella Refill | nutellarefill | Array
(
[0] => room308
)
|
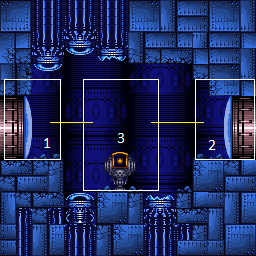 |
link | Norfair / East Nutella RefillWiki |
|||
| Oasis | oasis | Array
(
[0] => room198
)
|
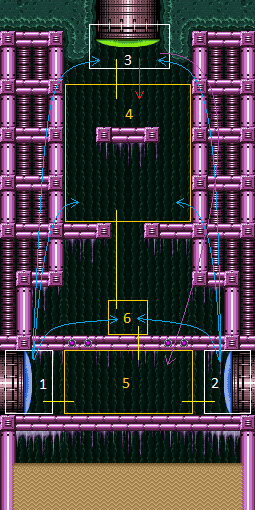 |
link | Maridia / Inner / Green OasisWiki |
|||
| Pants Room | pantsroom | Array
(
[0] => room220
)
|
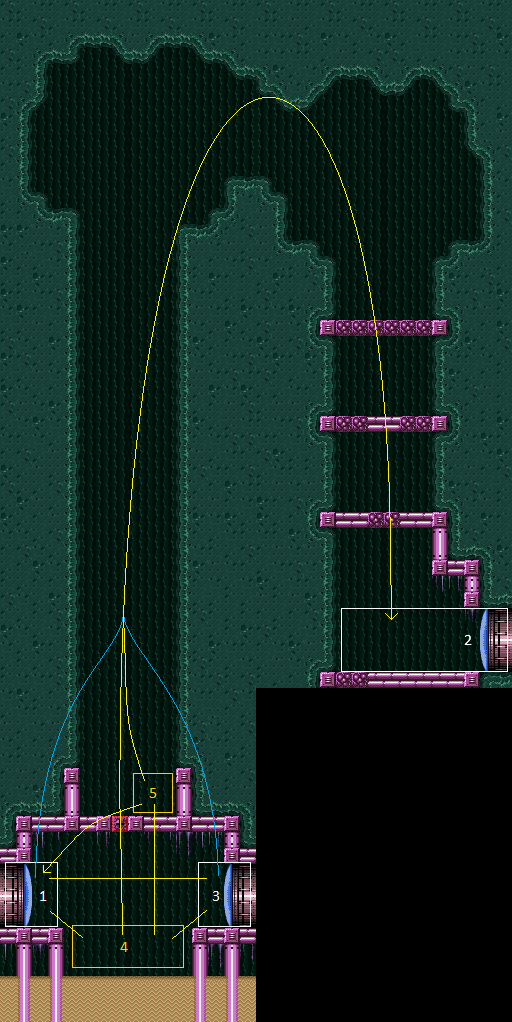 |
link | Maridia / Inner / Green Pants RoomWiki |
|||
| Parlor And Alcatraz | parlorandalcatraz | Array
(
[0] => parlor
[1] => alcatraz
[2] => room10
)
|
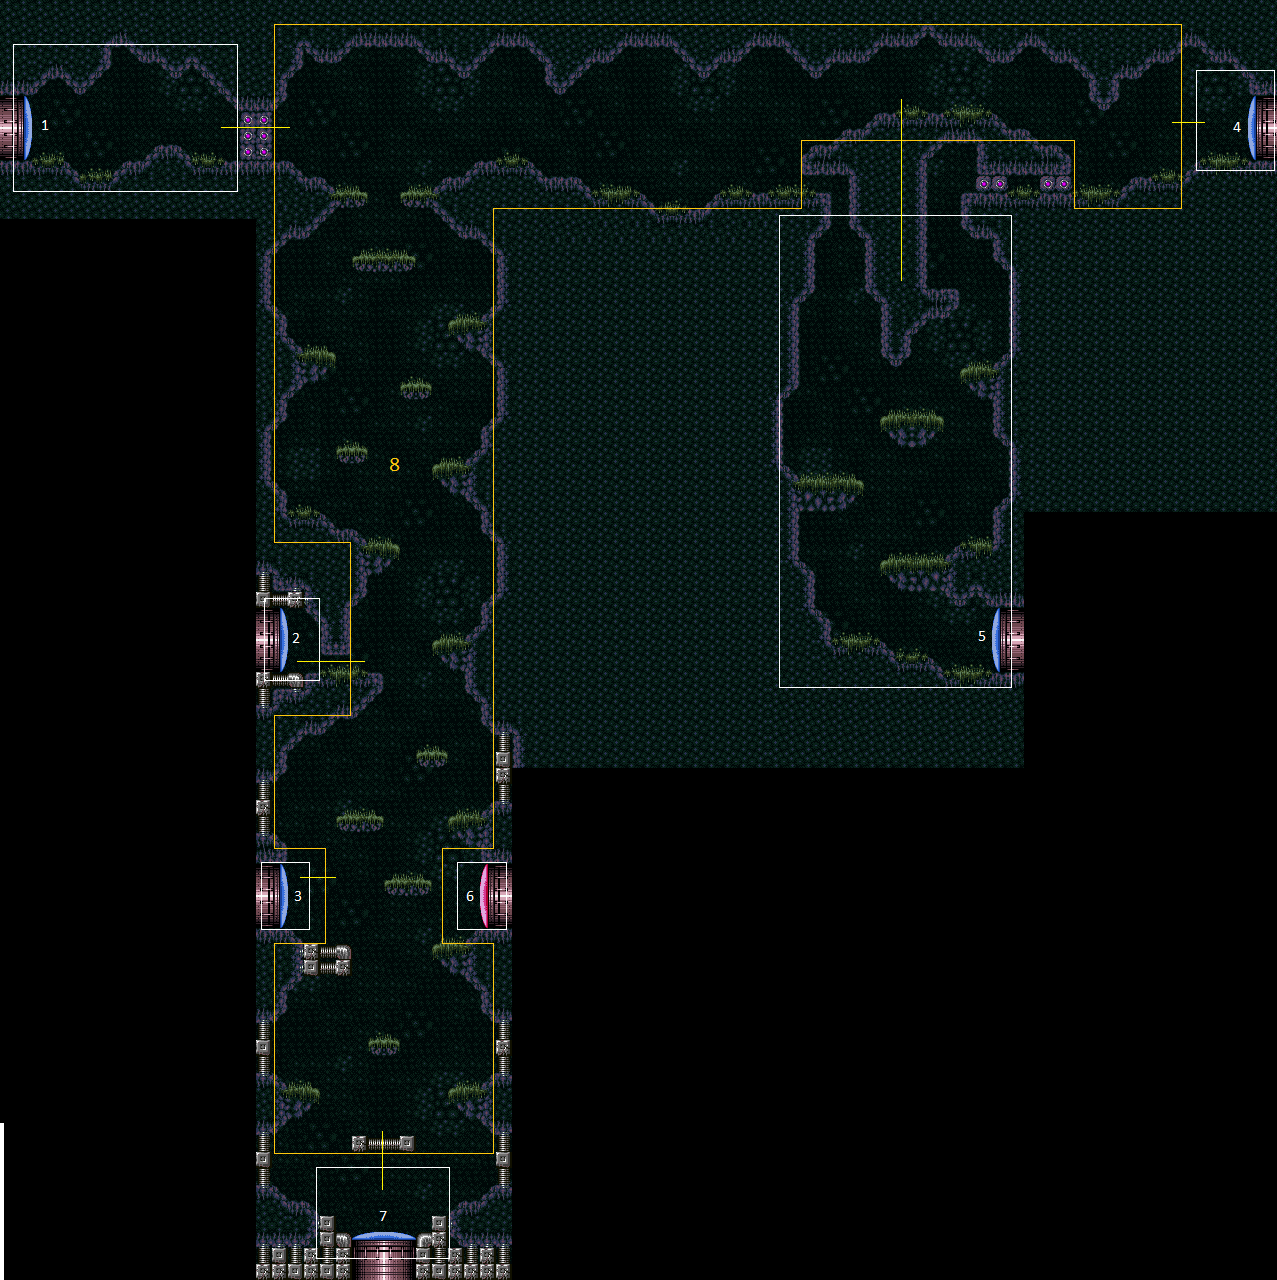 |
link | Crateria / Central Parlor And AlcatrazWiki |
|||
| Phantoon's Room | phantoonsroom | Array
(
[0] => room158
)
|
 |
link | Wrecked Ship Phantoon's RoomWiki |
|||
| Pillar Room | pillarroom | Array
(
[0] => room134
)
|
 |
link | Lower Norfair / East Pillar RoomWiki |
|||
| Pink Brinstar Hopper Room | pinkbrinstarhopperroom | Array
(
[0] => room61
)
|
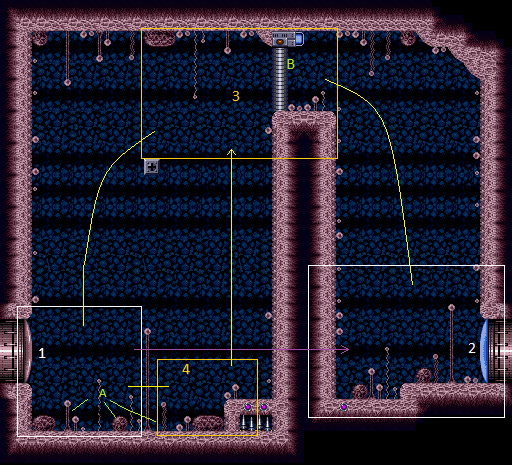 |
link | Brinstar / Pink Pink Brinstar Hopper RoomWiki |
|||
| Pink Brinstar Power Bomb Room | pinkbrinstarpowerbombroom | Array
(
[0] => room60
)
|
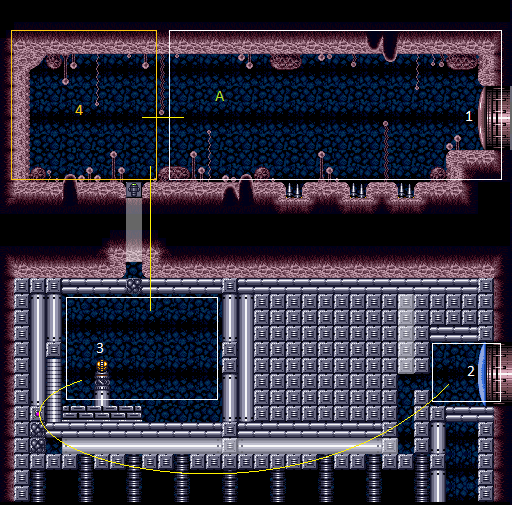 |
link | Brinstar / Pink Pink Brinstar Power Bomb RoomWiki |
|||
| Pit Room | pitroom | Array
(
[0] => room12
)
|
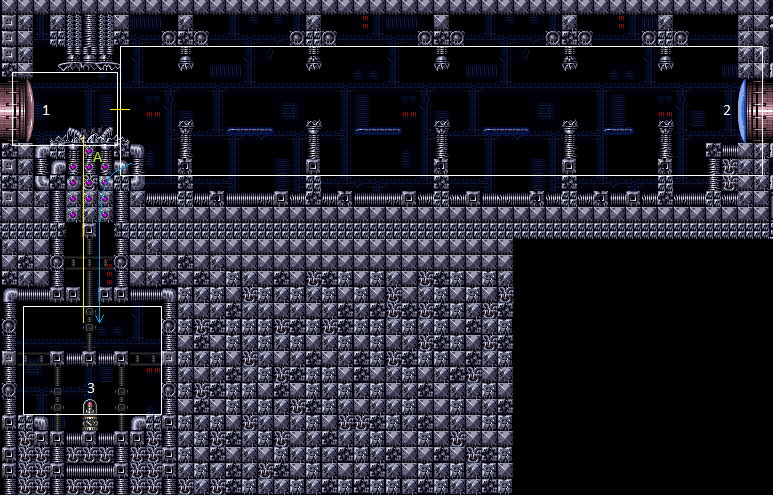 |
link | Crateria / Central Pit RoomWiki |
|||
| Plasma Beach Quicksand Room | plasmabeachquicksandroom | Array
(
[0] => room212
)
|
 |
link | Maridia / Inner / Yellow Plasma Beach Quicksand RoomWiki |
|||
| Plasma Room | plasmaroom | Array
(
[0] => room219
)
|
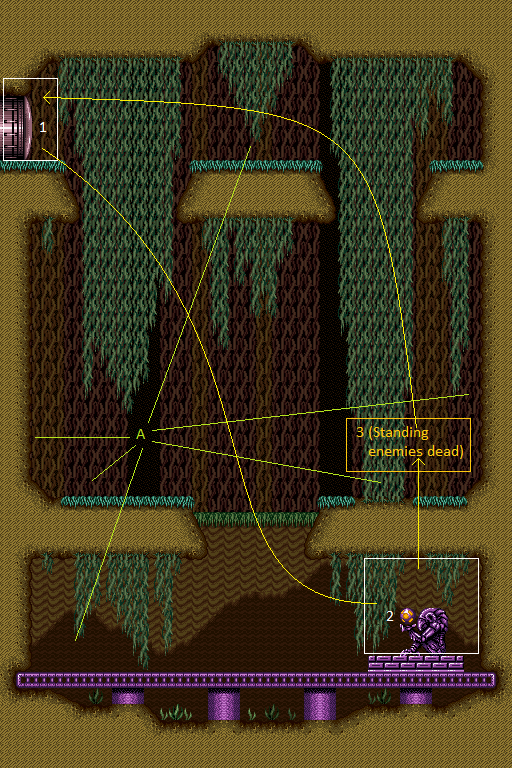 |
link | Maridia / Inner / Yellow Plasma RoomWiki |
|||
| Plasma Spark Room | plasmasparkroom | Array
(
[0] => room197
)
|
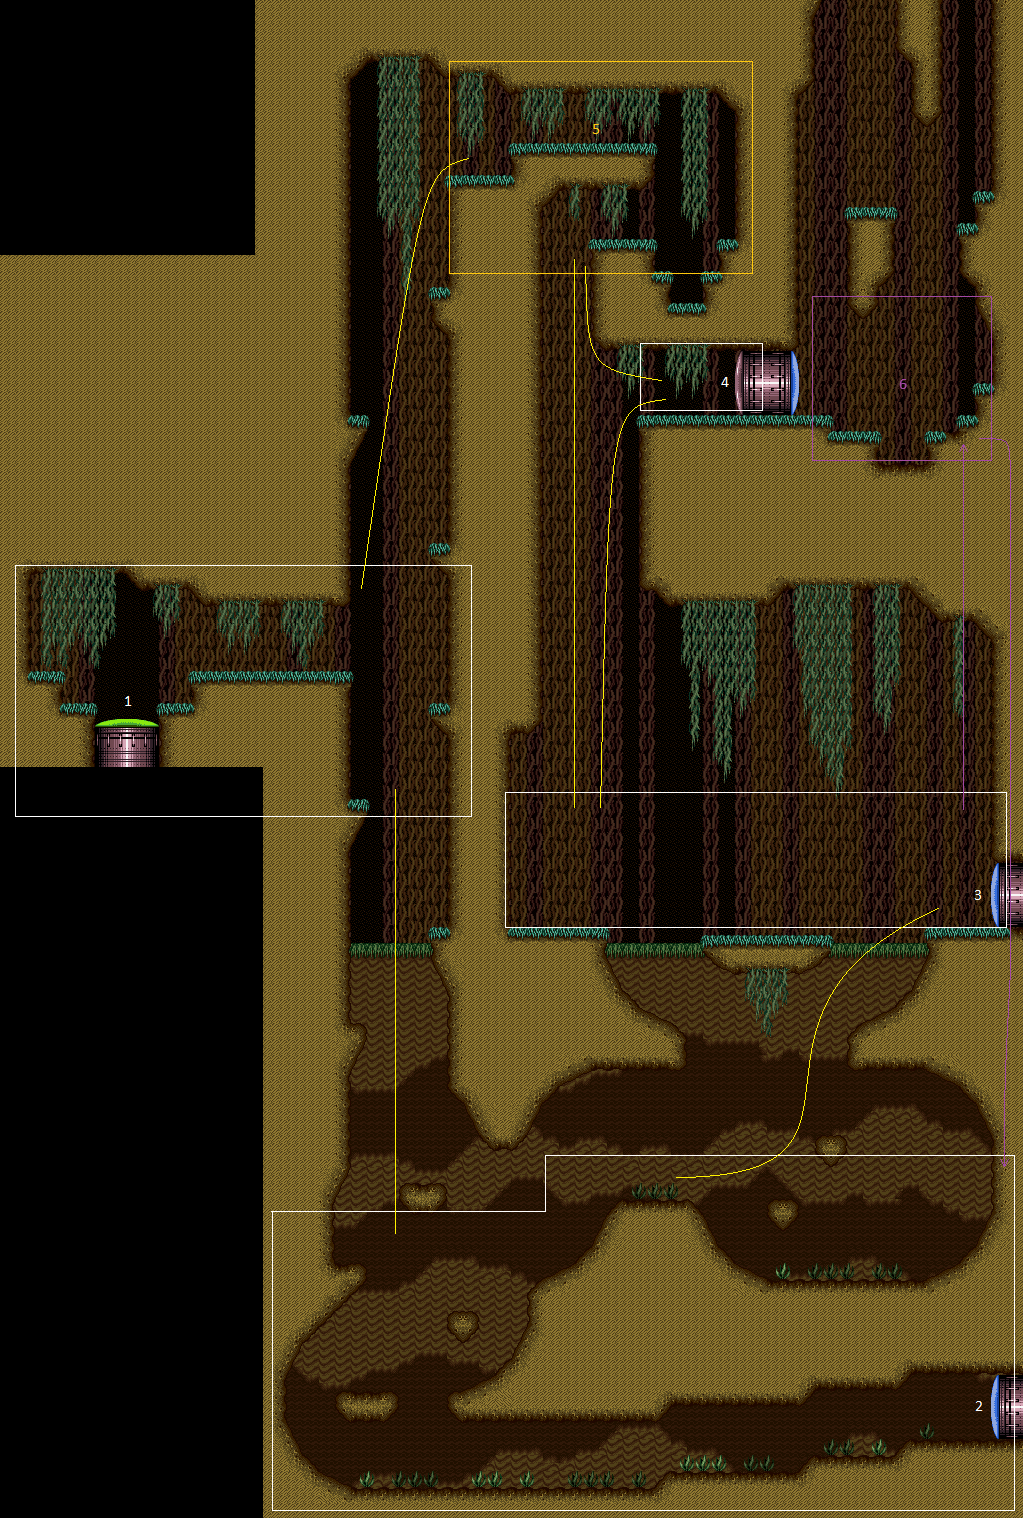 |
link | Maridia / Inner / Yellow Plasma Spark RoomWiki |
|||
| Plasma Tutorial Room | plasmatutorialroom | Array
(
[0] => room218
)
|
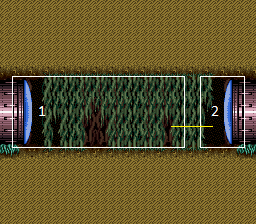 |
link | Maridia / Inner / Yellow Plasma Tutorial RoomWiki |
|||
| Plowerhouse Room | plowerhouseroom | Array
(
[0] => room140
)
|
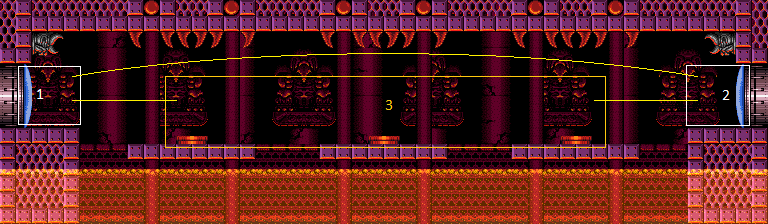 |
link | Lower Norfair / East Plowerhouse RoomWiki |
|||
| Post Crocomire Farming Room | postcrocomirefarmingroom | Array
(
[0] => room123
)
|
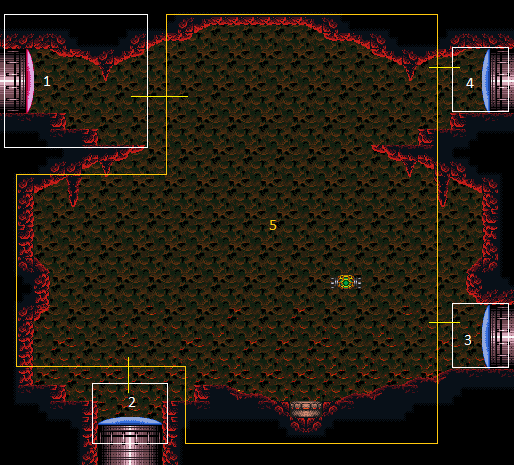 |
link | Norfair / Crocomire Post Crocomire Farming RoomWiki |
|||
| Post Crocomire Jump Room | postcrocomirejumproom | Array
(
[0] => room127
)
|
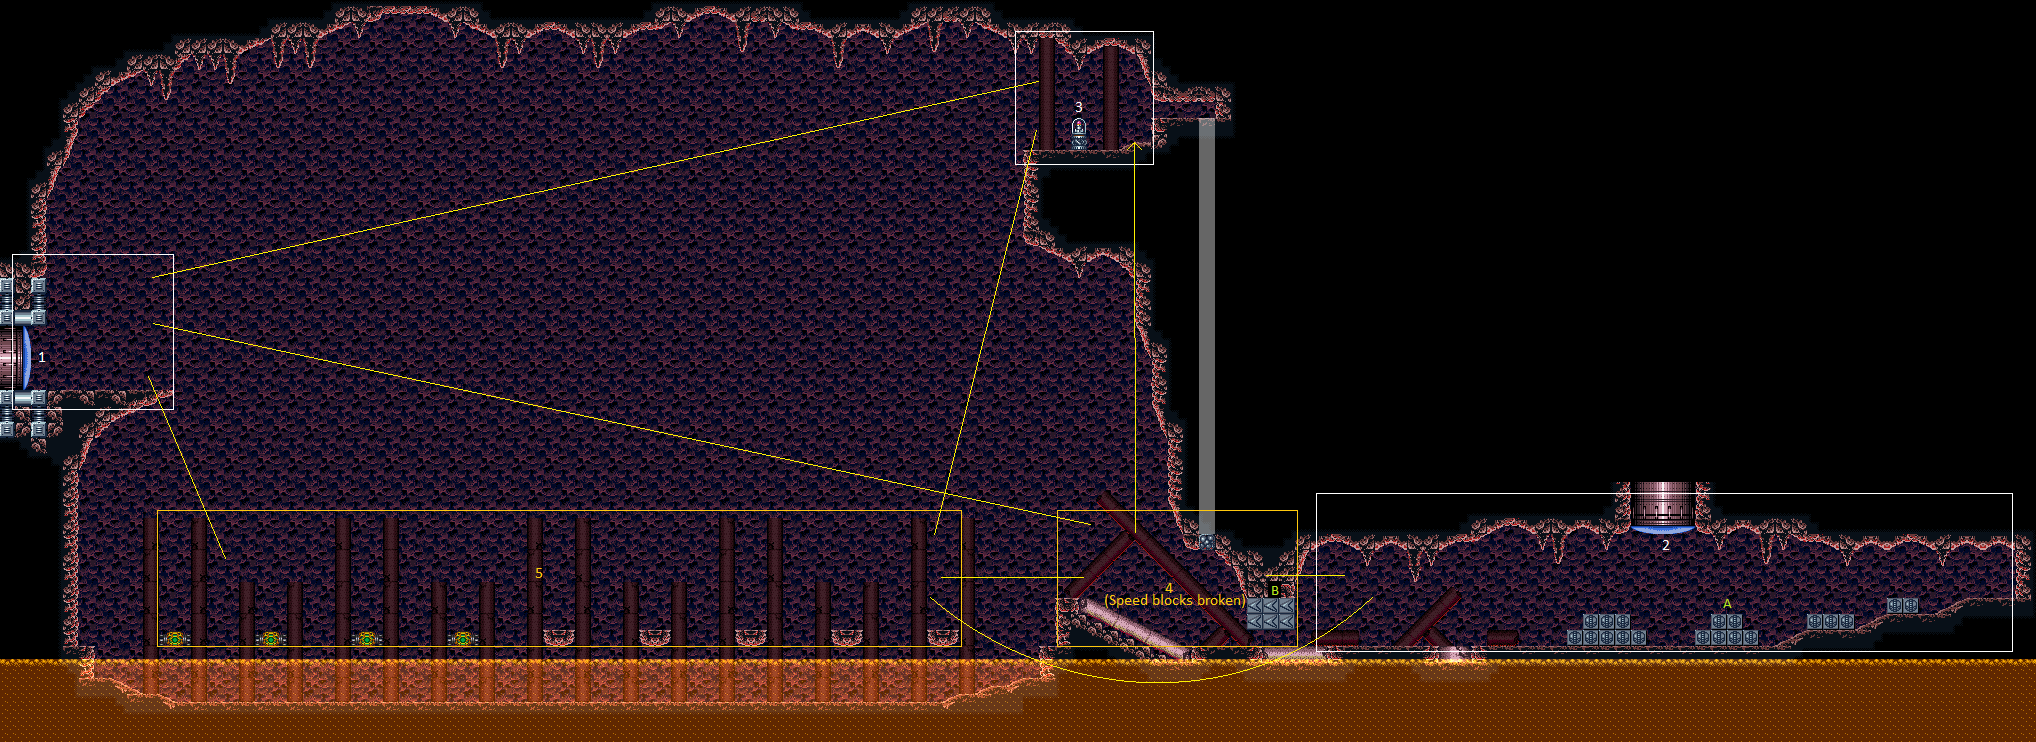 |
link | Norfair / Crocomire Post Crocomire Jump RoomWiki |
|||
| Post Crocomire Missile Room | postcrocomiremissileroom | Array
(
[0] => room126
)
|
 |
link | Norfair / Crocomire Post Crocomire Missile RoomWiki |
|||
| Post Crocomire Power Bomb Room | postcrocomirepowerbombroom | Array
(
[0] => room124
)
|
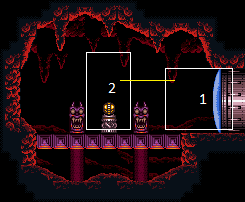 |
link | Norfair / Crocomire Post Crocomire Power Bomb RoomWiki |
|||
| Post Crocomire Save Room | postcrocomiresaveroom | Array
(
[0] => room311
)
|
 |
link | Norfair / Crocomire Post Crocomire Save RoomWiki |
|||
| Post Crocomire Shaft | postcrocomireshaft | Array
(
[0] => room125
)
|
 |
link | Norfair / Crocomire Post Crocomire ShaftWiki |
|||
| Pre Map Flyway | premapflyway | Array
(
[0] => room14
)
|
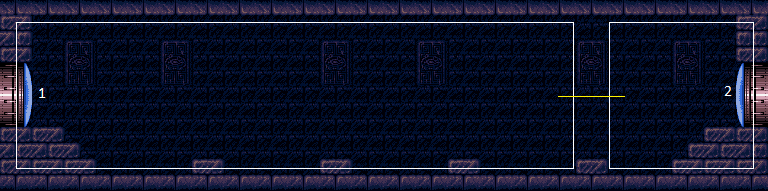 |
link | Crateria / Central Pre Map FlywayWiki |
|||
| Pseudo Plasma Spark Room | pseudoplasmasparkroom | Array
(
[0] => room179
)
|
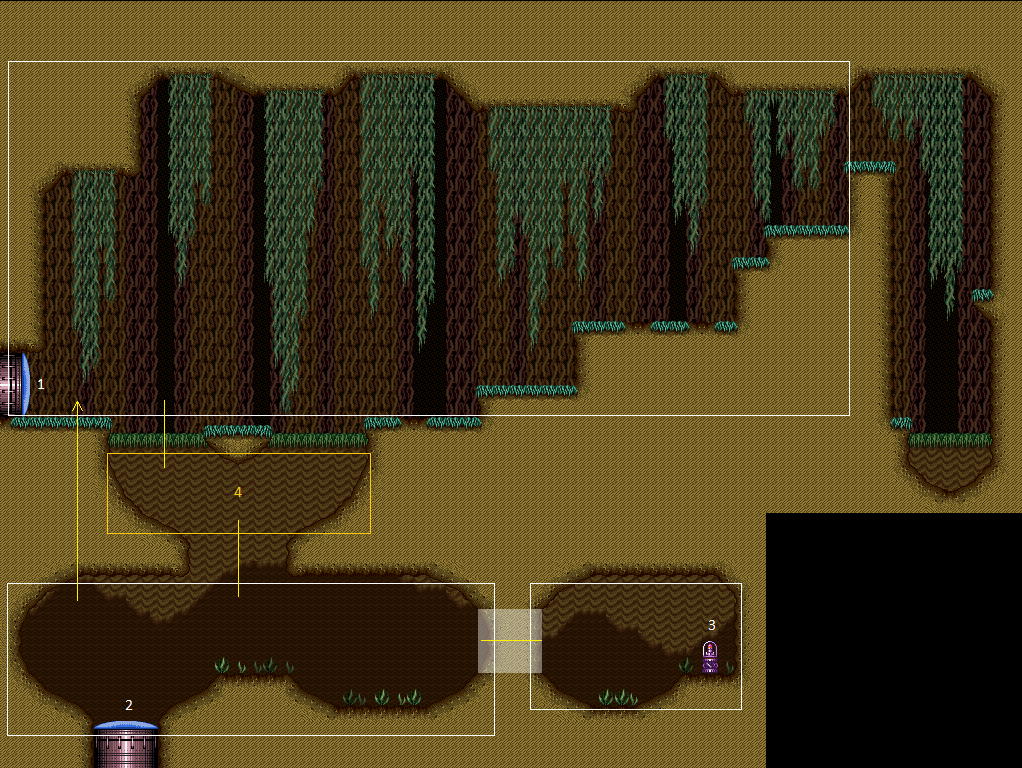 |
link | Maridia / Inner / Yellow Pseudo Plasma Spark RoomWiki |
|||
| Purple Farming Room | purplefarmingroom | Array
(
[0] => room96
)
|
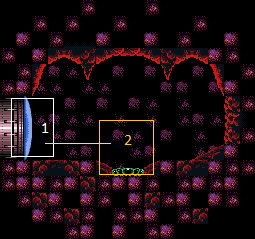 |
link | Norfair / East Purple Farming RoomWiki |
|||
| Purple Shaft | purpleshaft | Array
(
[0] => room95
)
|
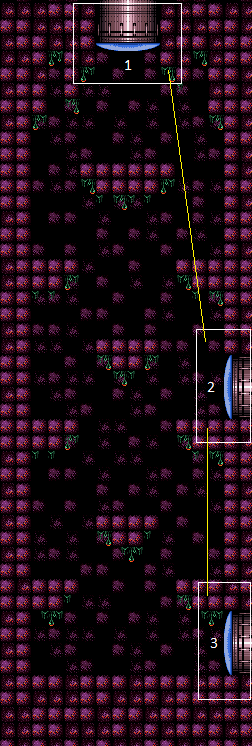 |
link | Norfair / East Purple ShaftWiki |
|||
| Red Brinstar Elevator Room | redbrinstarelevatorroom | Array
(
[0] => room25
)
|
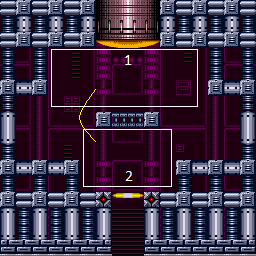 |
link | Crateria / East Red Brinstar Elevator RoomWiki |
|||
| Red Brinstar Fireflea Room | redbrinstarfireflearoom | Array
(
[0] => room67
)
|
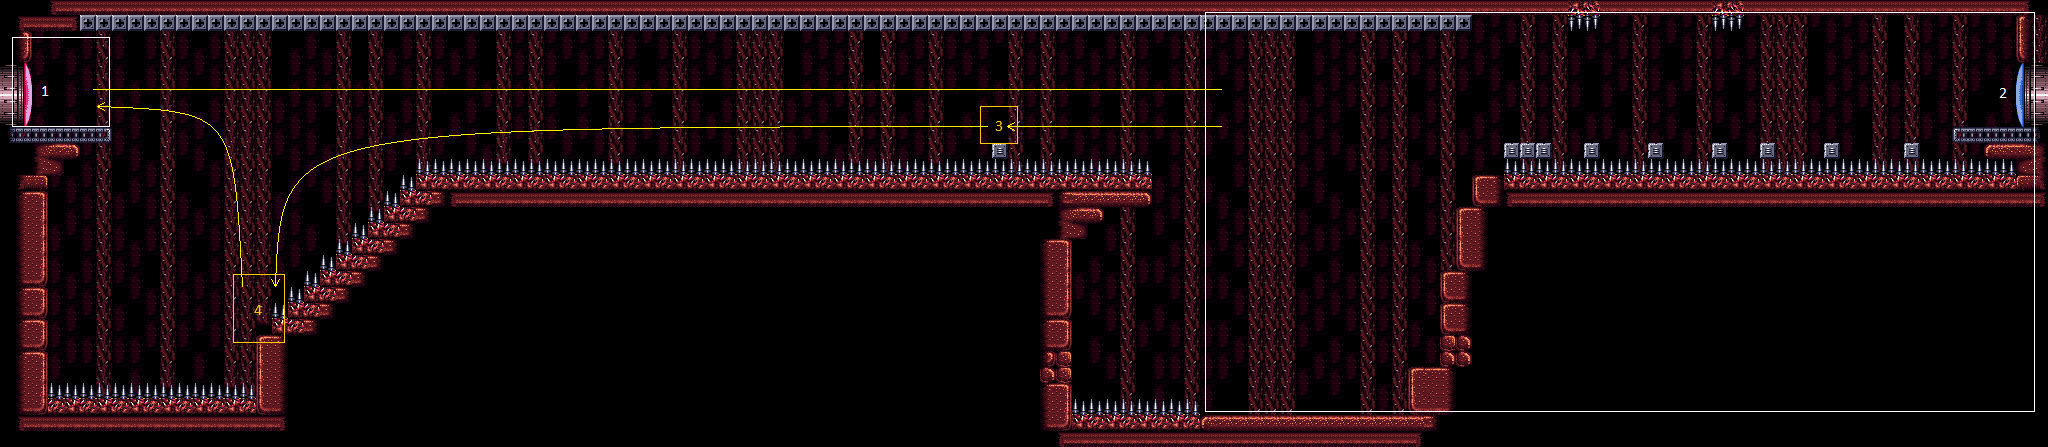 |
link | Brinstar / Red Red Brinstar Fireflea RoomWiki |
|||
| Red Fish Room | redfishroom | Array
(
[0] => room177
)
|
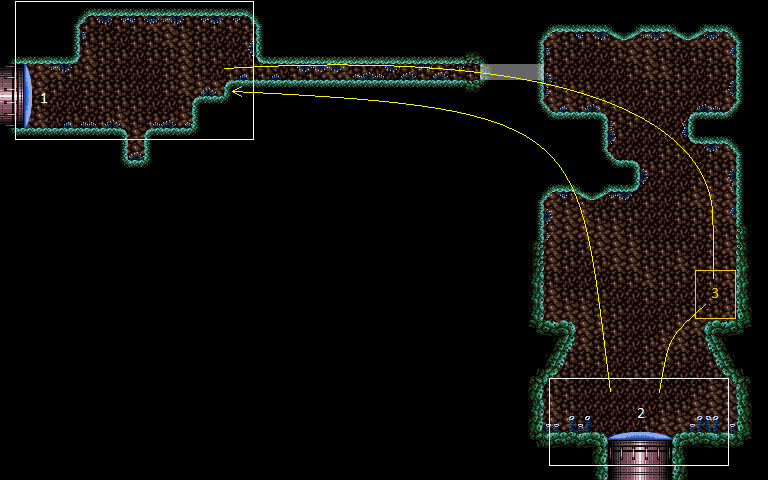 |
link | Maridia / Outer Red Fish RoomWiki |
|||
| Red Kihunter Shaft | redkihuntershaft | Array
(
[0] => room137
)
|
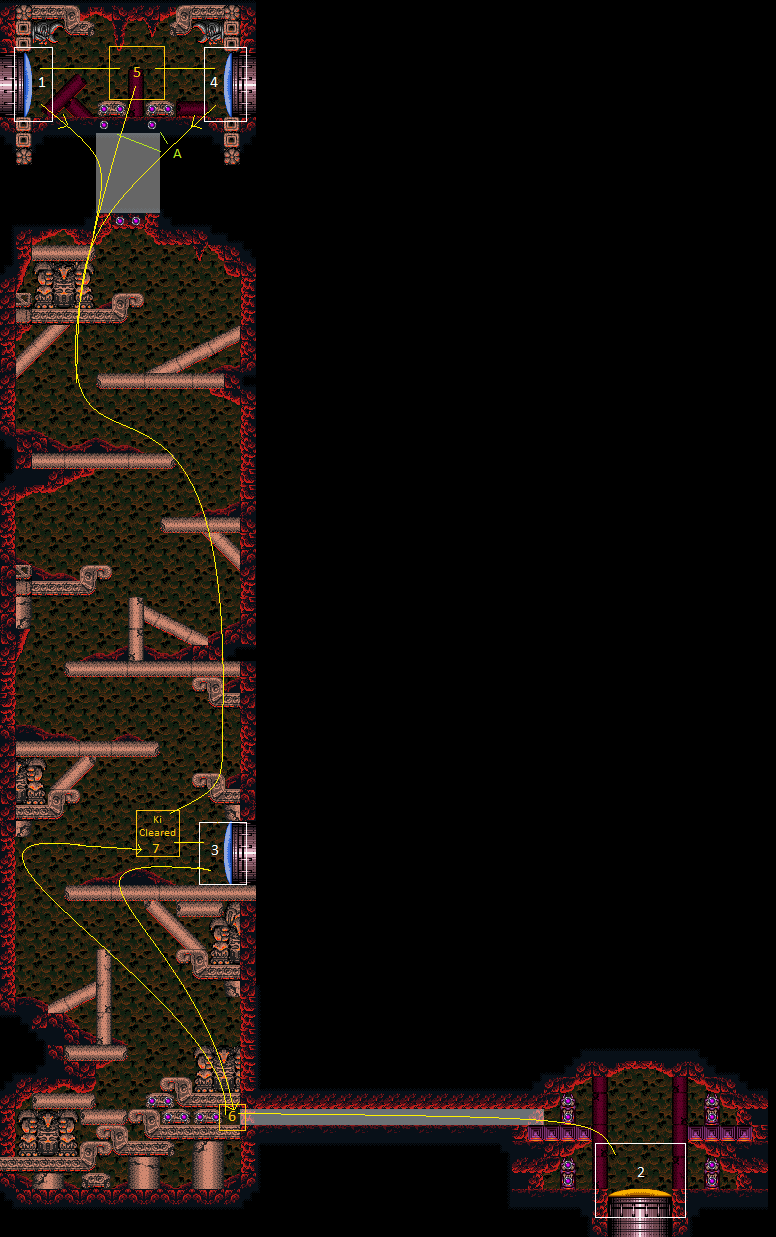 |
link | Lower Norfair / East Red Kihunter ShaftWiki |
|||
| Red Kihunter Shaft Save Room | redkihuntershaftsaveroom | Array
(
[0] => room312
)
|
 |
link | Lower Norfair / East Red Kihunter Shaft Save RoomWiki |
|||
| Red Pirate Shaft | redpirateshaft | Array
(
[0] => room118
)
|
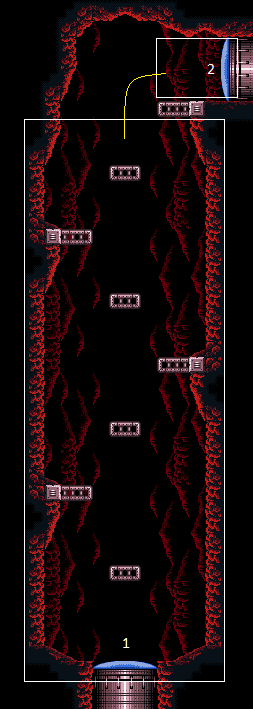 |
link | Norfair / East Red Pirate ShaftWiki |
|||
| Red Tower | redtower | Array
(
[0] => room66
)
|
 |
link | Brinstar / Red Red TowerWiki |
|||
| Ridley Tank Room | ridleytankroom | Array
(
[0] => room143
)
|
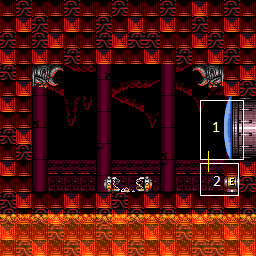 |
link | Lower Norfair / East Ridley Tank RoomWiki |
|||
| Ridley's Room | ridleysroom | Array
(
[0] => room142
)
|
 |
link | Lower Norfair / East Ridley's RoomWiki |
|||
| Rinka Shaft | rinkashaft | Array
(
[0] => room236
)
|
 |
link | Tourian Rinka ShaftWiki |
|||
| Rising Tide | risingtide | Array
(
[0] => room92
)
|
 |
link | Norfair / East Rising TideWiki |
|||
| Screw Attack Room | screwattackroom | Array
(
[0] => room151
)
|
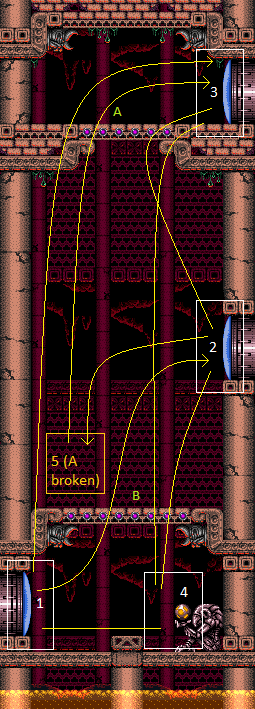 |
link | Lower Norfair / West Screw Attack RoomWiki |
|||
| Seaweed Room | seaweedroom | Array
(
[0] => room233
)
|
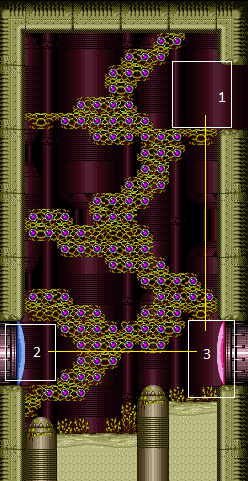 |
link | Tourian Seaweed RoomWiki |
|||
| Shaktool Room | shaktoolroom | Array
(
[0] => room222
)
|
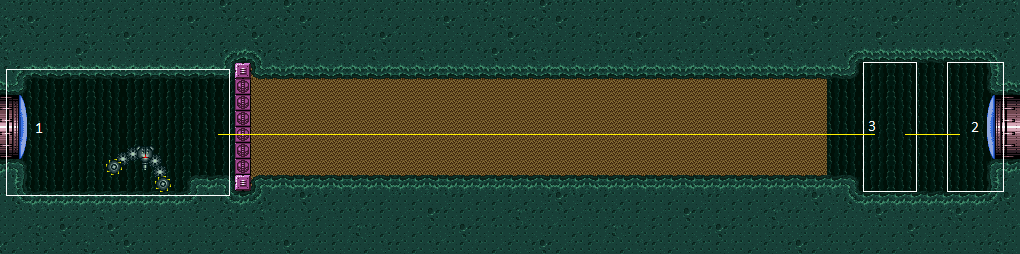 |
link | Maridia / Inner / Green Shaktool RoomWiki |
|||
| Single Chamber | singlechamber | Array
(
[0] => room103
)
|
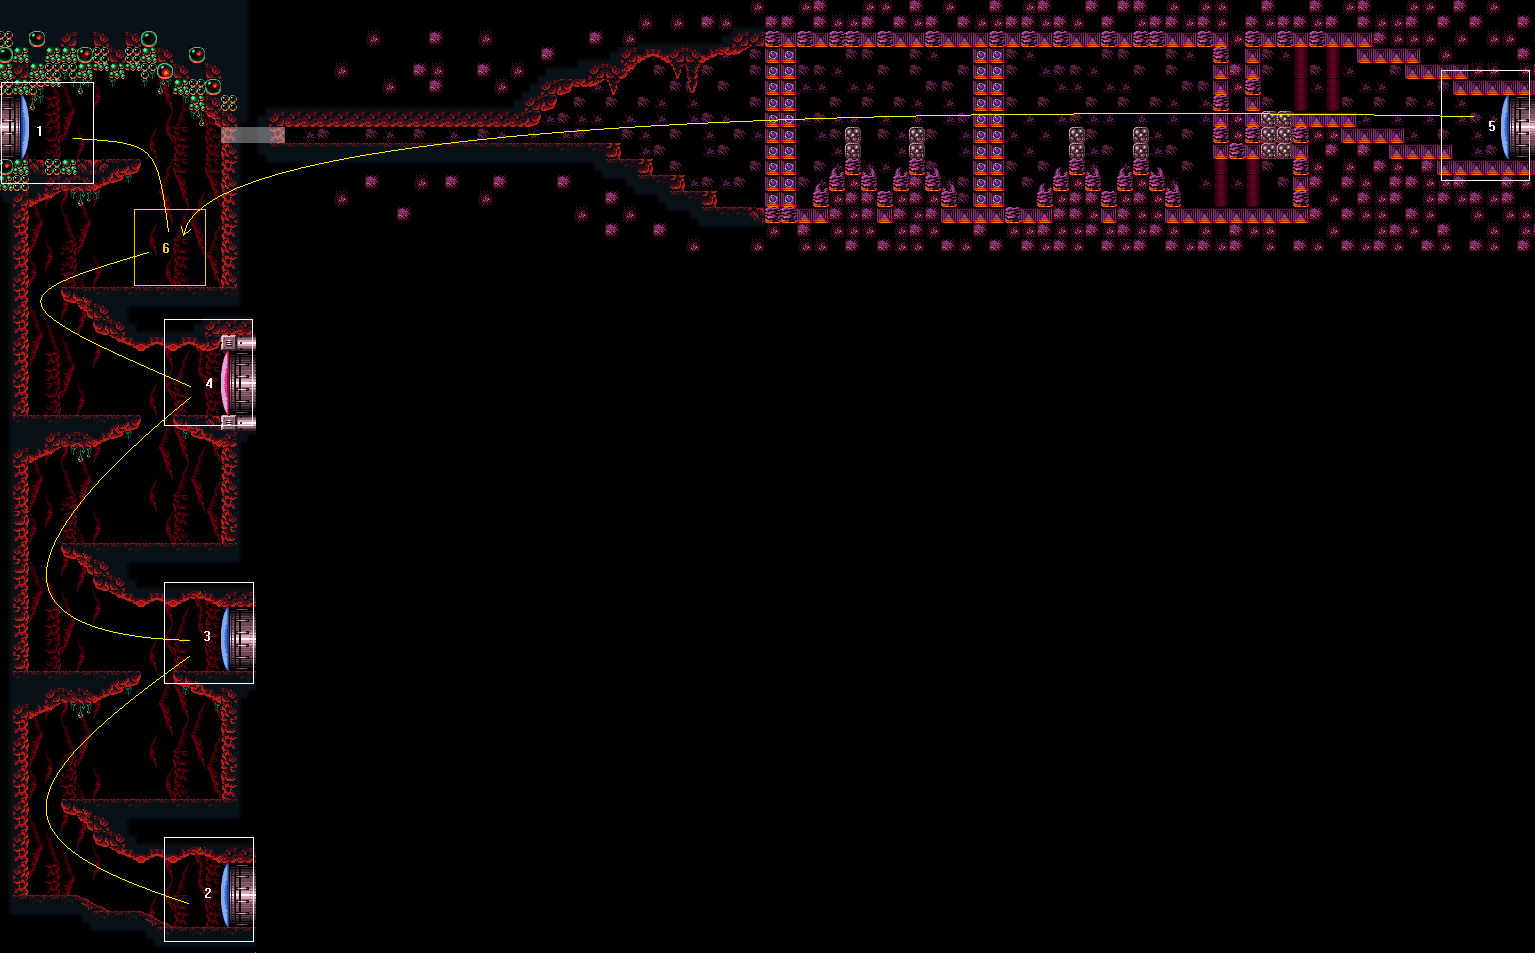 |
link | Norfair / East Single ChamberWiki |
|||
| Sloaters Refill | sloatersrefill | Array
(
[0] => room319
)
|
 |
link | Brinstar / Red Sloaters RefillWiki |
|||
| Space Jump Room | spacejumproom | Array
(
[0] => room194
)
|
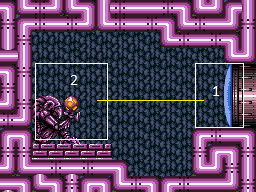 |
link | Maridia / Inner / Pink Space Jump RoomWiki |
|||
| Spazer Room | spazerroom | Array
(
[0] => room71
)
|
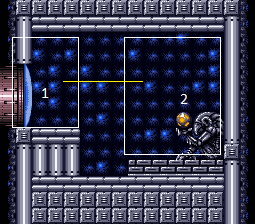 |
link | Brinstar / Red Spazer RoomWiki |
|||
| Speed Booster Hall | speedboosterhall | Array
(
[0] => room101
)
|
 |
link | Norfair / East Speed Booster HallWiki |
|||
| Speed Booster Room | speedboosterroom | Array
(
[0] => room102
)
|
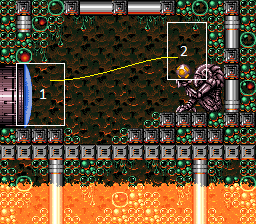 |
link | Norfair / East Speed Booster RoomWiki |
|||
| Spiky Acid Snakes Tunnel | spikyacidsnakestunnel | Array
(
[0] => room112
)
|
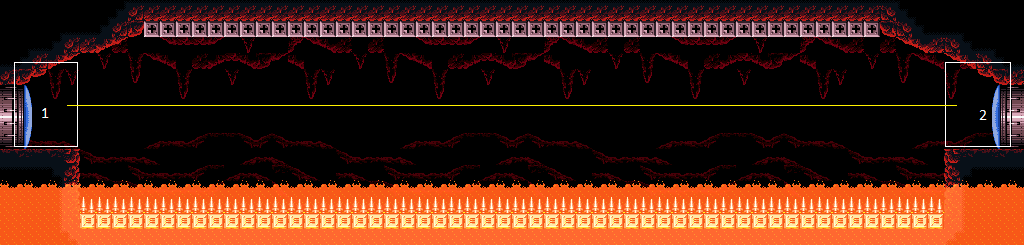 |
link | Norfair / East Spiky Acid Snakes TunnelWiki |
|||
| Spiky Death Room | spikydeathroom | Array
(
[0] => room165
)
|
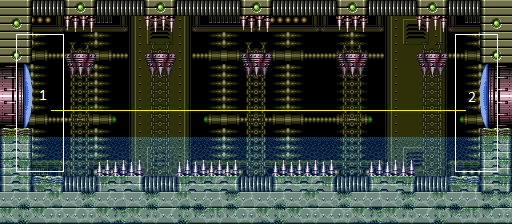 |
link | Wrecked Ship Spiky Death RoomWiki |
|||
| Spiky Platforms Tunnel | spikyplatformstunnel | Array
(
[0] => room117
)
|
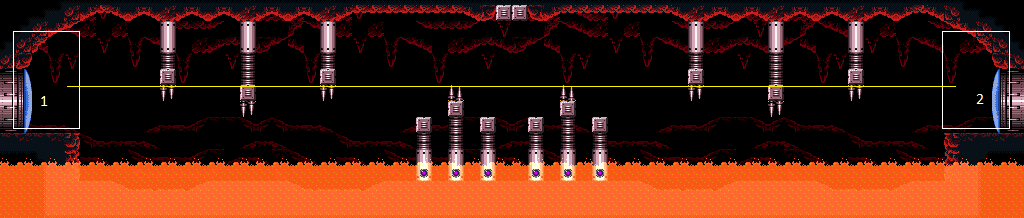 |
link | Norfair / East Spiky Platforms TunnelWiki |
|||
| Sponge Bath | spongebath | Array
(
[0] => room164
)
|
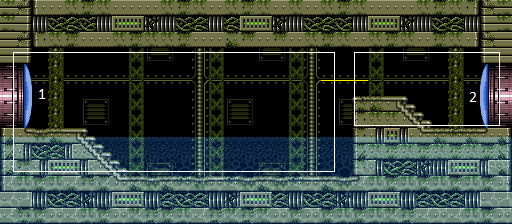 |
link | Wrecked Ship Sponge BathWiki |
|||
| Spore Spawn Farming Room | sporespawnfarmingroom | Array
(
[0] => room64
)
|
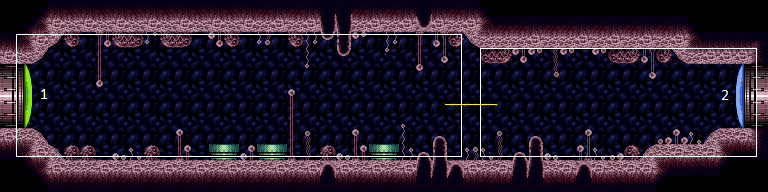 |
link | Brinstar / Pink Spore Spawn Farming RoomWiki |
|||
| Spore Spawn Kihunter Room | sporespawnkihunterroom | Array
(
[0] => room56
)
|
 |
link | Brinstar / Green Spore Spawn Kihunter RoomWiki |
|||
| Spore Spawn Room | sporespawnroom | Array
(
[0] => room57
)
|
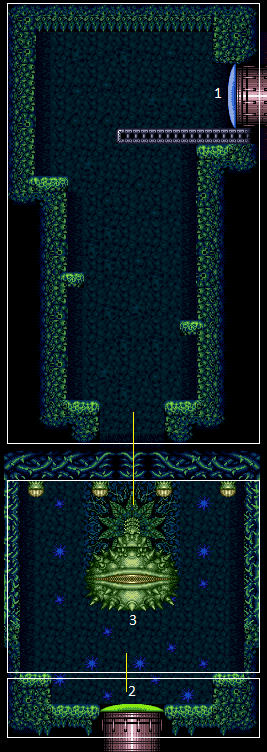 |
link | Brinstar / Green Spore Spawn RoomWiki |
|||
| Spore Spawn Super Room | sporespawnsuperroom | Array
(
[0] => room63
)
|
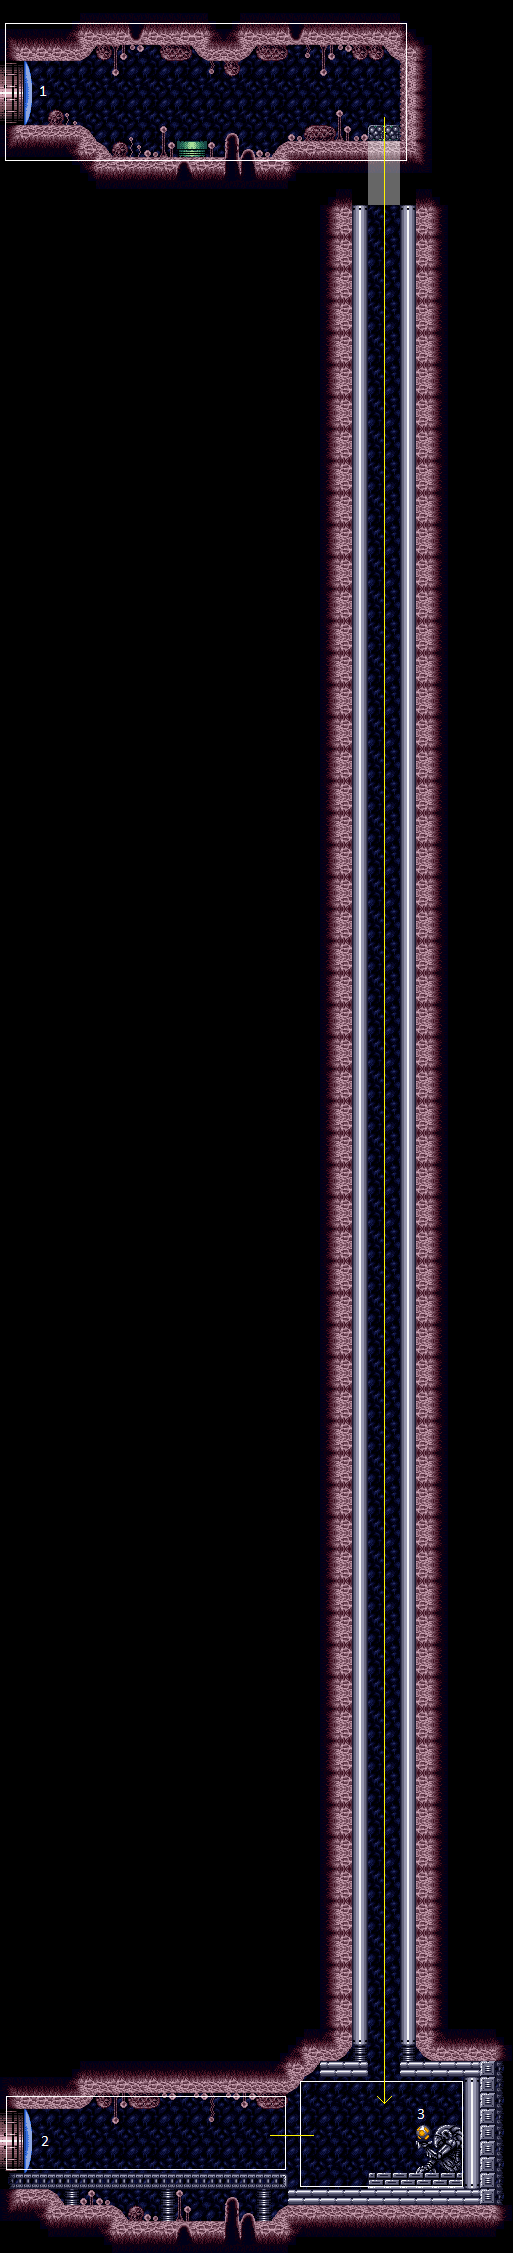 |
link | Brinstar / Pink Spore Spawn Super RoomWiki |
|||
| Spring Ball Room | springballroom | Array
(
[0] => room223
)
|
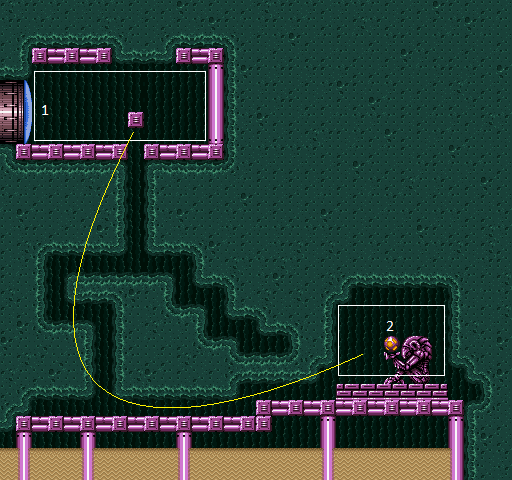 |
link | Maridia / Inner / Green Spring Ball RoomWiki |
|||
| Statues Hallway | statueshallway | Array
(
[0] => room26
)
|
 |
link | Crateria / West Statues HallwayWiki |
|||
| Statues Room | statuesroom | Array
(
[0] => room27
)
|
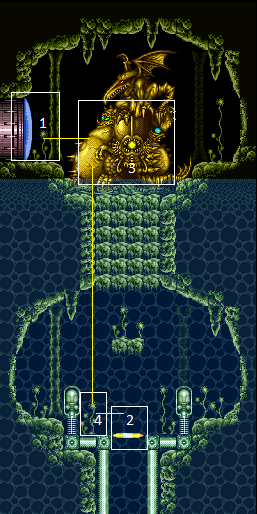 |
link | Crateria / West Statues RoomWiki |
|||
| Terminator Room | terminatorroom | Array
(
[0] => room20
)
|
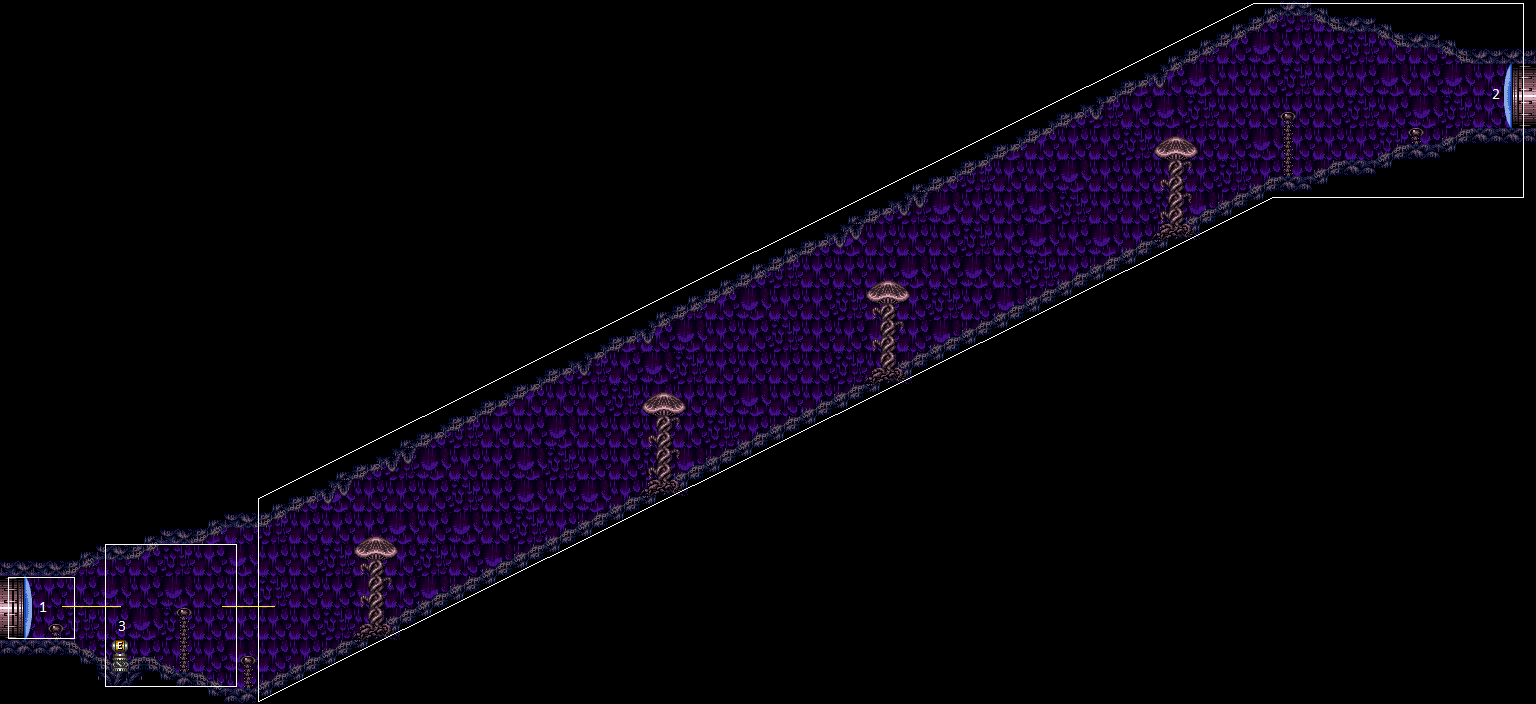 |
link | Crateria / West Terminator RoomWiki |
|||
| The Final Missile | thefinalmissile | Array
(
[0] => finalmissile
[1] => room17
)
|
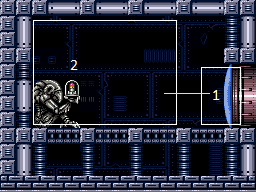 |
link | Crateria / Central The Final MissileWiki |
|||
| The Moat | themoat | Array
(
[0] => moat
[1] => room7
)
|
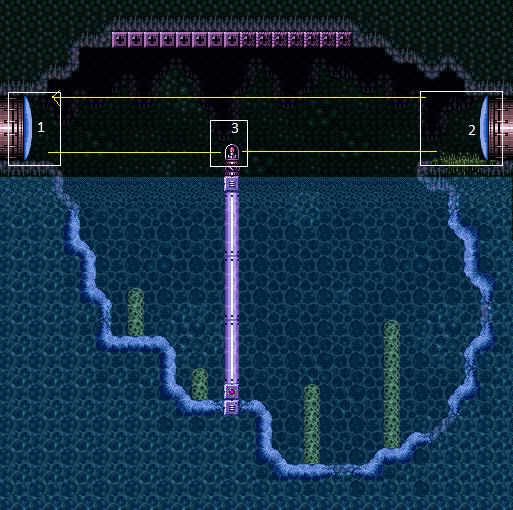 |
link | Crateria / East The MoatWiki |
|||
| The Precious Room | thepreciousroom | Array
(
[0] => preciousroom
[1] => room192
)
|
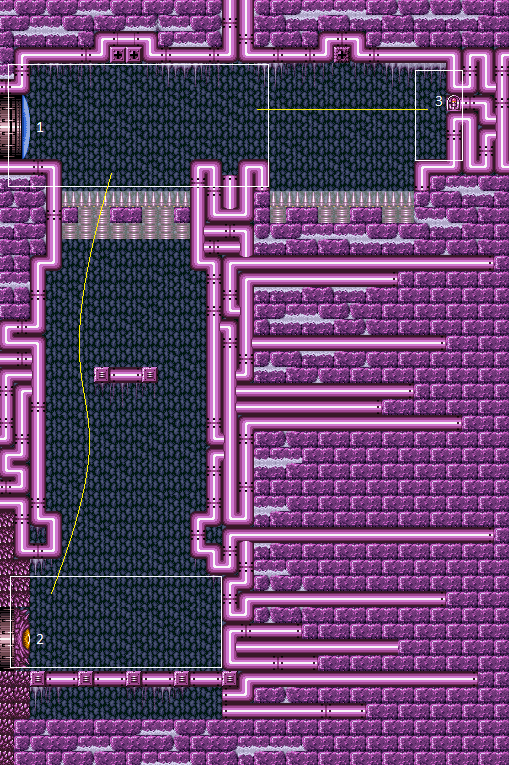 |
link | Maridia / Inner / Pink The Precious RoomWiki |
|||
| The Worst Room In The Game | theworstroominthegame | Array
(
[0] => worstroominthegame
[1] => room135
)
|
 |
link | Lower Norfair / East The Worst Room In The GameWiki |
|||
| Thread The Needle Room | threadtheneedleroom | Array
(
[0] => room214
)
|
 |
link | Maridia / Inner / Yellow Thread The Needle RoomWiki |
|||
| Three Musketeers Room | threemusketeersroom | Array
(
[0] => room148
)
|
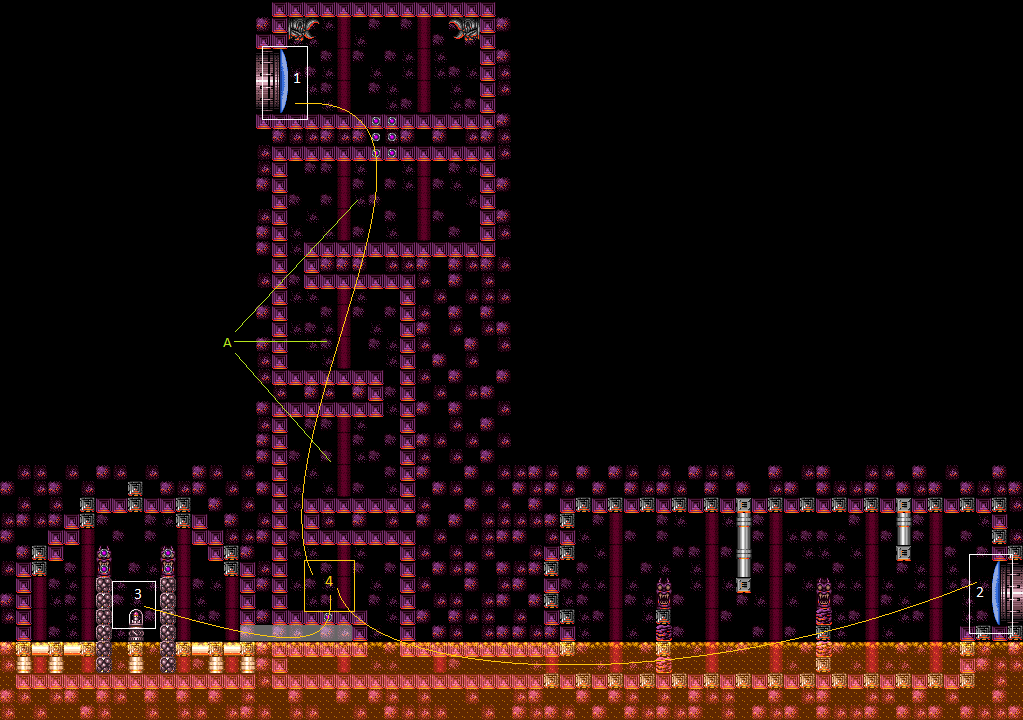 |
link | Lower Norfair / East Three Musketeers RoomWiki |
|||
| Toilet Bowl | toiletbowl | Array
(
[0] => room321
)
|
 |
link | Maridia / Inner / Pink Toilet BowlWiki |
|||
| Tourian Escape Room 1 | tourianescaperoom1 | Array
(
[0] => room239
)
|
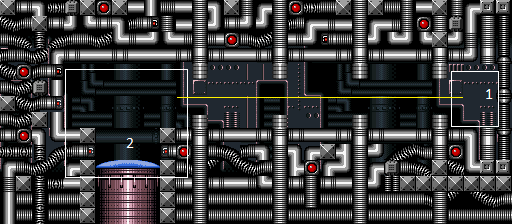 |
link | Tourian Tourian Escape Room 1Wiki |
|||
| Tourian Escape Room 2 | tourianescaperoom2 | Array
(
[0] => room240
)
|
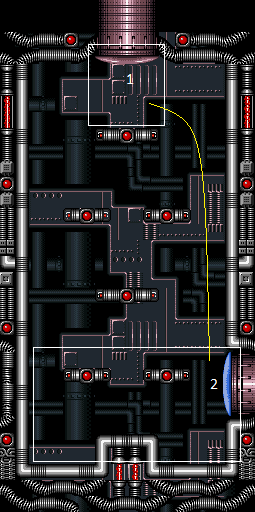 |
link | Tourian Tourian Escape Room 2Wiki |
|||
| Tourian Escape Room 3 | tourianescaperoom3 | Array
(
[0] => room241
)
|
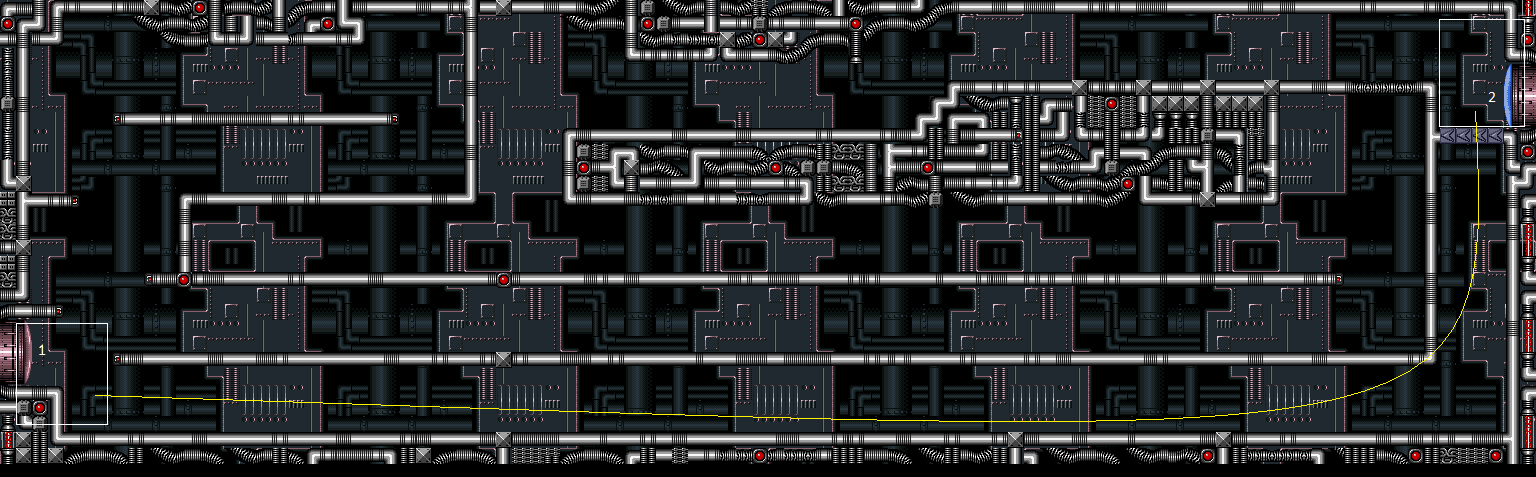 |
link | Tourian Tourian Escape Room 3Wiki |
|||
| Tourian Escape Room 4 | tourianescaperoom4 | Array
(
[0] => room242
)
|
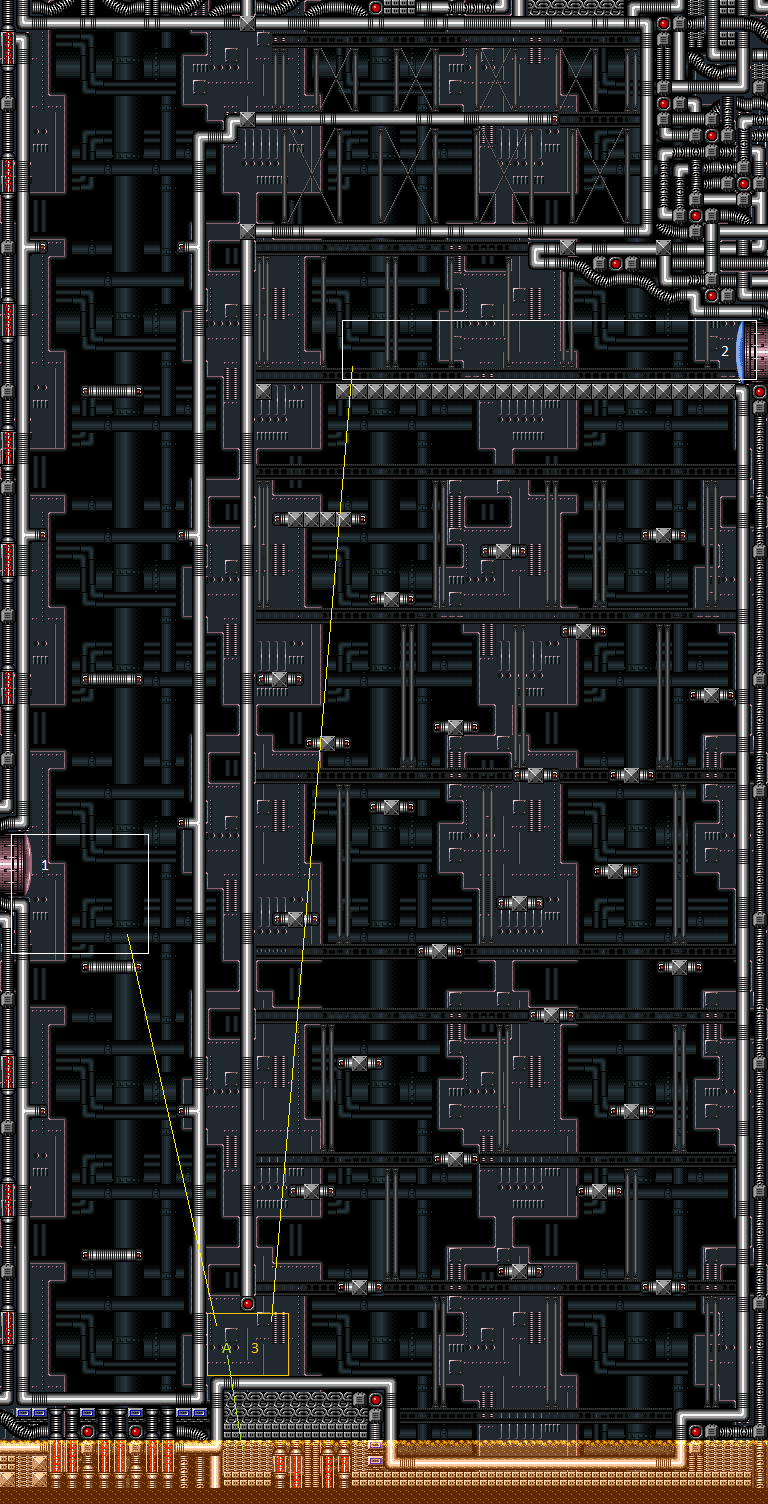 |
link | Tourian Tourian Escape Room 4Wiki |
|||
| Tourian Eye Door Room | tourianeyedoorroom | Array
(
[0] => room235
)
|
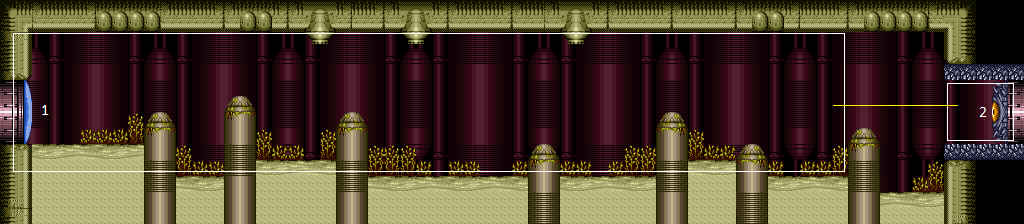 |
link | Tourian Tourian Eye Door RoomWiki |
|||
| Tourian First Room | tourianfirstroom | Array
(
[0] => room224
)
|
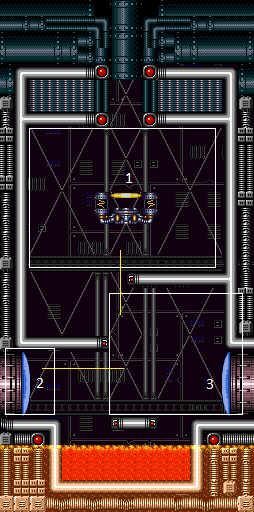 |
link | Tourian Tourian First RoomWiki |
|||
| Tourian Recharge Room | tourianrechargeroom | Array
(
[0] => room234
)
|
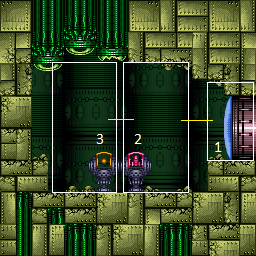 |
link | Tourian Tourian Recharge RoomWiki |
|||
| Upper Norfair Farming Room | uppernorfairfarmingroom | Array
(
[0] => room94
)
|
 |
link | Norfair / East Upper Norfair Farming RoomWiki |
|||
| Upper Tourian Save Room | uppertouriansaveroom | Array
(
[0] => room225
)
|
 |
link | Tourian Upper Tourian Save RoomWiki |
|||
| Varia Suit Room | variasuitroom | Array
(
[0] => room85
)
|
 |
link | Brinstar / Kraid Varia Suit RoomWiki |
|||
| Volcano Room | volcanoroom | Array
(
[0] => room116
)
|
 |
link | Norfair / East Volcano RoomWiki |
|||
| Warehouse Energy Tank Room | warehouseenergytankroom | Array
(
[0] => room80
)
|
 |
link | Brinstar / Kraid Warehouse Energy Tank RoomWiki |
|||
| Warehouse Entrance | warehouseentrance | Array
(
[0] => room78
)
|
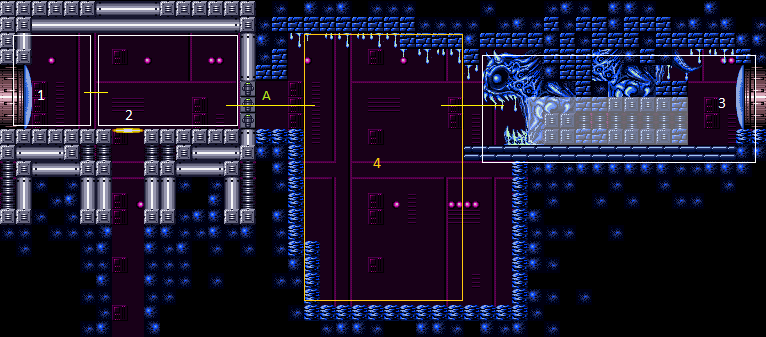 |
link | Brinstar / Kraid Warehouse EntranceWiki |
|||
| Warehouse Kihunter Room | warehousekihunterroom | Array
(
[0] => room81
)
|
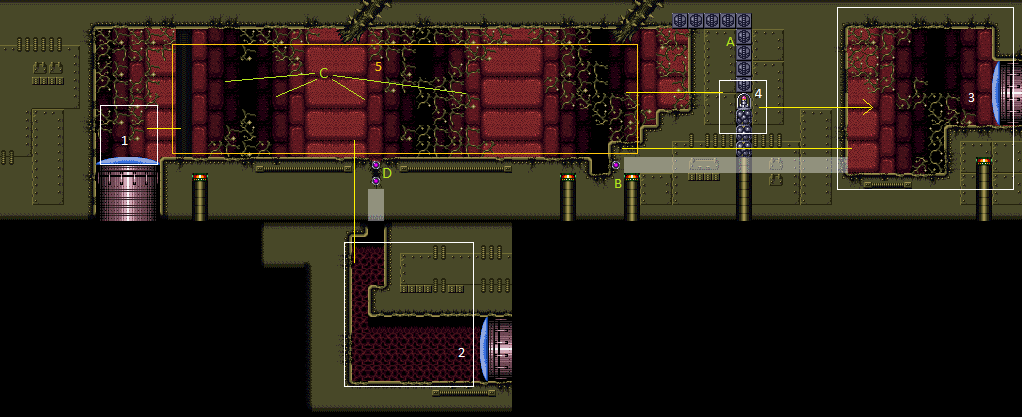 |
link | Brinstar / Kraid Warehouse Kihunter RoomWiki |
|||
| Warehouse Zeela Room | warehousezeelaroom | Array
(
[0] => room79
)
|
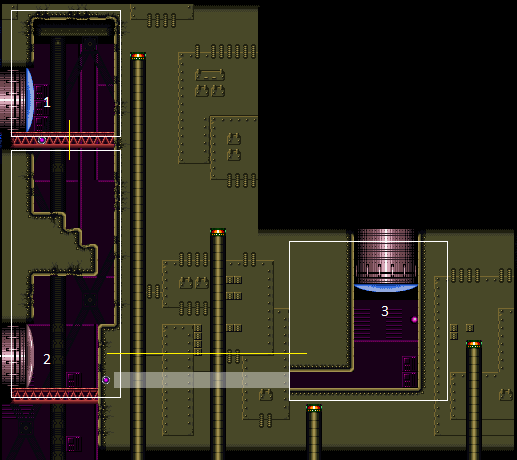 |
link | Brinstar / Kraid Warehouse Zeela RoomWiki |
|||
| Wasteland | wasteland | Array
(
[0] => room138
)
|
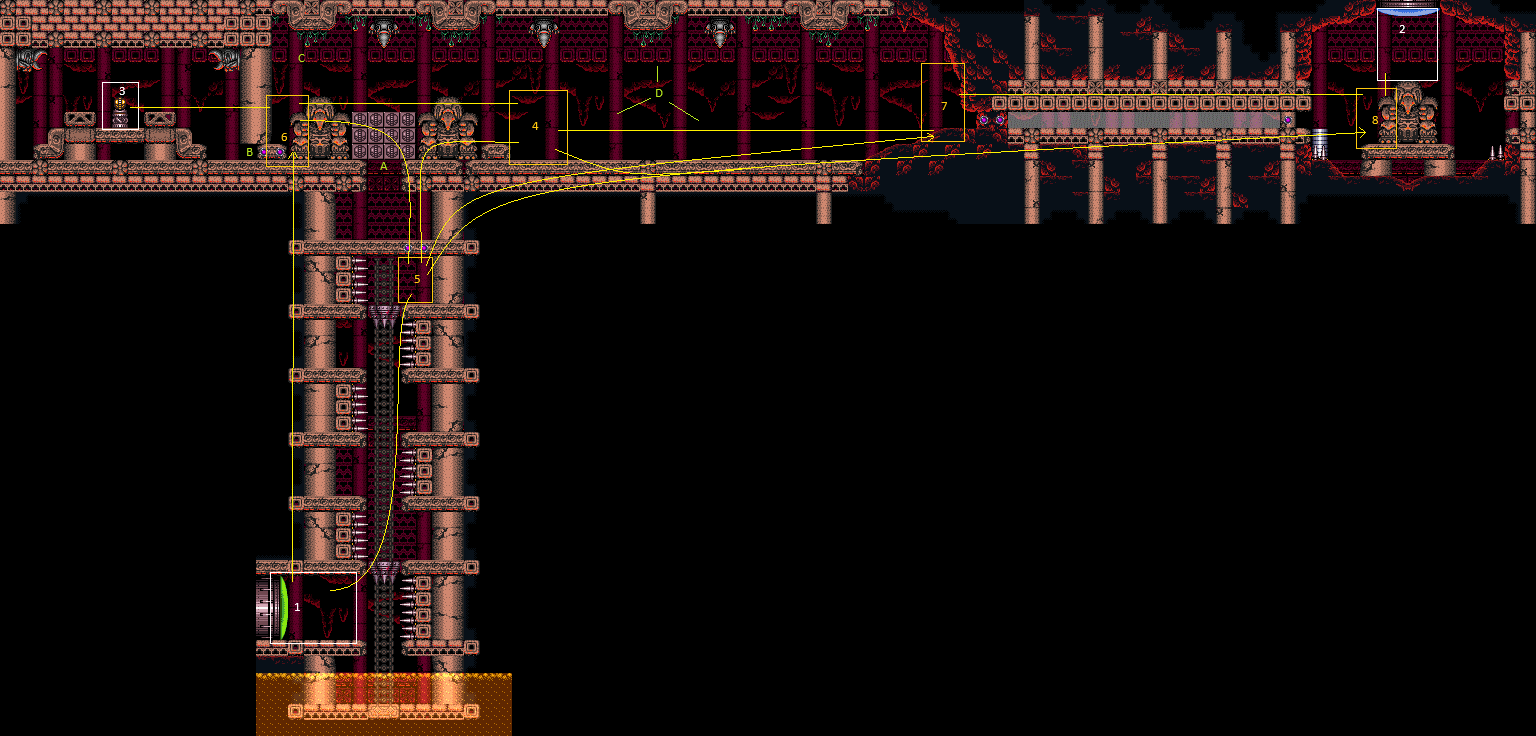 |
link | Lower Norfair / East WastelandWiki |
|||
| Watering Hole | wateringhole | Array
(
[0] => room181
)
|
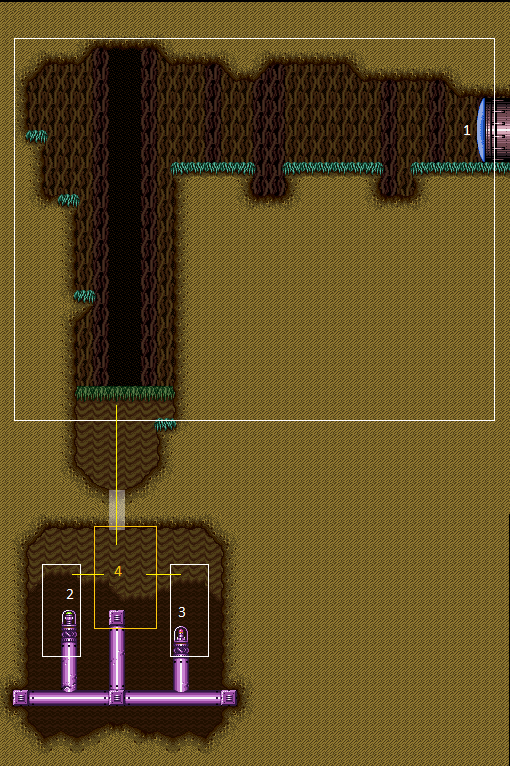 |
link | Maridia / Inner / Yellow Watering HoleWiki |
|||
| Waterway Energy Tank Room | waterwayenergytankroom | Array
(
[0] => room65
)
|
 |
link | Brinstar / Pink Waterway Energy Tank RoomWiki |
|||
| Wave Beam Room | wavebeamroom | Array
(
[0] => room105
)
|
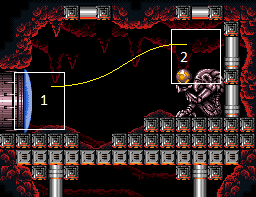 |
link | Norfair / East Wave Beam RoomWiki |
|||
| West Aqueduct Quicksand Room | westaqueductquicksandroom | Array
(
[0] => room206
)
|
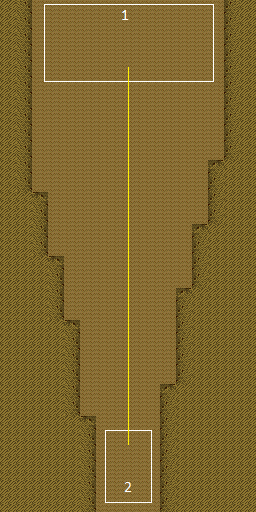 |
link | Maridia / Inner / Pink West Aqueduct Quicksand RoomWiki |
|||
| West Cactus Alley Room | westcactusalleyroom | Array
(
[0] => room195
)
|
 |
link | Maridia / Inner / Pink West Cactus Alley RoomWiki |
|||
| West Glass Tube Tunnel | westglasstubetunnel | Array
(
[0] => room169
)
|
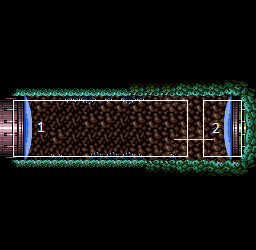 |
link | Maridia / Outer West Glass Tube TunnelWiki |
|||
| West Ocean | westocean | Array
(
[0] => room32
)
|
 |
link | Crateria / East West OceanWiki |
|||
| West Sand Hall | westsandhall | Array
(
[0] => room199
)
|
 |
link | Maridia / Inner / Green West Sand HallWiki |
|||
| West Sand Hall Tunnel | westsandhalltunnel | Array
(
[0] => room202
)
|
 |
link | Maridia / Inner / Green West Sand Hall TunnelWiki |
|||
| West Sand Hole | westsandhole | Array
(
[0] => room209
)
|
 |
link | Maridia / Inner / Pink West Sand HoleWiki |
|||
| Wrecked Ship East Super Room | wreckedshipeastsuperroom | Array
(
[0] => room163
)
|
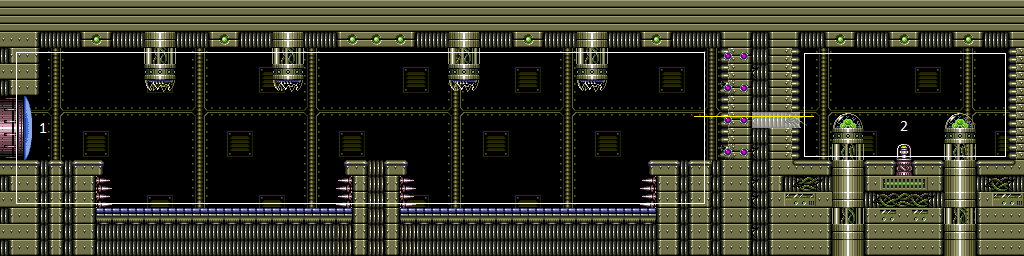 |
link | Wrecked Ship Wrecked Ship East Super RoomWiki |
|||
| Wrecked Ship Energy Tank Room | wreckedshipenergytankroom | Array
(
[0] => room167
)
|
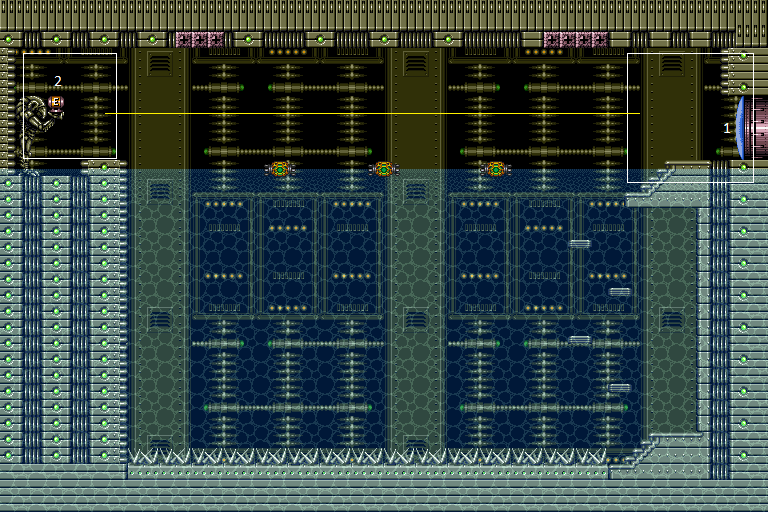 |
link | Wrecked Ship Wrecked Ship Energy Tank RoomWiki |
|||
| Wrecked Ship Entrance | wreckedshipentrance | Array
(
[0] => room154
)
|
 |
link | Wrecked Ship Wrecked Ship EntranceWiki |
|||
| Wrecked Ship Main Shaft | wreckedshipmainshaft | Array
(
[0] => room155
)
|
 |
link | Wrecked Ship Wrecked Ship Main ShaftWiki |
|||
| Wrecked Ship Map Room | wreckedshipmaproom | Array
(
[0] => room157
)
|
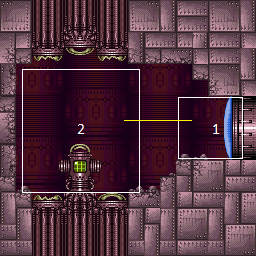 |
link | Wrecked Ship Wrecked Ship Map RoomWiki |
|||
| Wrecked Ship Save Room | wreckedshipsaveroom | Array
(
[0] => room304
)
|
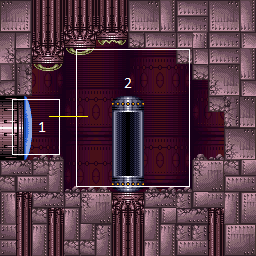 |
link | Wrecked Ship Wrecked Ship Save RoomWiki |
|||
| Wrecked Ship West Super Room | wreckedshipwestsuperroom | Array
(
[0] => room159
)
|
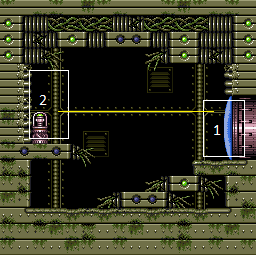 |
link | Wrecked Ship Wrecked Ship West Super RoomWiki |
|||
| X-Ray Scope Room | xrayscoperoom | Array
(
[0] => room68
)
|
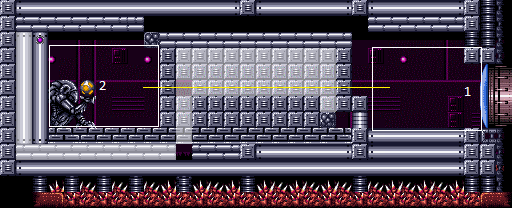 |
link | Brinstar / Red X-Ray Scope RoomWiki |
|||
| Release #1 | release1 | link | redirect | Release #1 See also: Index Listing |
||||
| Release #2 | release2 | link | redirect | Release #2 See also: Index Listing |
||||
| Release #3 | release3 | link | redirect | Release #3 See also: Index Listing |
||||
| Release #4 | release4 | link | redirect | Release #4 See also: Index Listing |
||||
| Release #5 | release5 | link | redirect | Release #5 See also: Index Listing |
||||
| Release #6 | release6 | link | redirect | Release #6 See also: Index Listing |
||||
| Release #7 | release7 | link | redirect | Release #7 See also: Index Listing |
||||
| Release #8 | release8 | link | redirect | Release #8 See also: Index Listing |
||||
| Release #9 | release9 | link | redirect | Release #9 See also: Index Listing |
||||
| Release #10 | release10 | link | redirect | Release #10 See also: Index Listing |
||||
| Release #11 | release11 | link | redirect | Release #11 See also: Index Listing |
||||
| Release #12 | release12 | link | redirect | Release #12 See also: Index Listing |
||||
| Release #13 | release13 | link | redirect | Release #13 See also: Index Listing |
||||
| Release #14 | release14 | link | redirect | Release #14 See also: Index Listing |
||||
| Release #15 | release15 | link | redirect | Release #15 See also: Index Listing |
||||
| Release #16 | release16 | link | redirect | Release #16 See also: Index Listing |
||||
| Release #17 | release17 | link | redirect | Release #17 See also: Index Listing |
||||
| Release #18 | release18 | link | redirect | Release #18 See also: Index Listing |
||||
| Release #19 | release19 | link | redirect | Release #19 See also: Index Listing |
||||
| Release #20 | release20 | link | redirect | Release #20 See also: Index Listing |
||||
| Release #21 | release21 | link | redirect | Release #21 See also: Index Listing |
||||
| Release #22 | release22 | link | redirect | Release #22 See also: Index Listing |
||||
| Release #23 | release23 | link | redirect | Release #23 See also: Index Listing |
||||
| Release #24 | release24 | link | redirect | Release #24 See also: Index Listing |
||||
| Release #25 | release25 | link | redirect | Release #25 See also: Index Listing |
||||
| Release #26 | release26 | link | redirect | Release #26 See also: Index Listing |
||||
| Release #27 | release27 | link | redirect | Release #27 See also: Index Listing |
||||
| Release #28 | release28 | link | redirect | Release #28 See also: Index Listing |
||||
| Release #29 | release29 | link | redirect | Release #29 See also: Index Listing |
||||
| Release #30 | release30 | link | redirect | Release #30 See also: Index Listing |
||||
| Release #31 | release31 | link | redirect | Release #31 See also: Index Listing |
||||
| Release #32 | release32 | link | redirect | Release #32 See also: Index Listing |
||||
| Release #33 | release33 | link | redirect | Release #33 See also: Index Listing |
||||
| Release #34 | release34 | link | redirect | Release #34 See also: Index Listing |
||||
| Release #35 | release35 | link | redirect | Release #35 See also: Index Listing |
||||
| Release #36 | release36 | link | redirect | Release #36 See also: Index Listing |
||||
| Release #37 | release37 | link | redirect | Release #37 See also: Index Listing |
||||
| Release #38 | release38 | link | redirect | Release #38 See also: Index Listing |
||||
| Release #39 | release39 | link | redirect | Release #39 See also: Index Listing |
||||
| Release #40 | release40 | link | redirect | Release #40 See also: Index Listing |
||||
| Release #41 | release41 | link | redirect | Release #41 See also: Index Listing |
||||
| Release #42 | release42 | link | redirect | Release #42 See also: Index Listing |
||||
| Release #43 | release43 | link | redirect | Release #43 See also: Index Listing |
||||
| Release #44 | release44 | link | redirect | Release #44 See also: Index Listing |
||||
| Release #45 | release45 | link | redirect | Release #45 See also: Index Listing |
||||
| Release #46 | release46 | link | redirect | Release #46 See also: Index Listing |
||||
| Release #47 | release47 | link | redirect | Release #47 See also: Index Listing |
||||
| Release #48 | release48 | link | redirect | Release #48 See also: Index Listing |
||||
| Release #49 | release49 | link | redirect | Release #49 See also: Index Listing |
||||
| Release #50 | release50 | link | redirect | Release #50 See also: Index Listing |
||||
| Release #51 | release51 | link | redirect | Release #51 See also: Index Listing |
||||
| Release #52 | release52 | link | redirect | Release #52 See also: Index Listing |
||||
| Release #53 | release53 | link | redirect | Release #53 See also: Index Listing |
||||
| Release #54 | release54 | link | redirect | Release #54 See also: Index Listing |
||||
| Release #55 | release55 | link | redirect | Release #55 See also: Index Listing |
||||
| Release #56 | release56 | link | redirect | Release #56 See also: Index Listing |
||||
| Release #57 | release57 | link | redirect | Release #57 See also: Index Listing |
||||
| Release #58 | release58 | link | redirect | Release #58 See also: Index Listing |
||||
| Release #59 | release59 | link | redirect | Release #59 See also: Index Listing |
||||
| Release #60 | release60 | link | redirect | Release #60 See also: Index Listing |
||||
| Release #61 | release61 | link | redirect | Release #61 See also: Index Listing |
||||
| Release #62 | release62 | link | redirect | Release #62 See also: Index Listing |
||||
| Release #63 | release63 | link | redirect | Release #63 See also: Index Listing |
||||
| Release #64 | release64 | link | redirect | Release #64 See also: Index Listing |
||||
| Release #65 | release65 | link | redirect | Release #65 See also: Index Listing |
||||
| Release #66 | release66 | link | redirect | Release #66 See also: Index Listing |
||||
| Release #67 | release67 | link | redirect | Release #67 See also: Index Listing |
||||
| Release #68 | release68 | link | redirect | Release #68 See also: Index Listing |
||||
| Release #69 | release69 | link | redirect | Release #69 See also: Index Listing |
||||
| Release #70 | release70 | link | redirect | Release #70 See also: Index Listing |
||||
| Release #71 | release71 | link | redirect | Release #71 See also: Index Listing |
||||
| Release #72 | release72 | link | redirect | Release #72 See also: Index Listing |
||||
| Release #73 | release73 | link | redirect | Release #73 See also: Index Listing |
||||
| Release #74 | release74 | link | redirect | Release #74 See also: Index Listing |
||||
| Release #75 | release75 | link | redirect | Release #75 See also: Index Listing |
||||
| Release #76 | release76 | link | redirect | Release #76 See also: Index Listing |
||||
| Release #77 | release77 | link | redirect | Release #77 See also: Index Listing |
||||
| Release #78 | release78 | link | redirect | Release #78 See also: Index Listing |
||||
| Release #79 | release79 | link | redirect | Release #79 See also: Index Listing |
||||
| Release #80 | release80 | link | redirect | Release #80 See also: Index Listing |
||||
| Release #81 | release81 | link | redirect | Release #81 See also: Index Listing |
||||
| Release #82 | release82 | link | redirect | Release #82 See also: Index Listing |
||||
| Release #83 | release83 | link | redirect | Release #83 See also: Index Listing |
||||
| Release #84 | release84 | link | redirect | Release #84 See also: Index Listing |
||||
| Release #85 | release85 | link | redirect | Release #85 See also: Index Listing |
||||
| Release #86 | release86 | link | redirect | Release #86 See also: Index Listing |
||||
| Release #87 | release87 | link | redirect | Release #87 See also: Index Listing |
||||
| Release #88 | release88 | link | redirect | Release #88 See also: Index Listing |
||||
| Release #89 | release89 | link | redirect | Release #89 See also: Index Listing |
||||
| Release #90 | release90 | link | redirect | Release #90 See also: Index Listing |
||||
| Release #91 | release91 | link | redirect | Release #91 See also: Index Listing |
||||
| Release #92 | release92 | link | redirect | Release #92 See also: Index Listing |
||||
| Release #93 | release93 | link | redirect | Release #93 See also: Index Listing |
||||
| Release #94 | release94 | link | redirect | Release #94 See also: Index Listing |
||||
| Release #95 | release95 | link | redirect | Release #95 See also: Index Listing |
||||
| Release #96 | release96 | link | redirect | Release #96 See also: Index Listing |
||||
| Release #97 | release97 | link | redirect | Release #97 See also: Index Listing |
||||
| Release #98 | release98 | link | redirect | Release #98 See also: Index Listing |
||||
| Release #99 | release99 | link | redirect | Release #99 See also: Index Listing |
||||
| Release #100 | release100 | link | redirect | Release #100 See also: Index Listing |
||||
| Release #101 | release101 | link | redirect | Release #101 See also: Index Listing |
||||
| Release #102 | release102 | link | redirect | Release #102 See also: Index Listing |
||||
| Release #103 | release103 | link | redirect | Release #103 See also: Index Listing |
||||
| Release #104 | release104 | link | redirect | Release #104 See also: Index Listing |
||||
| Release #105 | release105 | link | redirect | Release #105 See also: Index Listing |
||||
| Release #106 | release106 | link | redirect | Release #106 See also: Index Listing |
||||
| Release #107 | release107 | link | redirect | Release #107 See also: Index Listing |
||||
| Release #108 | release108 | link | redirect | Release #108 See also: Index Listing |
||||
| Release #109 | release109 | link | redirect | Release #109 See also: Index Listing |
||||
| Release #110 | release110 | link | redirect | Release #110 See also: Index Listing |
||||
| Release #111 | release111 | link | redirect | Release #111 See also: Index Listing |
||||
| Release #112 | release112 | link | redirect | Release #112 See also: Index Listing |
||||
| Release #113 | release113 | link | redirect | Release #113 See also: Index Listing |
||||
| Release #114 | release114 | link | redirect | Release #114 See also: Index Listing |
||||
| Release #115 | release115 | link | redirect | Release #115 See also: Index Listing |
||||
| Release #116 | release116 | link | redirect | Release #116 See also: Index Listing |
||||
| Release #117 | release117 | link | redirect | Release #117 See also: Index Listing |
||||
| Release #118 | release118 | link | redirect | Release #118 See also: Index Listing |
||||
| Release #119 | release119 | link | redirect | Release #119 See also: Index Listing |
||||
| Release #120 | release120 | link | redirect | Release #120 See also: Index Listing |
||||
| Release #121 | release121 | link | redirect | Release #121 See also: Index Listing |
||||
| Release #122 | release122 | link | redirect | Release #122 See also: Index Listing |
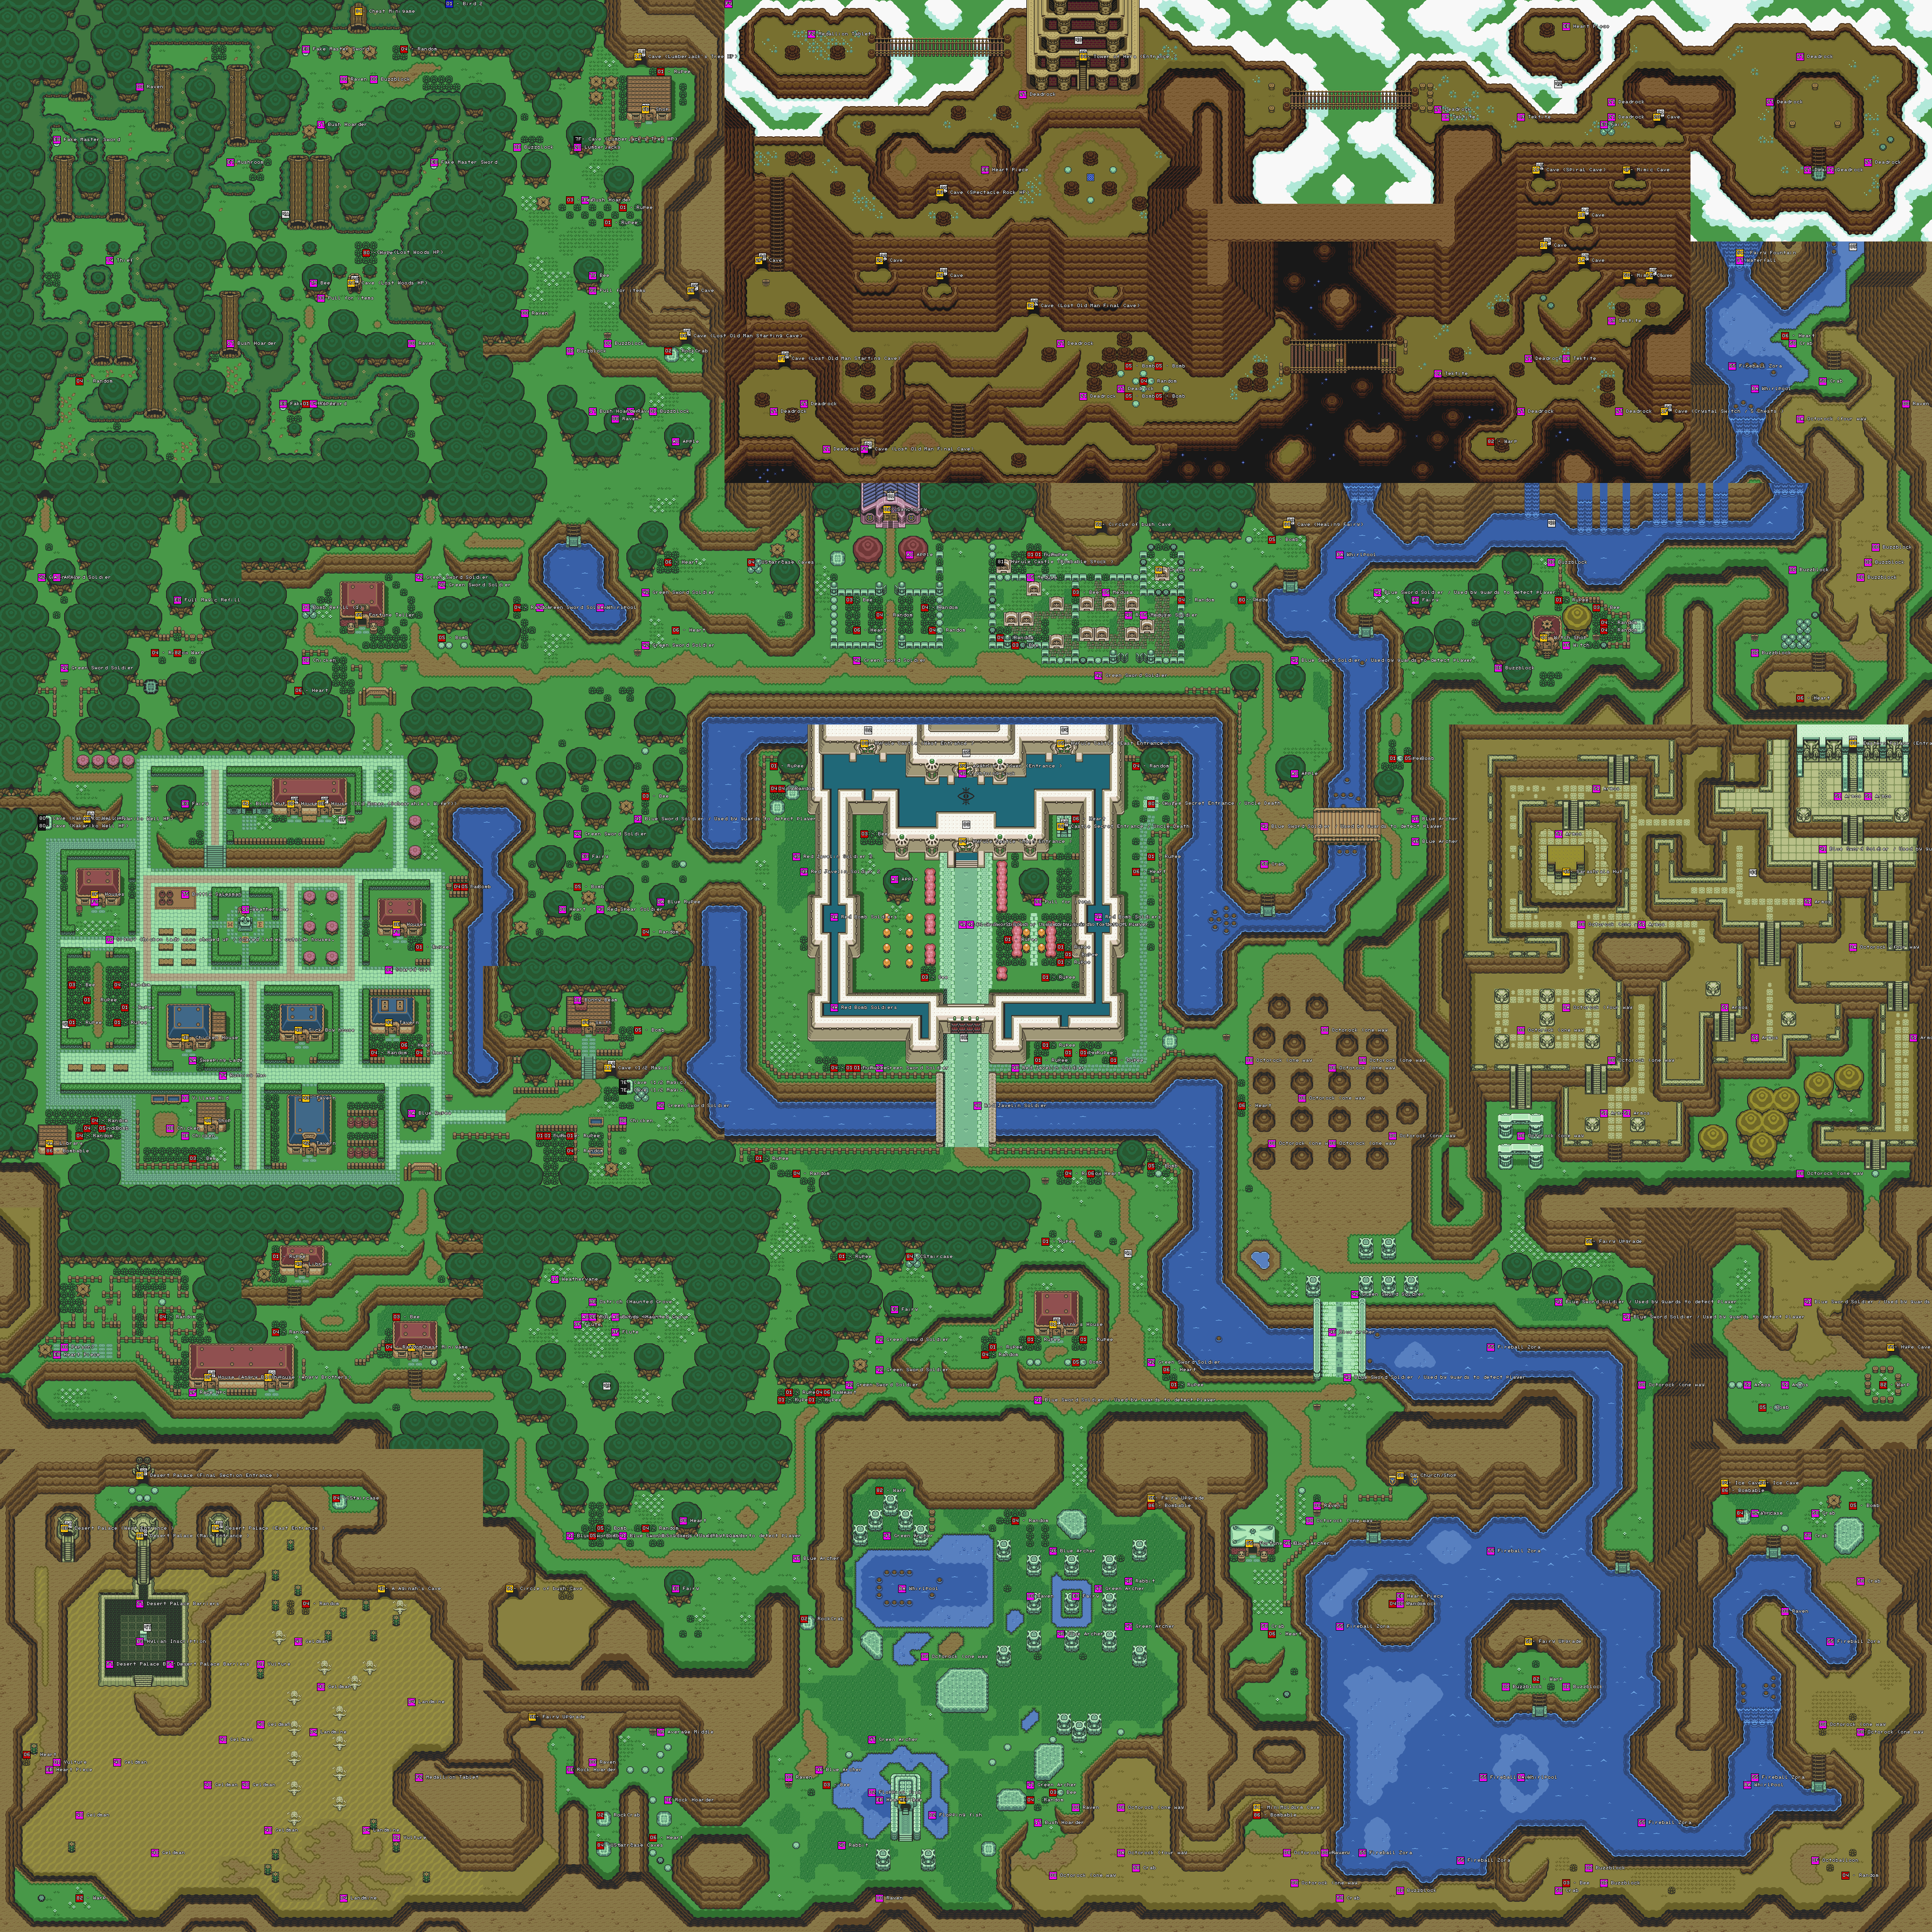